
Online help
The web host accessible to all
Procédure
The Duplicator plugin allows you to migrate your Wordpress site from one host to another easily and in just a few minutes. The migration takes place as follows:
It is also the extension recommended by the LWS Panel Auto-installer to import an already created WordPress site ("IMPORT" tab of the WordPress installation).
The first thing to do is install the "Duplicator" plugin via the Wordpress Dashboard of the site you want to import.
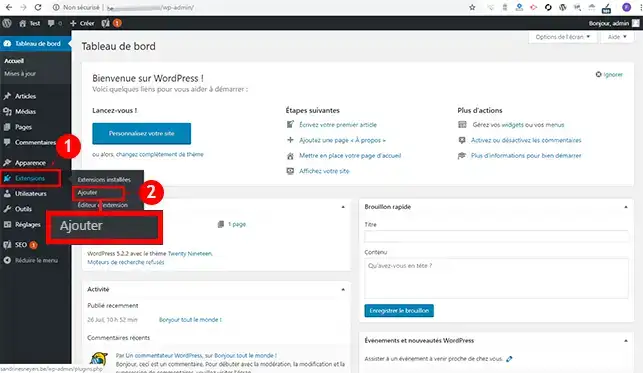
Search for the "Duplicator" plugin and click the "Install" button behind it.
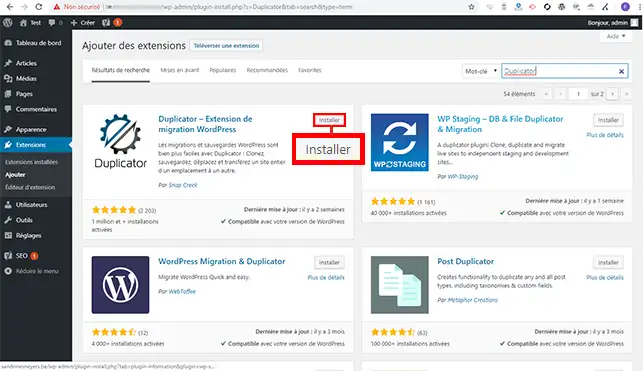
Click the "Activate" button behind the plugin.
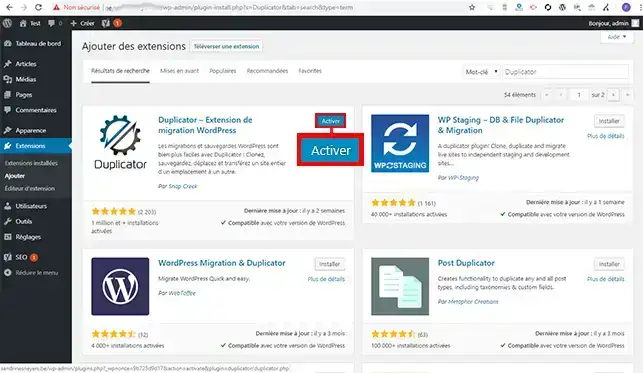
A new tab has been created in your left-hand menu called "Duplicator". Click this menu and then "Packages".
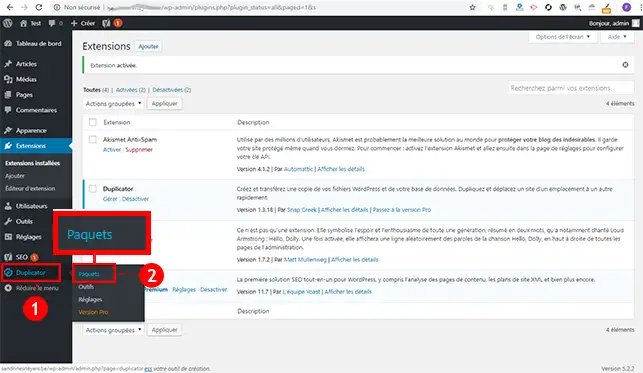
Click the "Create package" button to create the archive of your Wordpress site.
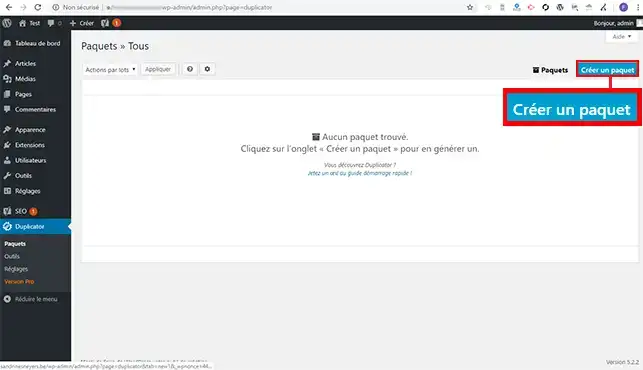
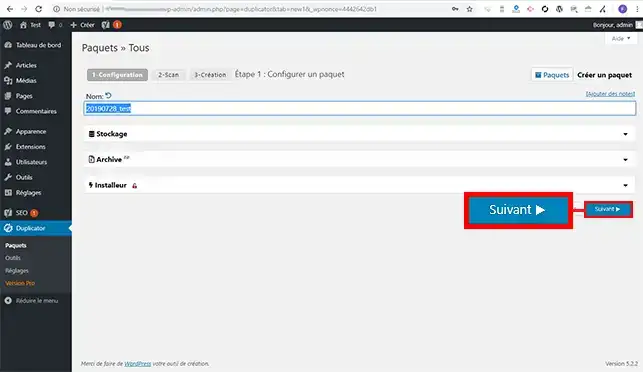
Click the "Next" button to create your archive and installation file. It is not necessary to go to "Storage", "Archive" and "Installer". The default settings are sufficient and will allow you, without any problem, to reinstall your Wordpress site.
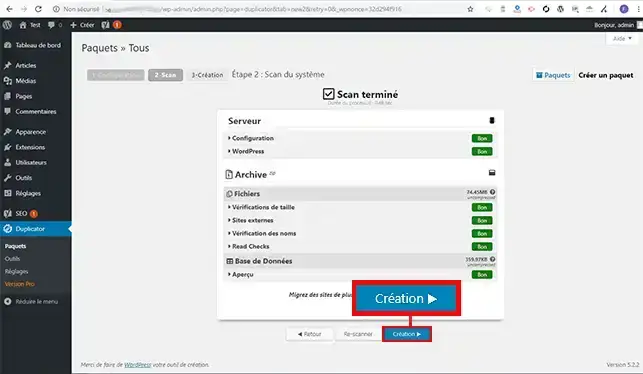
As soon as the scan is finished, check that all settings are correct and click the "Create" button to create your export files
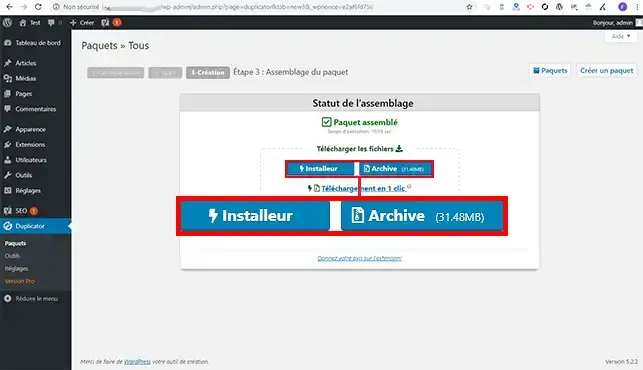
Click on "Installer" and then on "Archive" to download your two files locally. These files will allow you to reinstall your site on your new Web hosting.
Log in to your LWS customer area, open the "Domain(s) & Hosting(s)" tab and click "Manage" next to your domain. In the "Database & PHP" section, click "MySql & Phpmyadmin" to first create your database which will allow you to import your Wordpress site.
Then go back to your hosting dashboard and click "File manager" in the "Files" section. It opens in a new tab.

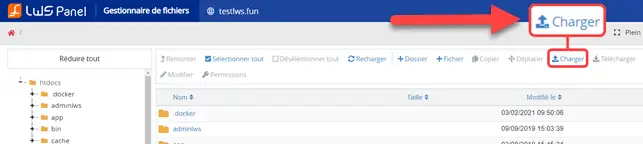
Click the "Upload" button to upload your installer.php file and the file containing the archive of your website.
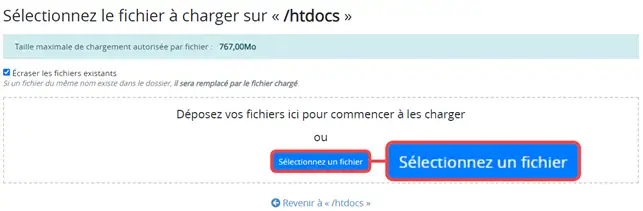
Click the Select a file button and choose the backup archive.zip and installer.php files from your computer
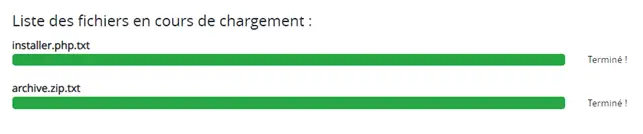
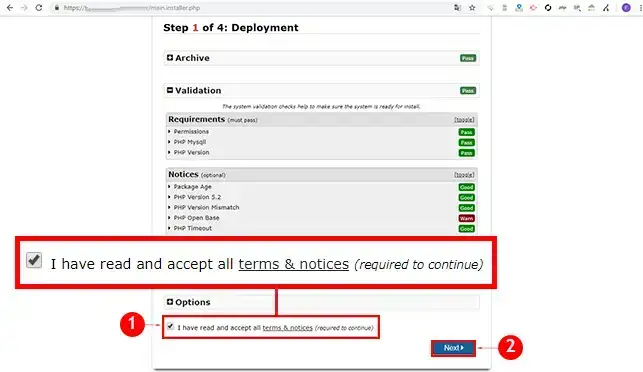
Open your Web browser and go to your site URL http://domaine.com/installer.php (installer.php is the file you uploaded beforehand). This file will allow you to restore your website. Once on the relevant page, check the "I have Read and accept all terms & notices" box and click the "Next" button.
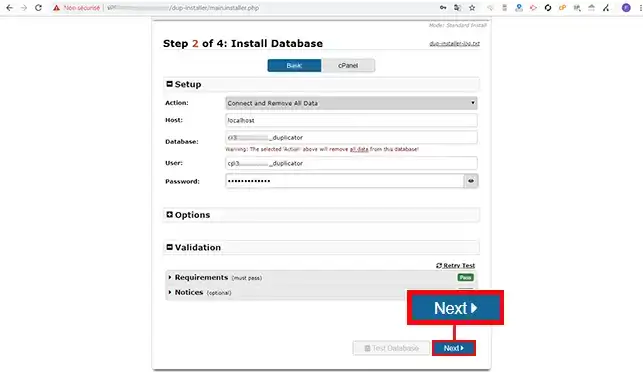
Enter the database connection information as follows:
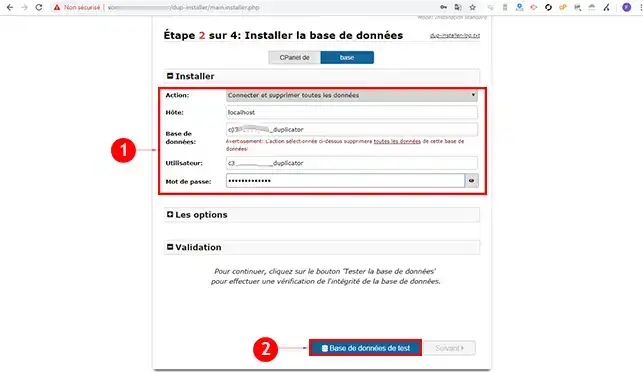
You received this information by email when the database was created. Once this information has been entered, click the "Test Database" button to verify that the database connection is working.
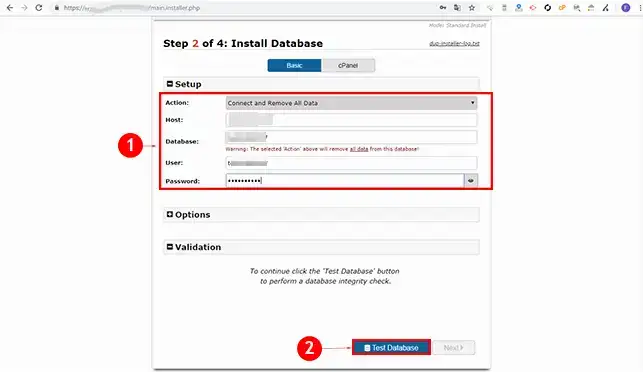
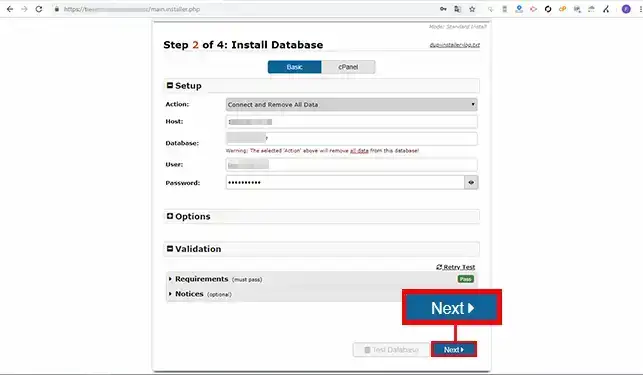
Click the "Next" button to move to the next step:
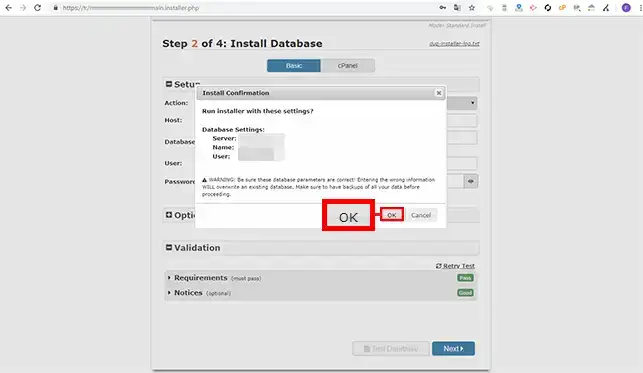
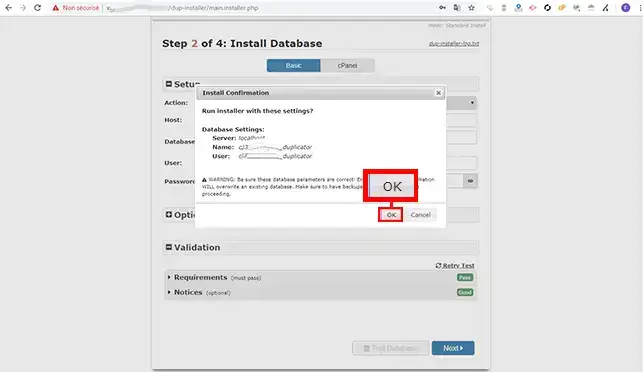
A new window will open warning you that if data is present in the database, it will be deleted. If your database contains tables, it is advisable, before clicking the "Ok" button, to make a backup of it.
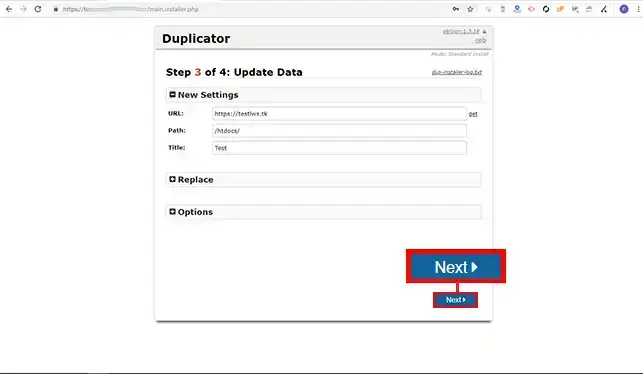
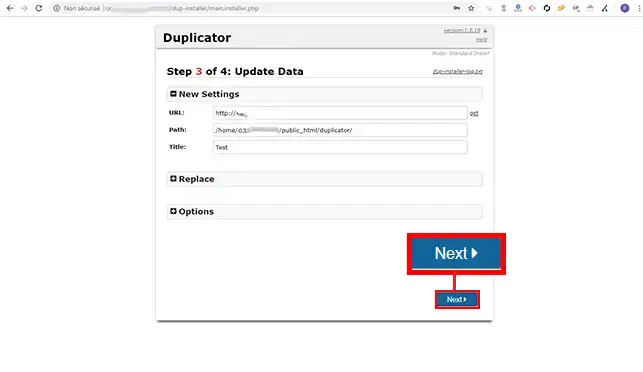
Step 3 of Duplicator is the configuration step. You can modify the configuration such as the URL or the title of your site. You must not modify "Path". However, by going to "Options", it will be possible to add an "Administrator" or modify your "wp-config.php" file. Once the changes have been made, click the "Next" button.
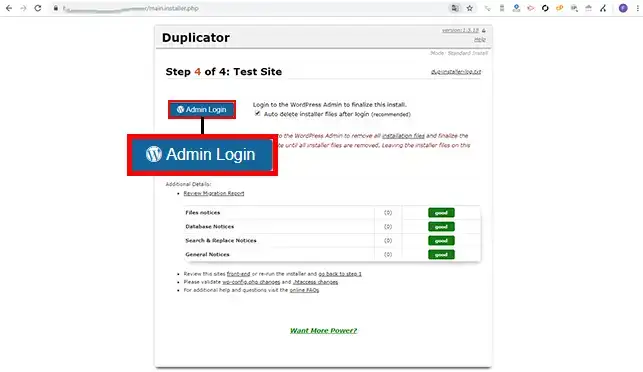
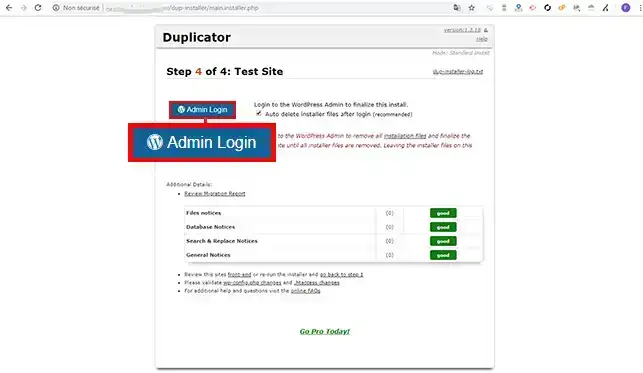
If the installation went well, click the "Admin Login" button to log in to your Wordpress Dashboard. Logging in is necessary and will allow you to delete your site archive as well as the installation file you used to duplicate your website.
Log in to your cPanel interface to create a database and the user associated with your database.
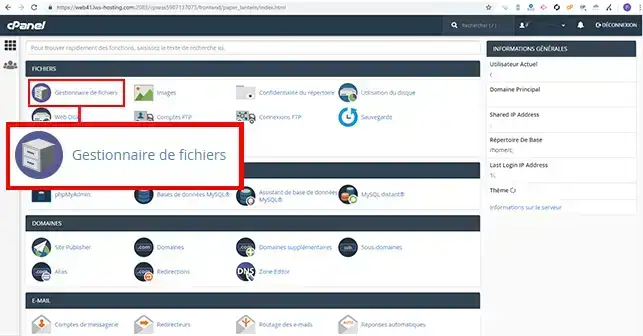
Once your database has been created, click on "File manager" in the "Files" section of your cPanel interface.
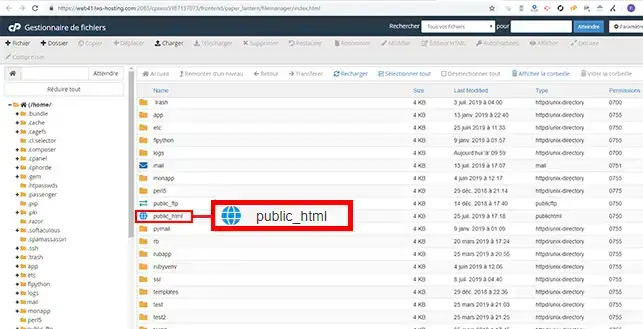
Click the "Public_html" folder to open it.
Click the "Upload" tab to upload the "installer.php" file as well as the archive of your Wordpress site.
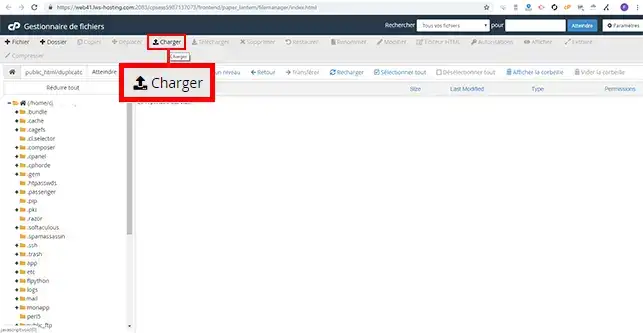
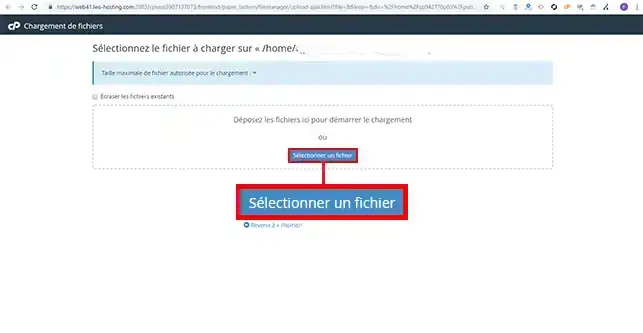
Click the "Select a file" button and upload them to your FTP space.
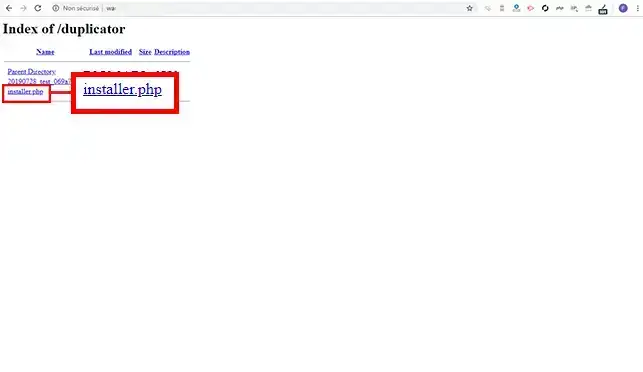
Open your browser and go to the URL related to the import of your site. Click on the "installer.php" file.
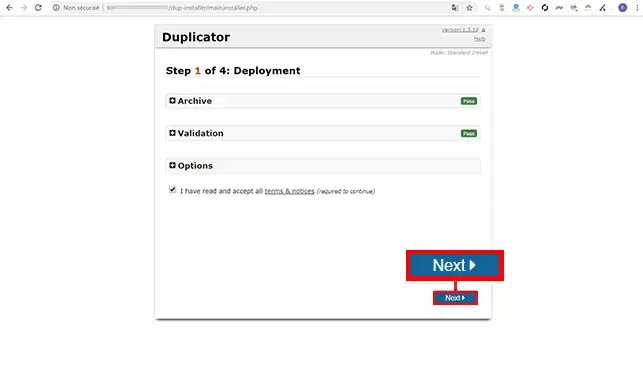
Click the "Next" button to move to the second installation step.
Enter the database connection information as follows:
Click the "Next" button on the installation page.
A new window will open warning you that if data is present in the database, it will be deleted. If your database contains tables, it is advisable, before clicking the "Ok" button, to make a backup of it.
Check the new configuration and click the "Next" button to proceed with the Wordpress import.
If the installation went well, click the "Admin Login" button to log in to your Wordpress Dashboard. Logging in is necessary and will allow you to delete your site archive as well as the installation file you used to duplicate your website.
You are now able to import your Wordpress site to your shared hosting or your cPanel hosting with LWS.
Feel free to contact our technical support team via a support ticket for any questions.
Ask the LWS team and the community. Answers are published after moderation.
 About LWS :
LWS is a 100% French web hosting company that focuses on quality and innovation and offers a responsive and competent technical service at affordable prices.


 Yes
 No