Contact us
 Customer Area


 Visit LWS
Rate this article :
This article was useful to you ?
 Yes
Yes
 No
No
 Article read
7805 once
Article read
7805 once Merci ! N'hésitez pas à
poser des questions sur nos documentations si vous souhaitez plus d'informations et nous aider à les
améliorer.
Merci ! N'hésitez pas à
poser des questions sur nos documentations si vous souhaitez plus d'informations et nous aider à les
améliorer.Vous avez noté 0 étoile(s)



Procédure
Image optimisation is a key element in improving website performance. Good management of image formats can reduce page load times, improve the user experience and optimise search engine optimisation (SEO). WebP is certainly one of the best-known optimised image formats, and although new alternatives, such as AVIF, are available on the market, it continues to grow in popularity and to be used everywhere, enjoying great compatibility with all browsers on the market.
However, it is quite rare to have images and photos natively in WebP: PNG or JPEG types are generally the default format, so it is necessary to convert them to WebP format beforehand.
The WordPress extension LWS Optimize lets you convert all your images directly from your site. Each image will be losslessly optimised to reduce their size as much as possible without reducing their quality.
In this documentation, we'll guide you through the different stages of configuring and using image conversion with LWS Optimize. You'll find out how to activate this feature and optimise your site for greater speed and efficiency.
Immediately optimise the speed and user experience of your site by automatically converting your JPEG and PNG images to WebP or AVIF format, directly from LWS Optimize. This best-of-breed WordPress caching plugin combines lossless compression, conversion on download and easy restoration of the original files, for an effortless performance boost. And for easy installation via the official directory, find this free, high-performance solution on WordPress as the best free WordPress cache plugin.
To activate automatic conversion of images to WebP via the LWS Optimize plugin, access your WordPress dashboard and then click on LWS Optimize in the left-hand menu.
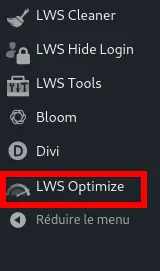
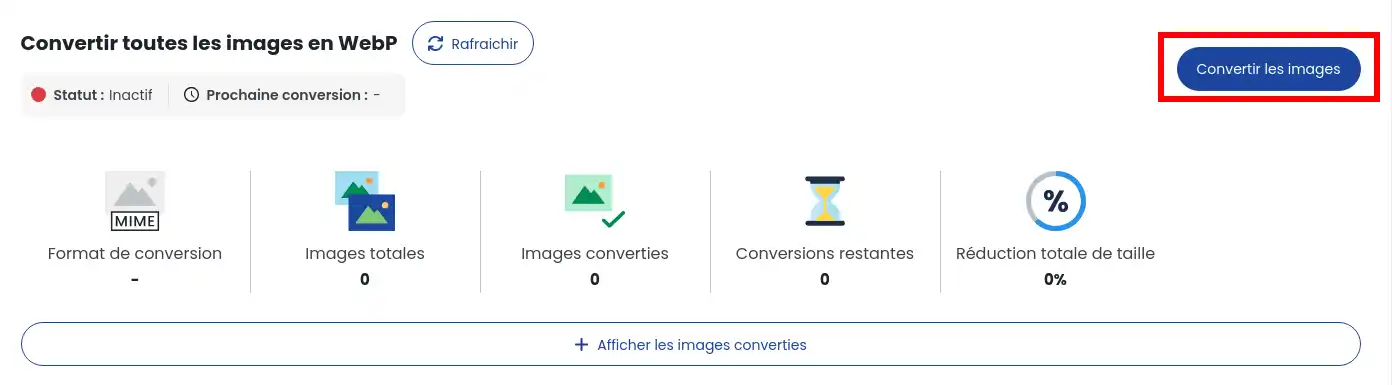
Once on the plugin page, you'll find the image conversion block at the bottom of the page. Click on "Convert images" to open the configuration panel.
In this mode, you can choose whether or not to use our API to convert your images. By using the API you can convert 2000 images (a credit recovery method will be made available in the future) to WebP/AVIF; otherwise, it will use your site's resources to convert your images without limit to WebP, with a lower conversion rate.
You can also choose the maximum quality and size of images once converted, to save extra space. This choice is only available for standard conversion, with the API automatically returning the best possible image.
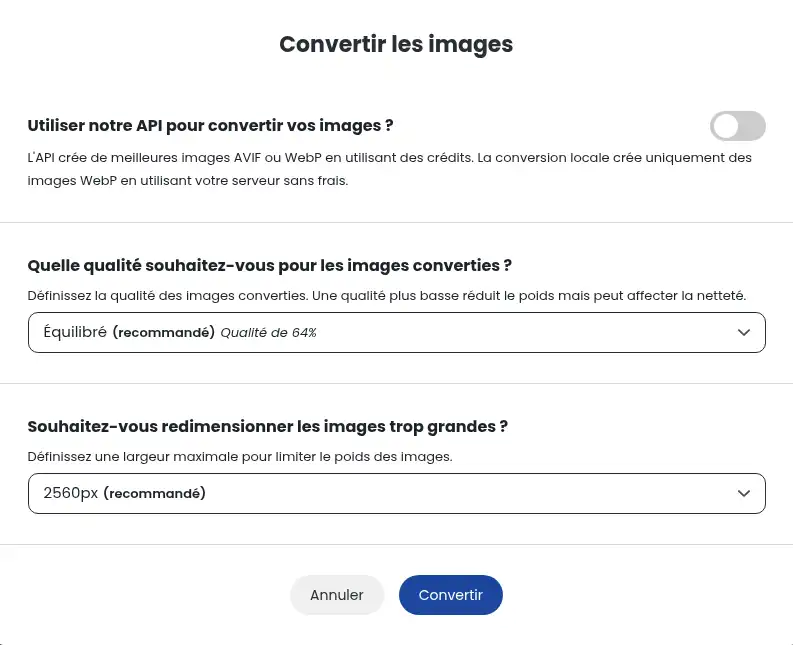
Once you have configured the parameters, click on "Convert" to launch the conversion cron. The images on the site will be scanned and those matching the criteria will be converted to WebP or AVIF.
Depending on the number of images, this may take some time, but you can track the progress of the conversion by looking at the statistics. As conversions are carried out in the background using cron, you can leave the page during the process.
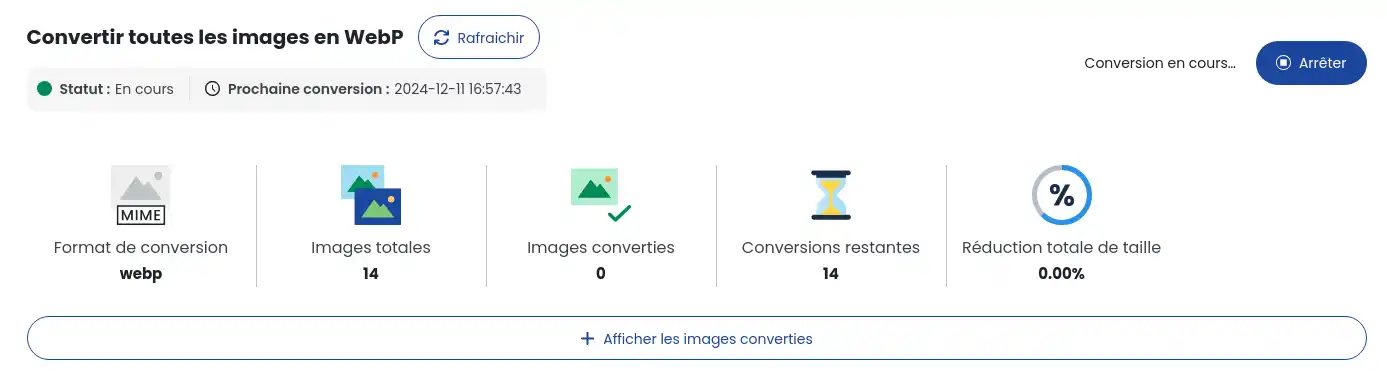
If you are using the default WordPress WP-Cron, there must be activity on your site for the cron, and by extension the conversion, to take place.
The automatic conversion option allows you to convert any image uploaded to your site directly into WebP, instead of having to convert it afterwards. To activate this option, go to the plugin's advanced mode, the "Images" tab and then tick the "Automatic conversion on upload" box, which will open the same dialog box as above.

Configure the parameters for the conversion and confirm to activate the action. No copy of the original image will be made; the image will be converted before it is saved on the site.
Once the images have been converted, they will be automatically served on your site without any intervention on your part. If the converted image no longer exists, then the original image will be served in its place, if available, ensuring that your site will always be functional even if there are problems with the conversion.
To check that your site is using these optimised images:
Open your site in a browser.
Right-click on an image and select Inspect.
Check that the image displayed is in WebP/AVIF format and that it ends with _lwsoptimized.

If you encounter a problem with the converted images or wish to restore your images to their original state, click on the "Restore images" button in the "Restore images" line.

Make sure you read the information displayed before clicking on the "Restore images" button, which will start the restoration process. Like conversion, restoration may take a little time depending on the number of images to be processed.

You now know how to :
With these steps, your site should load faster, providing a better experience for your visitors and a competitive edge in the world of SEO. 🚀🌐
Thank you for reading this article! If you have any questions or would like to share your experience with LWS Optimize, please feel free to leave a comment below. Your feedback is valuable and helps us improve our services. 💬👍
Rate this article :
This article was useful to you ?
Yes
No
2mn reading
How do I install the LWS affiliate plugin on WordPress?
22mn reading
How do I clean my WordPress site with LWS Cleaner?
 About LWS :
LWS is a 100% French web hosting company that focuses on quality and innovation and offers a responsive and competent technical service at affordable prices.
About LWS :
LWS is a 100% French web hosting company that focuses on quality and innovation and offers a responsive and competent technical service at affordable prices.