Procédure
Introduction
Importing a database on LWS Panel shared hosting is an important operation for transferring your website. This operation can be performed quickly and easily using PHP My Admin, a web application that allows you to interact with MySQL databases.
In this documentation, we explain how to import a database on LWS shared hosting using phpMyAdmin. We present the steps required to prepare your database, connect to phpMyAdmin and import your database.
Preparing the database to be imported
Before you can start importing your database onto your LWS shared hosting via phpMyAdmin, you need to prepare your database.
Whether your site or application is created locally or hosted by another host, you will first need to export your database. To do this, we suggest you use the database management tool you used to create and manage it. Your database must be exported in SQL format.
[tips_warning]If the size of your database export reaches 100MB, it will be too large to work with the method we will look at below. I therefore recommend that you follow this documentation to export your database: How do I import a large database into the LWS Panel?
Creating the database on the LWS Panel
To import your database on your LWS Panel shared hosting, you must first create a new blank database to accommodate the exported data. If you do not wish to use the database provided with your service, you can follow the steps below to create a new one:
1. Log in to your LWS customer area
To access your customer area, simply follow this link and enter your login details: https: //panel.lws.fr
2. Access your service management via the "Manage" button
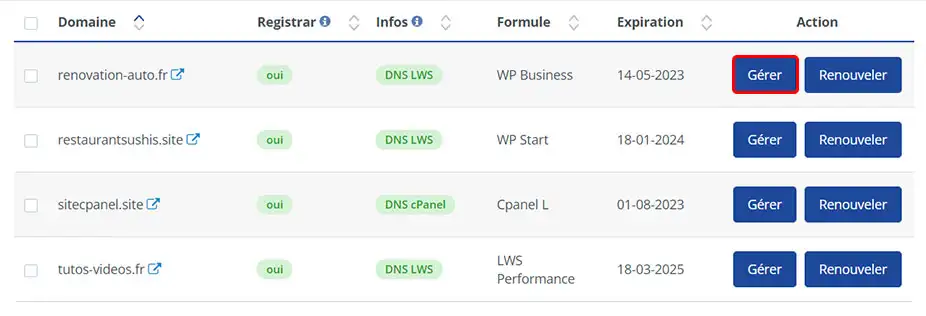
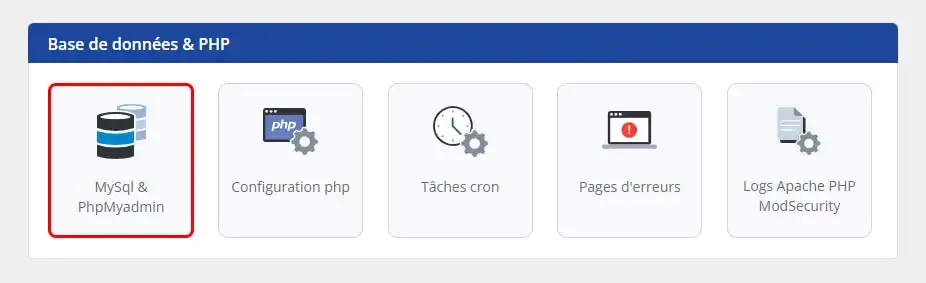
3. In the "Database & PHP" section, click on the "MySql & PhpMyadmin" button.
4. Click on the "Click here to create a MySql database" button to create the new database.
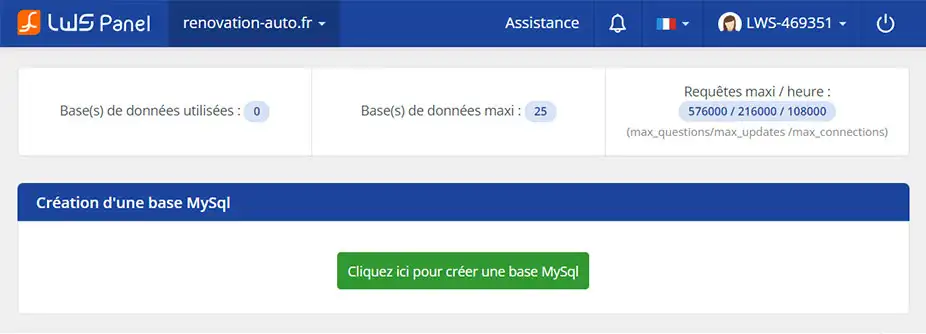
Once your database has been created, you will receive all the information relating to it by e-mail. Make sure you keep all this information safe, especially the database name, user name and password. You will need them later when you import the data.
Importing your data into the LWS Panel database
At this stage, you have a database ready for data import. You can use either the database delivered with your service or the one you created in the previous step. To import your data, follow the steps below:
1. In the "Database & PHP" section of your LWS panel, click on "MySql & PhpMyadmin".
2. Connect to phpMyAdmin
Click on the "PhpMyAdmin" button, then connect using the database details you received by email on delivery or when you created the database (depending on what you did before).
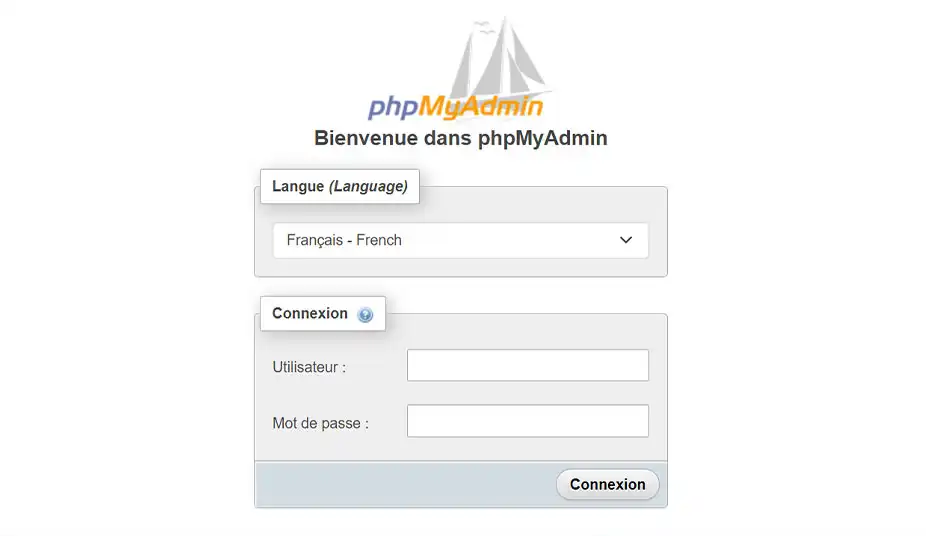
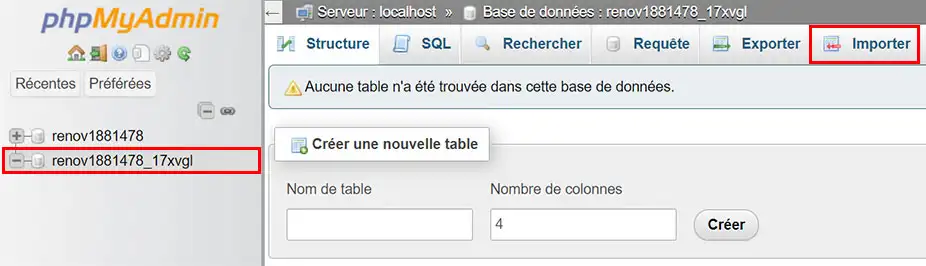
3. Click on the name of the database you created in the previous section and then click on Import in the links at the top of the page.
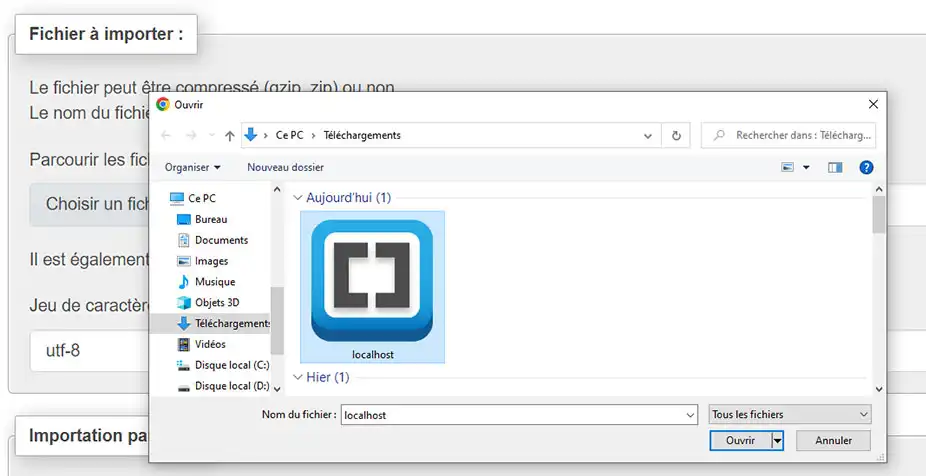
4. Click on the Choose a file button and browse for your export file. Open the file. Then click on the Import button.
5. Wait a few seconds for the import to complete.
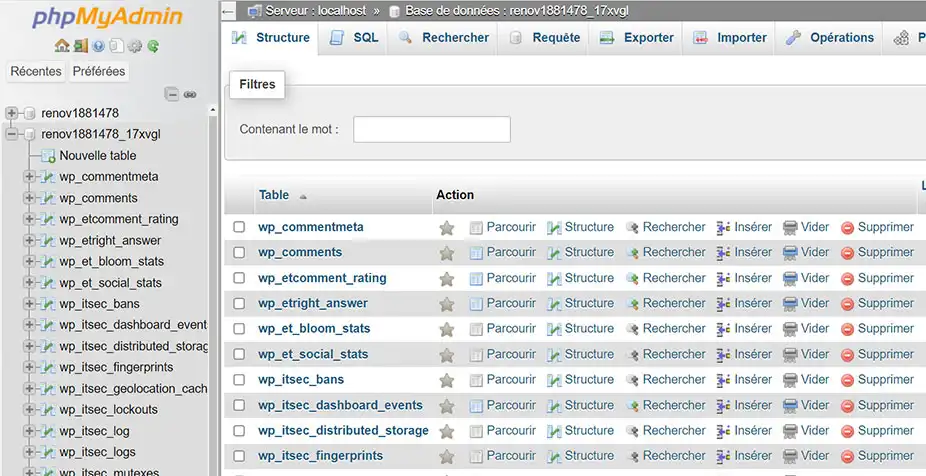
Your database has now been imported to your LWS Panel hosting. Don't forget to modify the file containing your connection information, indicating :
- Host: Localhost
- Base: The name of the database you created on LWS Panel
- Username: The username you created and linked to on LWS Panel
- Password: The password you generated for the username.
Can LWS do this for you?
Yes, LWS can perform this task for you, but only through a paid managed service. In fact, LWS can provide management and maintenance services for your infrastructure for an additional fee. If you are interested in this service, we can provide you with more information on the different options available and the associated costs.
You can set up a managed service with LWS from €9.99 from the LWS Panel control panel in the Support section. I invite you to follow this documentation to help you set up your outsourcing.

 Contact us
 Customer Area


 Visit LWS


 Yes
Yes No
No Article read
13183 once
Article read
13183 once Merci ! N'hésitez pas à
poser des questions sur nos documentations si vous souhaitez plus d'informations et nous aider à les
améliorer.
Merci ! N'hésitez pas à
poser des questions sur nos documentations si vous souhaitez plus d'informations et nous aider à les
améliorer.
 About
About 