Procédure
What is file cache?
There are countless ways to improve and optimize the performance of a WordPress site. Among the most popular methods, such as using server cache (NGINX, [PERSON_NAME]), image optimization, or file minification, let’s take a look at file cache.
File cache can massively improve your site’s performance by loading a static version of its pages. In fact, to load a page, WordPress runs many PHP functions and database queries to retrieve the page content and load its various elements. [PERSON_NAME] page loading and WordPress must repeat this process every time a page is requested.
That’s where file cache comes in: once the page is loaded, it is stored as a static HTML file. [PERSON_NAME] page, the cache displays the content of the HTML file instead of reloading the page [ADDRESS], [PERSON_NAME] reduced.
[PERSON_NAME], imagine that file cache is a camera and that the pages are works of art in a museum: each work you look at is photographed by the file cache and saved.
If later you want to look at the works again, instead of going back to the museum every time, you can simply look at the photos you took.
It is not realistically possible to manually create a functional file cache, especially on a CMS such as WordPress, so you will need to download a plugin for your site that allows it to do this for you. LWS offers the LWS Optimize plugin, specially designed to optimize your site and providing a file cache directly integrated into the plugin, as well as many options to boost your site’s performance.
Optimize your WordPress site’s performance by effectively using file cache, a feature enabled by default in . This system maintains a static version of your pages in order to significantly reduce loading times and provide smoother browsing. Thanks to simple options [PERSON_NAME], purge or automate the cache, you benefit from a powerful and intuitive solution. [PERSON_NAME] Best WordPress cache plugin, available for free on the official directory as Best free WordPress cache plugin
Using file cache with LWS Optimize
File cache is enabled by default on LWS Optimize and is a required component in order to take advantage of most of the plugin’s features. File cache helps actions [PERSON_NAME] work and greatly improves your site’s performance, so it is important that it is enabled.
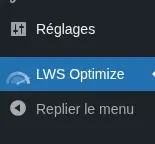
You can follow the cache status from the plugin dashboard, accessible from the [PERSON_NAME] menu>
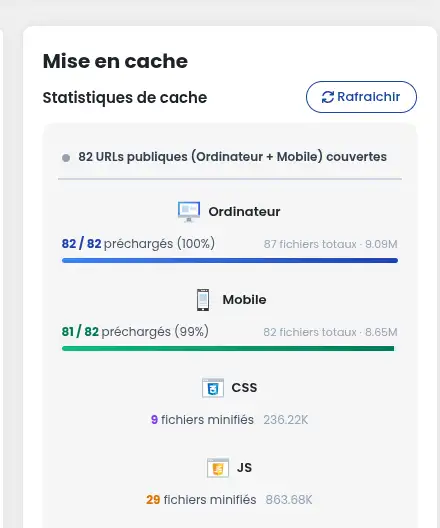
Here, you can see in real time the cache coverage: desktop and mobile pages, number of minified/combined CSS/JS files.
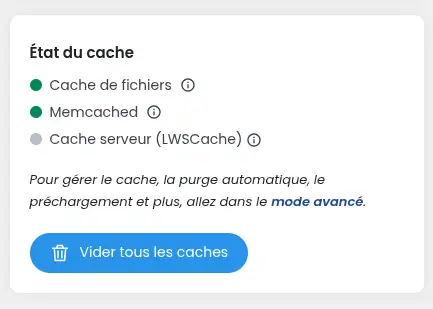
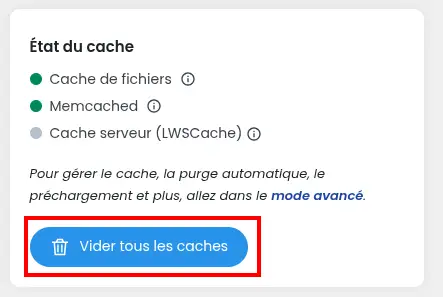
In the Cache status block, you can see the status of all the cache types managed by LWS Optimize.
If the dot next to "File cache" is green, [PERSON_NAME]. [PERSON_NAME], then it is inactive and you will need to activate it manually.
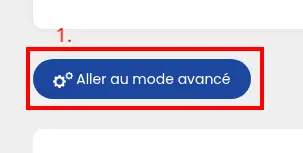
To activate file cache, go to advanced mode (by clicking the dedicated button) [PERSON_NAME] “Caching” :

Here, check that [PERSON_NAME] “file” is indeed active. [PERSON_NAME], tick the option, which will reload the page and reactivate the plugin’s features.

The cache fills up [PERSON_NAME] you visit pages on your site. You can check the current cache status via the dashboard seen previously or through the “Cache statistics” section, which lets you see how many pages and CSS/JS files have been cached. If the display is not up to date, click the “Refresh” button on the page to update the data.

Clear file cache
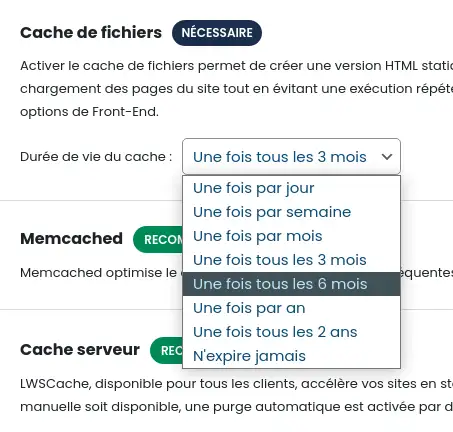
By default, the file cache is automatically cleared every year, which you can change by choosing a new value in the “[PERSON_NAME] cache” dropdown menu if you want the cache to expire sooner, later, or never :
If you want to clear the cache immediately without waiting for the cache lifetime to end, you can perform a manual purge at any time, [PERSON_NAME] will clear the entire site cache, by clicking “Clear cache” in the “Manual purge” option.

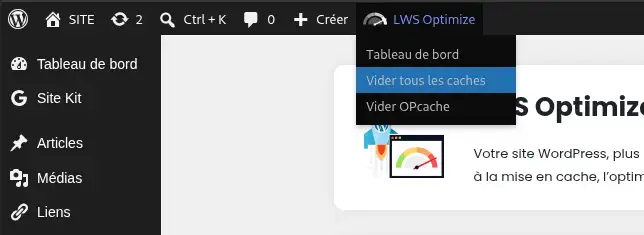
It is also possible to clear all caches (object + server) via the dashboard or via the WordPress top bar.
Also, you have the option to set up an automatic purge, which will remove the plugin’s various caches when the site is modified, so that your site dynamically displays the latest content. You can learn how to activate and configure automatic purge by reading the dedicated documentation.
Conclusion
You now know how to: optimize your WordPress site’s performance thanks to file cache, enable and configure this option with the LWS Optimize plugin, check the status of the cache, and perform its manual or automatic purge to ensure the latest content is displayed. 🚀
By applying this knowledge, you have everything you need to improve the user experience on your site and boost its loading speed, which is essential in a digital context where every second counts. 💡
Don’t forget that file cache is like a precious ally, capturing and preserving the essence of your pages for instant display, just as a camera captures the moment so it can be relived at any time. [PERSON_NAME]
[PERSON_NAME] article ! [PERSON_NAME] questions, suggestions, or feedback about using file cache with LWS Optimize, feel free to share them in the comments. [PERSON_NAME] will allow the community to grow through your valuable contributions. See you soon for more web optimizations! 👋



 Yes
Yes No
No About
About 