
Online help
The web host accessible to all
Procédure
WP Rocket is a powerful caching system and helps greatly improve the performance of a WordPress site. Like any caching plugin, it allows you to keep in memory the pages that have already been loaded. This therefore helps reduce the loading time of your pages and thus improve the speed of your site.
Here we will see how to install this module for free on our WordPress site.
Before being able to install WP Rocket on your WordPress site, you must first retrieve the module on the GPLDL website.
1. In order to be able to download the module from their website, you will first need to create an account on this platform.
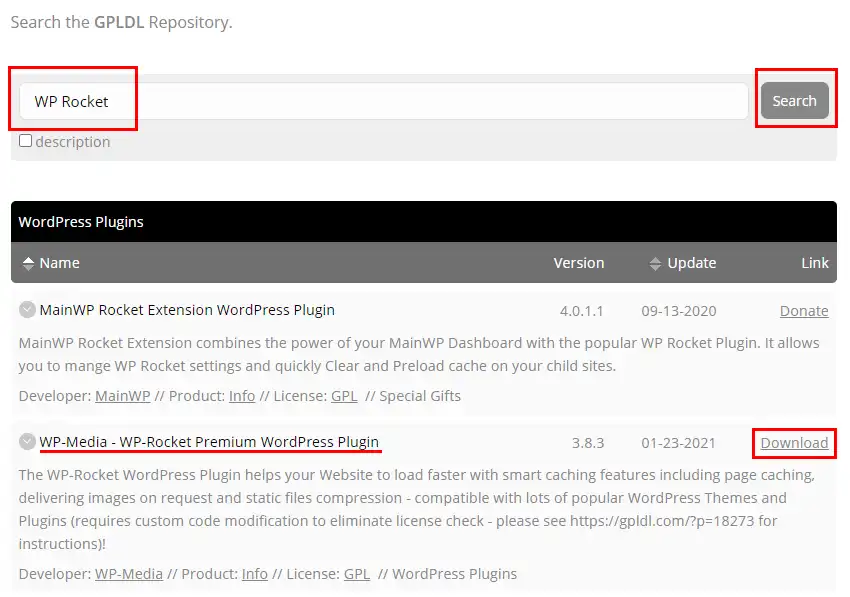
2. Once registered and logged in, go to the search page and in the search bar, type WP Rocket and click on "Search"
3. Two versions will be offered, click on the Download button for the "WP-Media - WP-Rocket Premium WordPress Plugin" version to start downloading the module.
Now that you have retrieved the module, all that remains is to install it on your WordPress site. To do this:
1. Log in to the administration area of your WordPress site
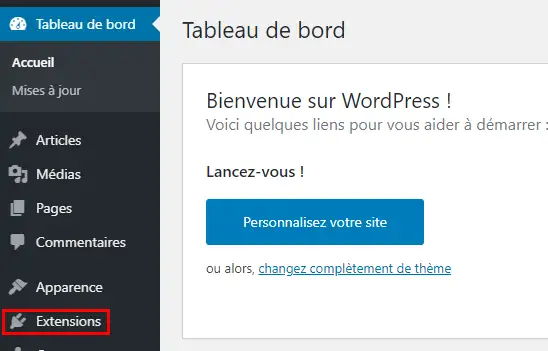
2. In the left-hand menu, click on Plugins
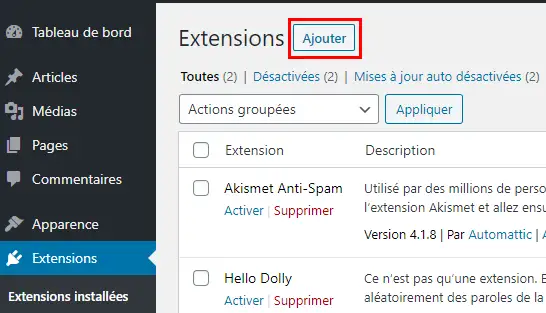
3. Then click on the "Add" button at the top of the page
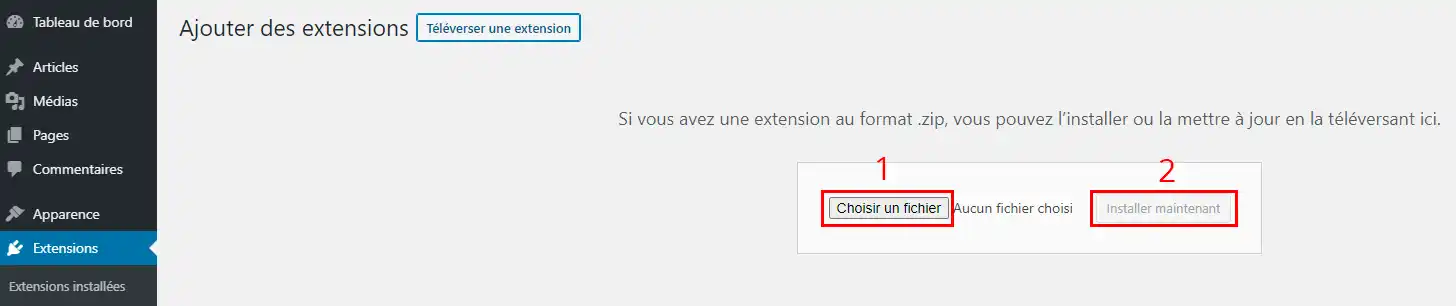
4. Then click on the "Upload Plugin" button and then on "Choose File". Select the file downloaded from the GPLDL website then click on the "Install Now" button
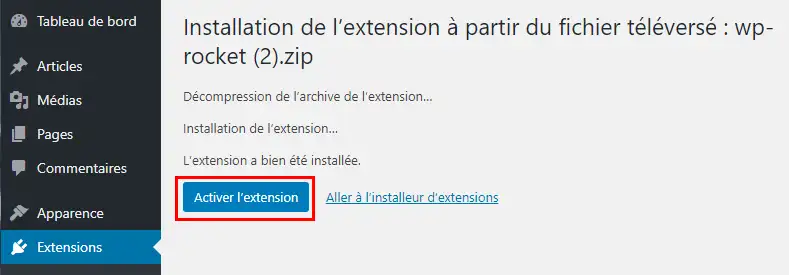
5. After a few seconds, the WP Rocket module is installed on your WordPress site. All that remains is to click on Activate to make it operational on your WordPress site.
Ask the LWS team and the community. Answers are published after moderation.
 About LWS :
LWS is a 100% French web hosting company that focuses on quality and innovation and offers a responsive and competent technical service at affordable prices.
About LWS :
LWS is a 100% French web hosting company that focuses on quality and innovation and offers a responsive and competent technical service at affordable prices.



 Yes
Yes No
No