Procédure
What is Shopify?
Shopify is an online sales platform. For a monthly fee, you can create and grow your store without any specific knowledge in order to promote, sell, and ship your products.
For many merchants, this is an excellent solution. However, it is less comprehensive than web hosting plans offering Woocommerce, PrestaShop, or Magento.
Step 1: modify your DNS records on the LWS account
11. Log in to your LWS customer area and click the "Manage" button corresponding to the domain name you want to link to your Shopify store.
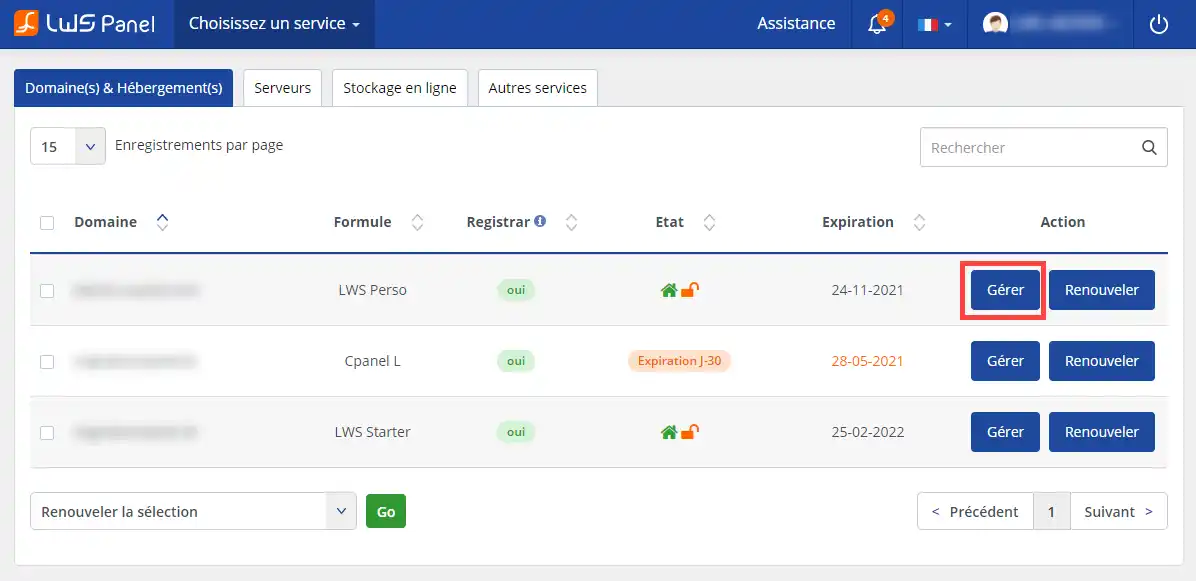
22. Click the "DNS Zone" menu so you can access all the zones for your domain name and modify them.
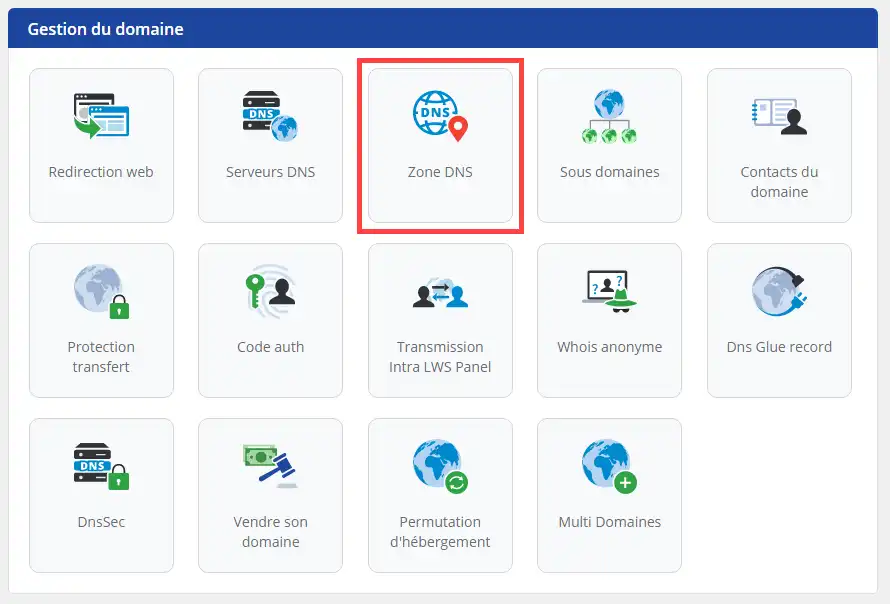
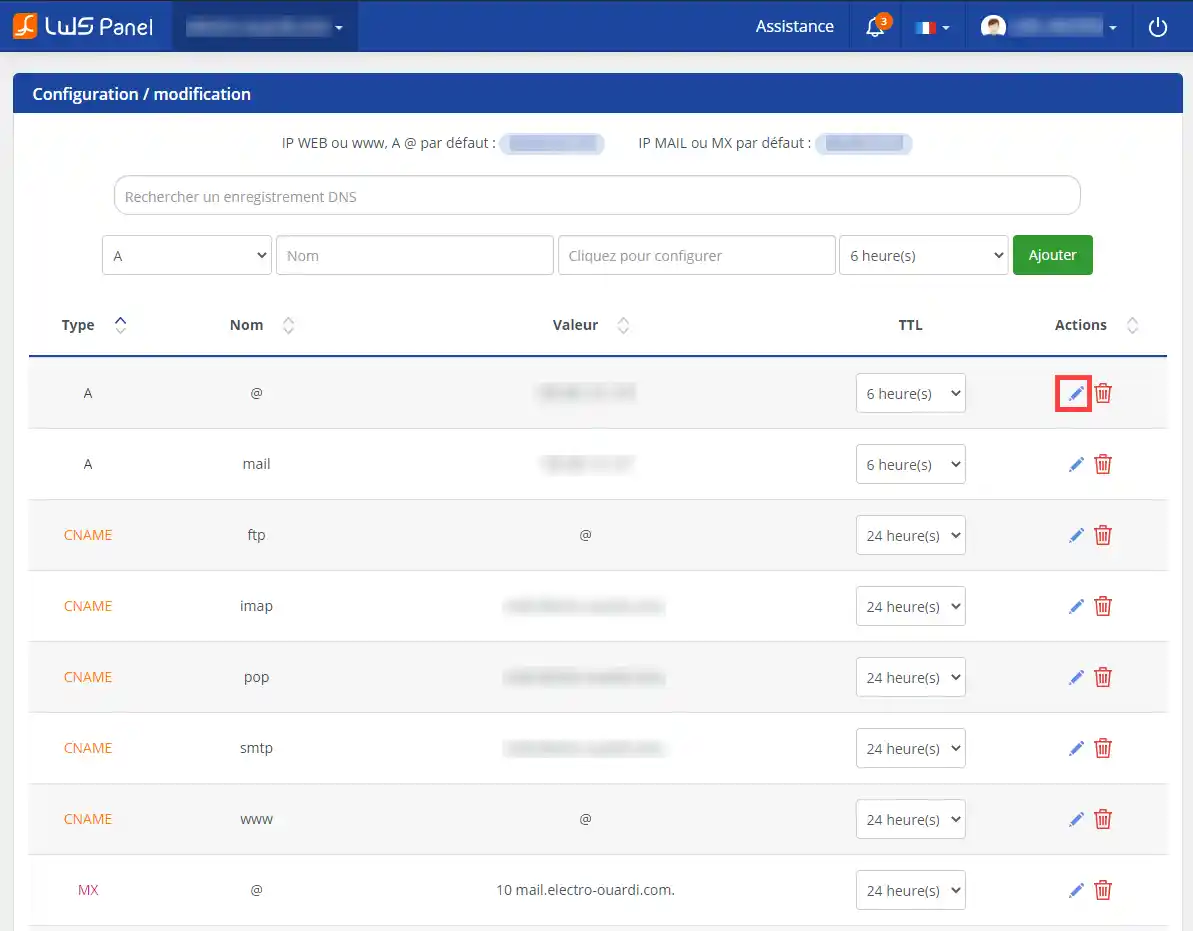
33. The first thing to modify is the IPv4 of your domain name located in the A type zone. To do this, click the pencil icon behind this zone.
44. Change the IP to 23.227.38.65. Then click the "Save" button to save your request.
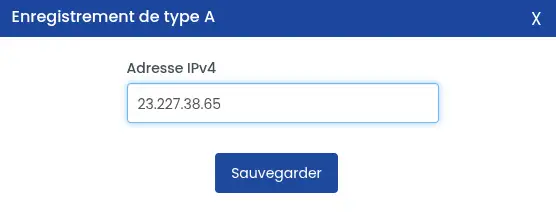
If Shopify gives you another IPv4, enter the IPv4 indicated by Shopify in the A record
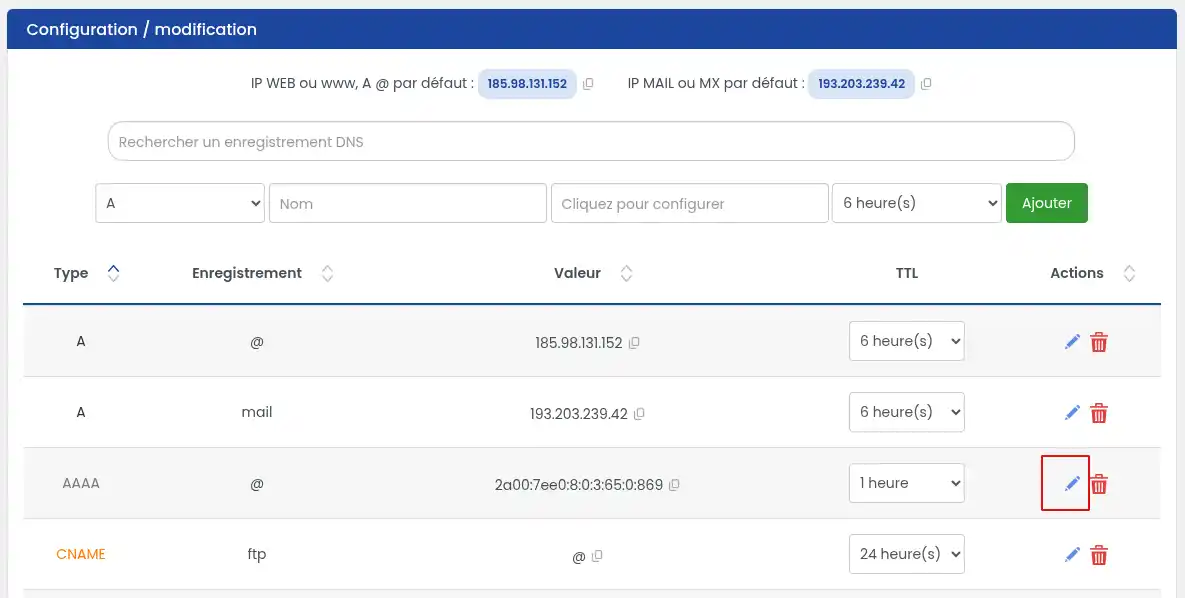
55. The second modification is the IPv6 of your domain name located in the AAAA type zone. To do this, click the pencil icon behind this zone.
this step should only be performed if an AAAA record is already present in your DNS zone
66. Change the IPv6 to 2620:0127:f00f:5:: Then click the "Save" button to save your request.
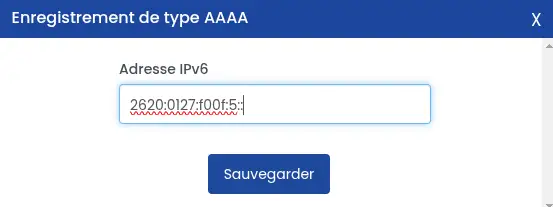
If Shopify gives you another IPv6, enter the IPv6 indicated by Shopify in the AAAA record
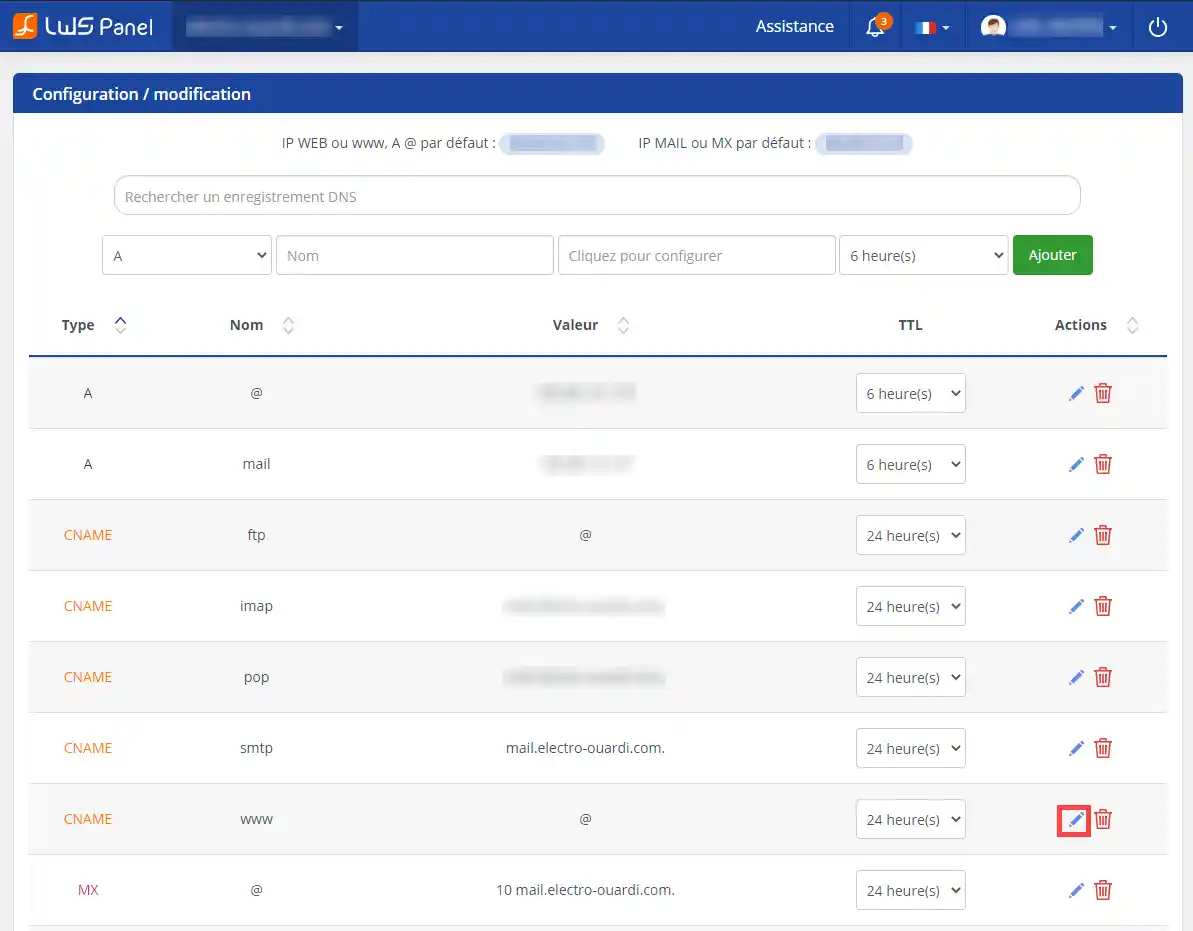
77. Find the CNAME zone for the www value and click the pencil icon to modify this record.
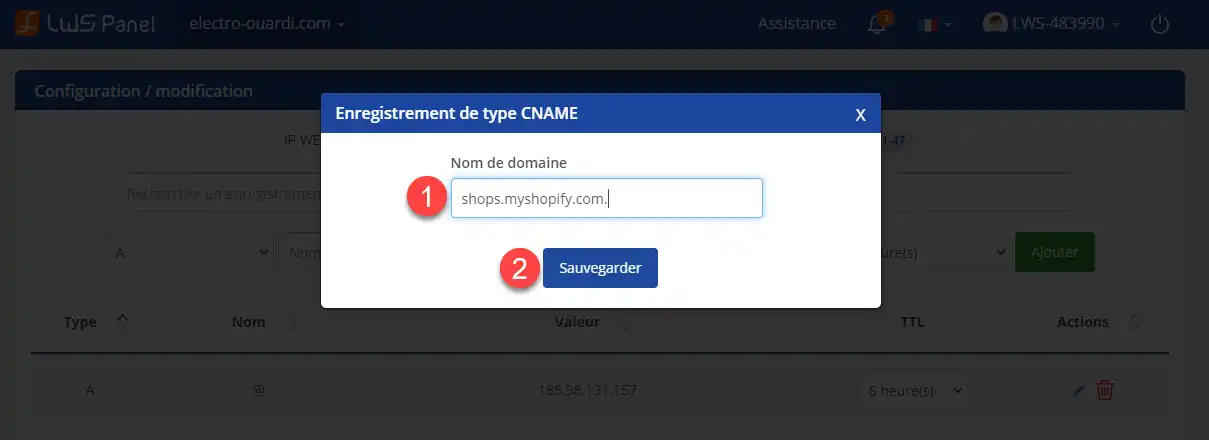
88. Enter the CNAME zone "shops.myshopify.com." (don't forget the "." at the end), then click the "Save" button.
Step 2: Connect your domain to Shopify
11. Go to your Shopify interface and click "Online Store" then "Domains"
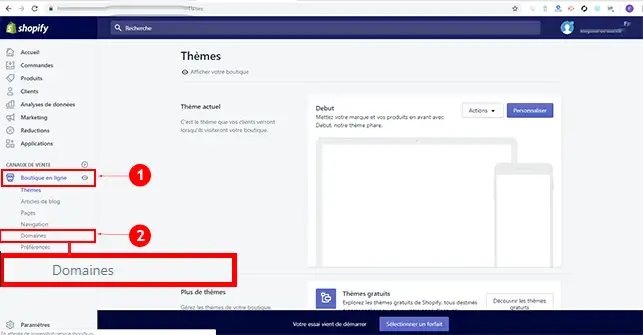
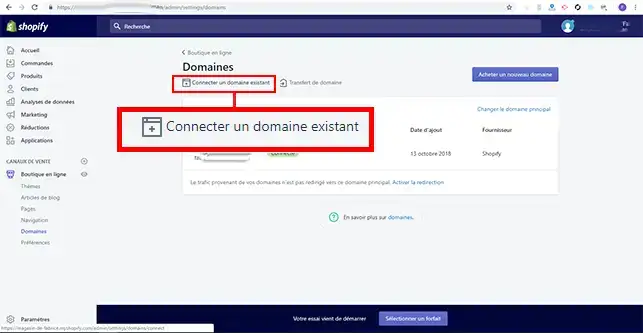
22. Click the "Connect existing domain" tab so you can link your domain located in your LWS management panel.
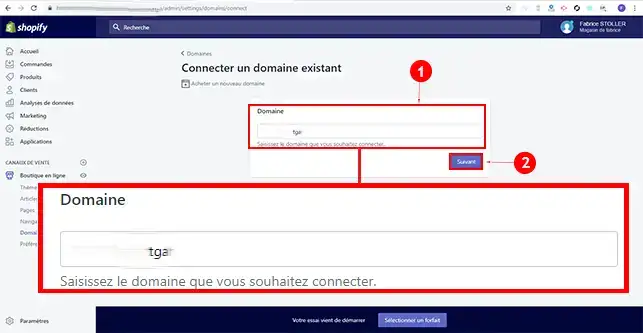
33. Enter the domain name you want to link to your online store and click the "Next" button.
-
Click Connect domain.
Domain verification can take up to 48 hours. Once it is complete, your domain is listed in the Domain section of the Domains page, and its status shows Connected.
Step 3: Connect your Shopify mail service to the LWS domain
You must authenticate your contact email address to prevent your emails from being flagged as "spam" and to ensure your customers receive them.
To authenticate your contact email address, you must add the following records to your domain to connect it to Shopify Sender Policy Framework (SPF) and Domain Keys Identified Mail (DKIM) records
Before you begin, make sure your store is running on an active paid Shopify plan. Adding CNAME records is not possible for development stores or for those using the Pause and Build plan.
You can ensure your emails reach your customers by adding CNAME records to your domain, so that it connects to Shopify SPF and DKIM records.
11. From your Shopify admin interface, go to Settings > Notifications.
22. In the Contact email address section, click Authenticate your domain.
33. Follow the instructions to enter the new CNAME records in your LWS domain manager
44. To make the records on the LWS interface, log in to your LWS customer area and click the "Manage" button corresponding to the desired domain name.
55. Click the "DNS Zone" menu so you can access all the zones for your domain name and modify them.
66. Add the CNAME-type records with the desired host name and value and click the add button to confirm the addition of the record.
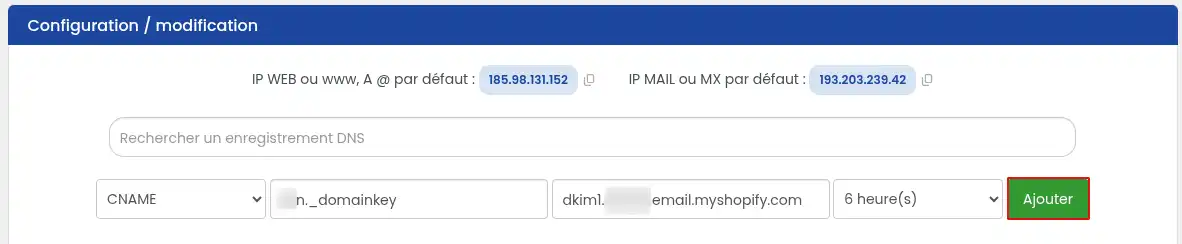
Sometimes you need to wait up to 24 hours for the changes to take effect.
Conclusion
You now know how to:
- Understand the usefulness of Shopify as an online sales platform.
- Modify your DNS records on the LWS account to link your domain name to your Shopify store.
- Connect your domain to Shopify to complete the process and launch your online store.
Thanks to these key steps, your e-commerce project is ready to take off 🚀. You have successfully crossed the bridge between creating your sales space and opening it to the world thanks to Shopify and LWS. Don't forget that patience is key, as domain verification can take up to 48 hours.
Thank you for reading to the end! If you have any questions or would like to share your experience, feel free to leave a comment below. Your feedback is valuable and helps us improve our services. See you soon for more e-commerce tips! 😊🛒



 Yes
Yes No
No About
About 