
Online help
The web host accessible to all
Procédure
Migrating a WordPress site can seem like a daunting task, but with the "All-in-One WP Migration" extension, this process becomes not only manageable but surprisingly simple. This documentation is designed to guide you through each step of migrating your WordPress site using this powerful and user-friendly tool.
Log in to theadministration of the current WordPress site you wish to migrate to LWS installations.
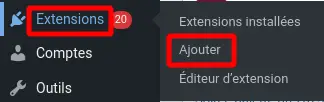
Then select"Extensions -> Add" from the menu:
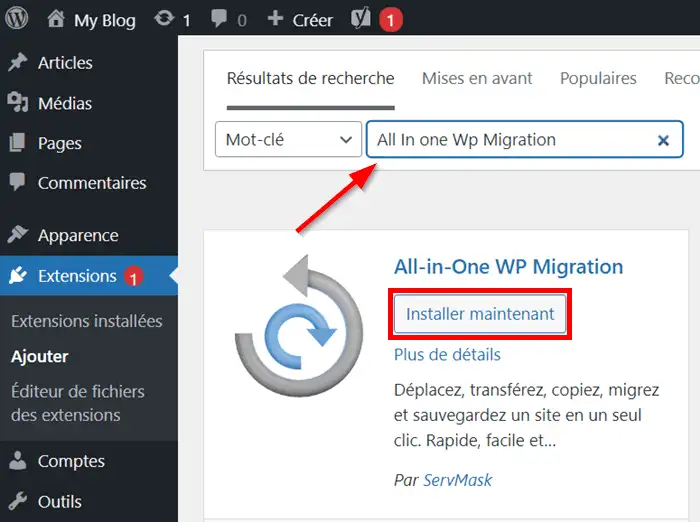
In the search bar, enter"All-in-One WP Migration", then click on"Install now", then"Activate" to be able to use the migration extension:
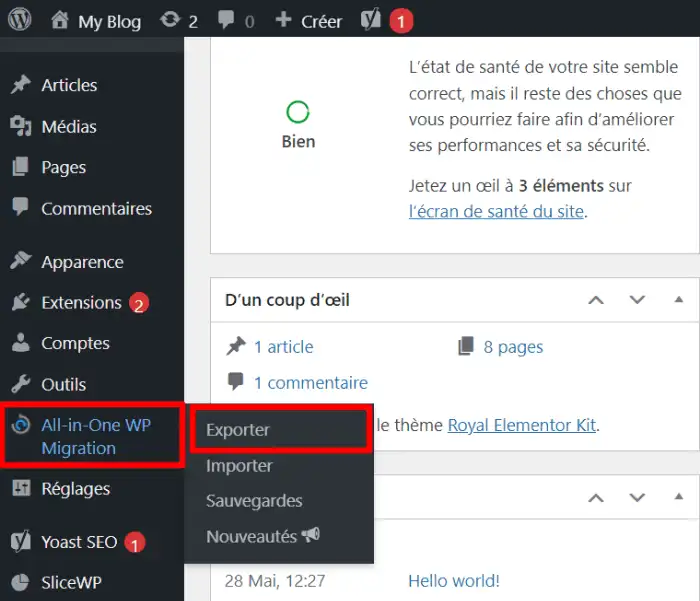
Select"All-in-One WP Migration -> Export" from the menu:
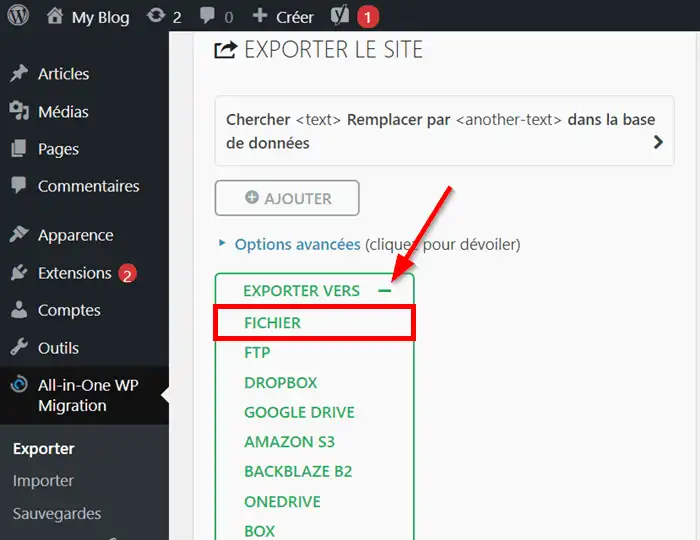
Then select"Export to -> File":
The process may take several minutes depending on the volume of data on the site to be exported:
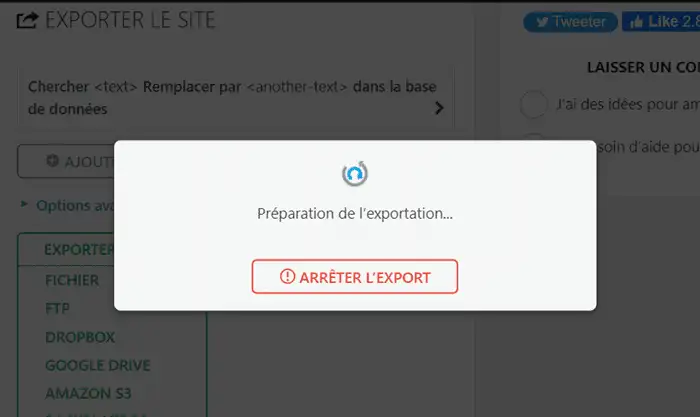
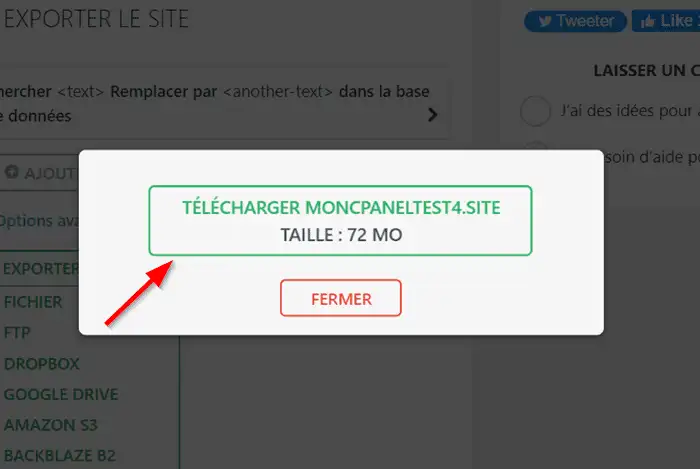
Once the export has been generated, you can download it to your computer:
Thanks to the LWS auto-installer, you can install a WordPress site on your LWS hosting in just a few clicks.
To carry out this operation, please follow this documentation for hosting managed with the LWS Panel or this one for hosting on cPanel.
At this stage, your domain is not yet pointing to LWS hosting and consequently the WordPress you have just installed is not accessible from a browser.
Until you have finalised the migration operation and checked that everything is working properly, you may not want to change the pointing of your domain name just yet.
You therefore need to make your computer (and only your computer) think that your domain is redirected to LWS hosting. This is done by modifying the Hosts file on your computer.
You can follow this documentation which explains how to do this on a Windows or Mac computer.
With the Hosts file now modified, your computer now links your domain name to your LWS hosting.
Connect to the WordPress site installed in part II using the login details you received by e-mail or connect via the WP-Manager in your customer area (LWS Panel).
Once in WordPress administration, install the All-in-One WP Migration extension in exactly the same way as in part I of this documentation.
If your backup file is larger than 512 MB, please refer to part V of this documentation to unblock the extension and be able to import your site.
If you have already carried out the procedure in part V of this documentation or if your export is less than 512 MB in size, you can continue with the import using the following steps.
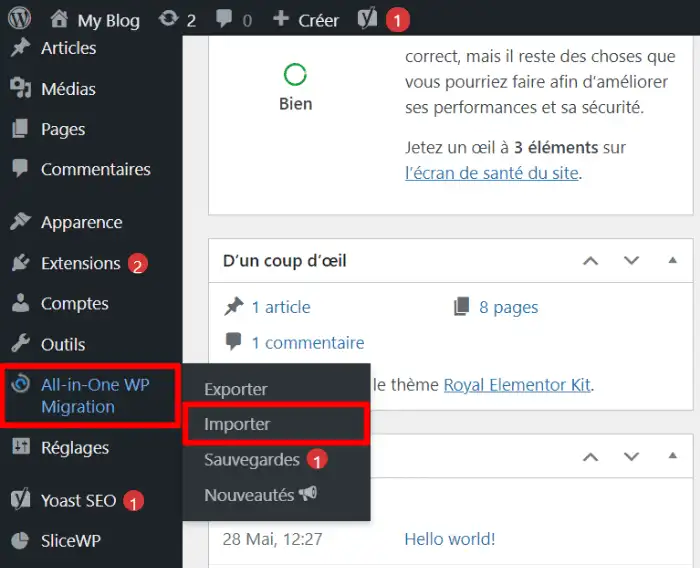
Select"All-in-One WP Migration -> Import" from the menu:
Then select"Import from -> File":
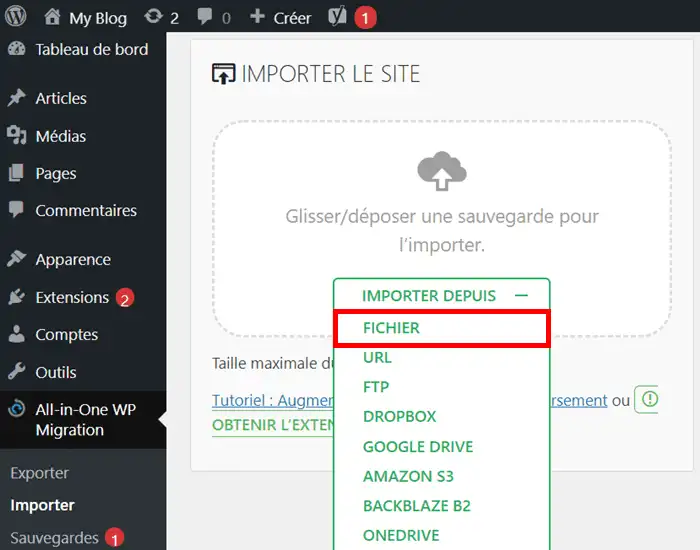
Select the export file created in step I and stored on your computer
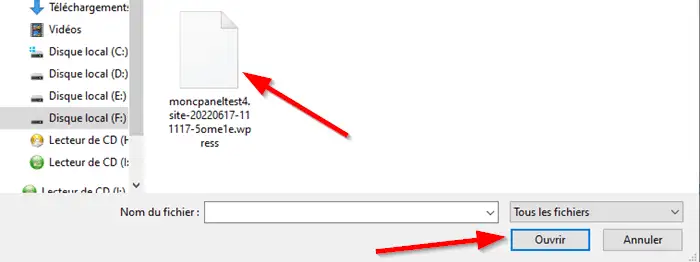
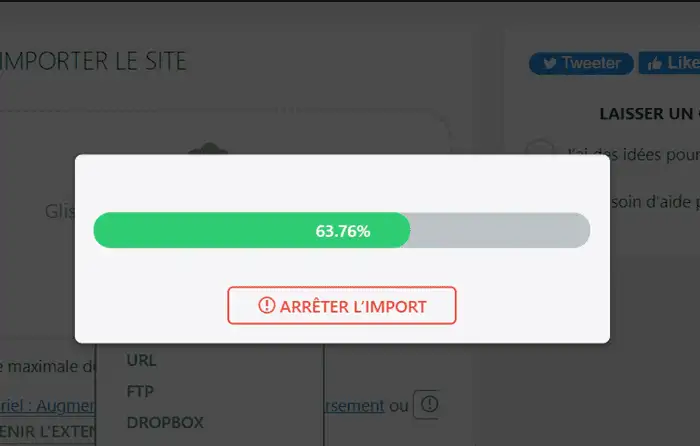
The import will take place, there may be periods of several tens of seconds when the application does not advance. This is normal and the import will continue smoothly. Do not close the window, otherwise the import will stop completely.
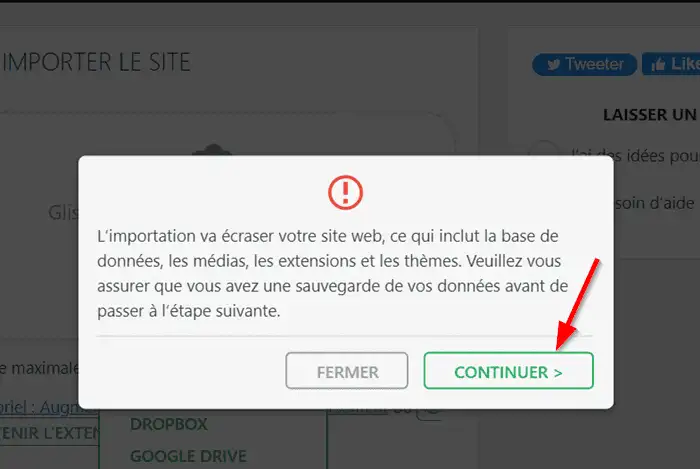
Once the file has been imported, click on"Continue".
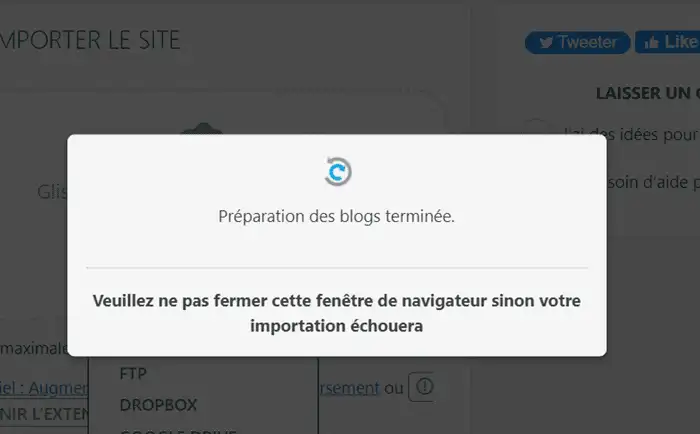
Let the extension configure your site.
Then click on "Finish".
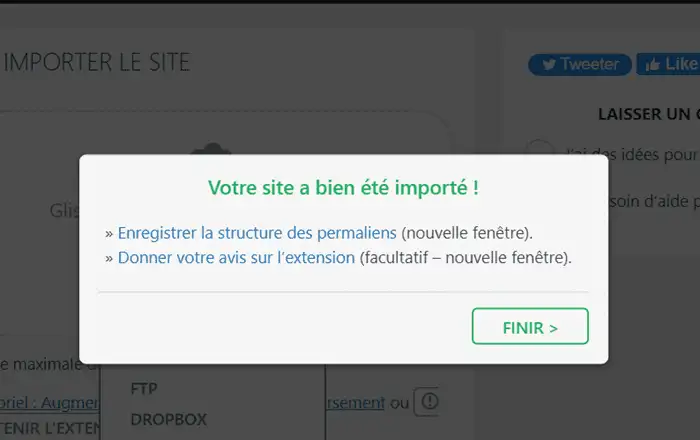
Check that everything is working properly. The SSL problem is normal as long as your domain does not actually point to your hosting.
Once the usual checks have been carried out, you can delete the settings previously made in your Hosts file and point your domain to your LWS installations.
If you need to import a backup created by All-in-One WP Migration that is larger than 512MB and therefore larger than the limit of the free version of the extension, you have several options.
The first option is, of course, to purchase the unblocking extension directly from the plugin store. This purchase will also give you access to the latest version, automatic updates and support from the extension publisher's team.
If, on the other hand, you only want to make a single import to migrate your site and you don't particularly want to reuse the extension afterwards, you can use the GPL-licensed unboxing extension.
| Official All-in-One WP Migration Unlimited Extension | All-in-One WP Migration Unlimited Extension GPL | |
| Removes loading limits | Yes | Yes |
| Use on multiple sites | Yes | Yes |
| Restore backup from a server | Yes | No |
| WP Cli command | Yes | No |
| Update MI | Yes | No |
| Support | Yes | No |
| Price | 5.75/month minimum 12-month commitment |
Free |
| Order/Download | Order | Download |
Whether you buy the paid version or download the GPL version, you will then be in possession of a ZIP file that you will need to import into the extensions of your WordPress site.
To do this, follow these steps:
In the menu, select"Extensions -> Add" :
Then click on "Upload an extension".

Click on"Choose a file" and select the ZIP file on your computer, then click on"Install now".

Then click on"Activate the extension".
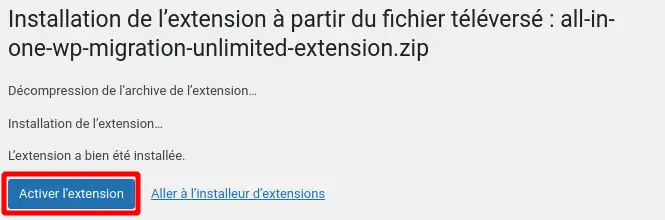
Once the extension has been successfully installed, you can continue the migration by importing a backup of more than 512MB by following part IV of this documentation.
Ask the LWS team and the community. Answers are published after moderation.
 About LWS :
LWS is a 100% French web hosting company that focuses on quality and innovation and offers a responsive and competent technical service at affordable prices.
About LWS :
LWS is a 100% French web hosting company that focuses on quality and innovation and offers a responsive and competent technical service at affordable prices.



 Yes
Yes No
No