
Online help
The web host accessible to all
Procédure
Cloudflare is a CDN (Content Delivery Network) solution integrating a security system and a caching system. Cloudflare then allows you to deliver your content to your visitors from a server closer to their location.
Cloudflare’s security features protect you from different forms of attacks such as DDoS attacks or bruteforce attacks, while the caching features allow you to improve your website’s performance.
A more detailed explanation of Cloudflare’s technology is available on their official website.
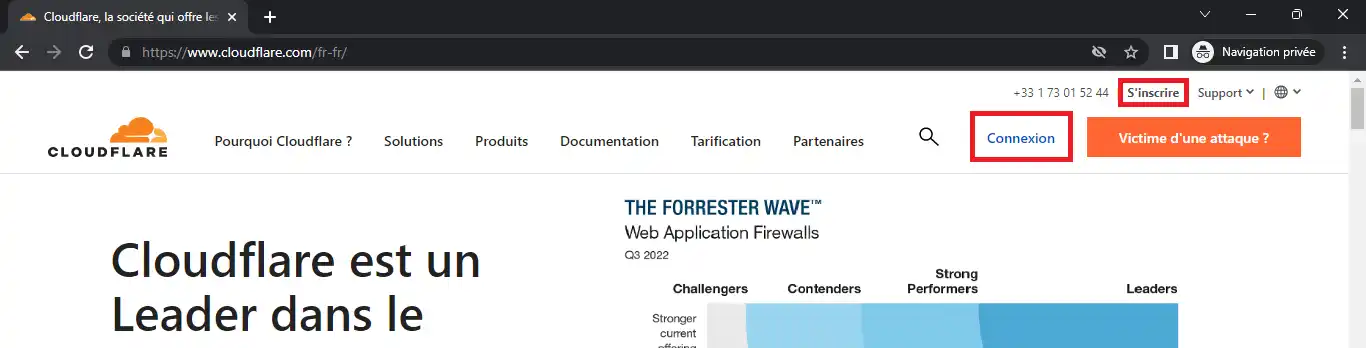
1. To install Cloudflare on a domain name, you will need to go to Cloudflare’s official website: www.cloudflare.com. Click on "Log in" or "Sign up" depending on whether or not you already have a Cloudflare account, and log in.
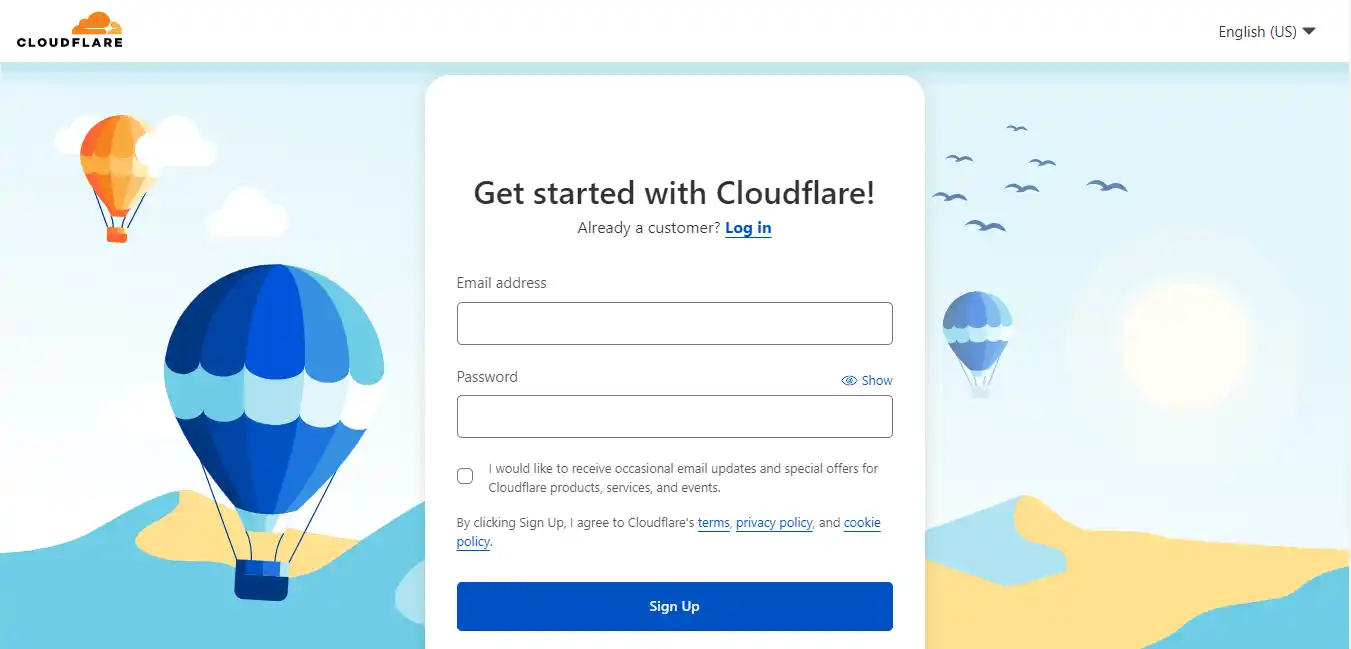
2. Then fill in the login or sign-up form:
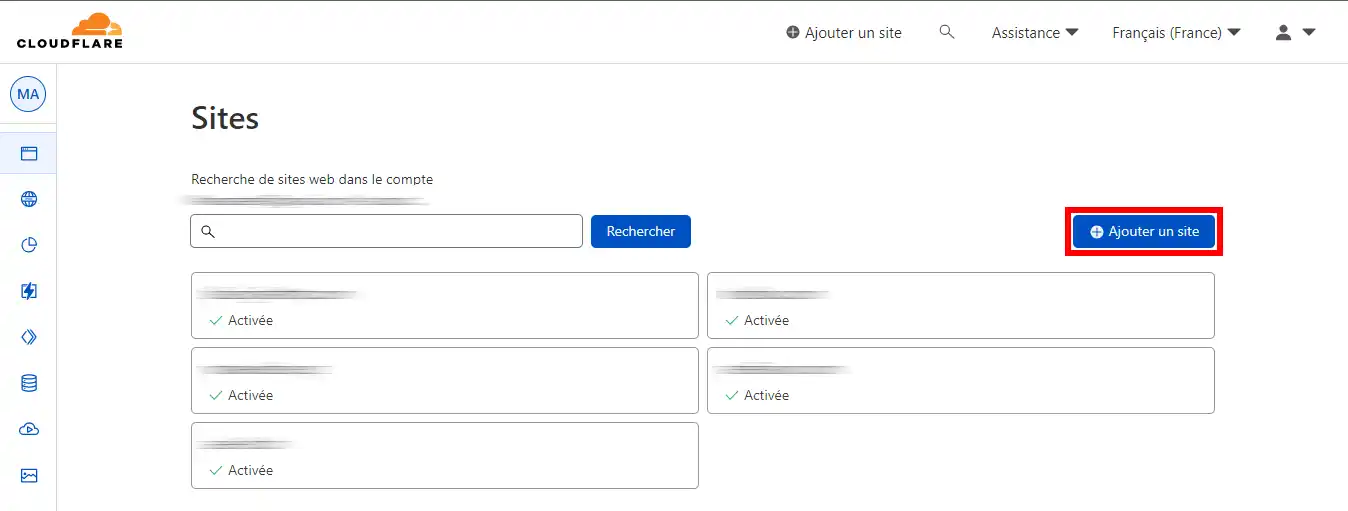
3. Once registered and logged in, you need to add your website from the Cloudflare dashboard by clicking on "Add a site" :
4. Enter the domain name you want to configure with Cloudflare and click on "Add a site" :

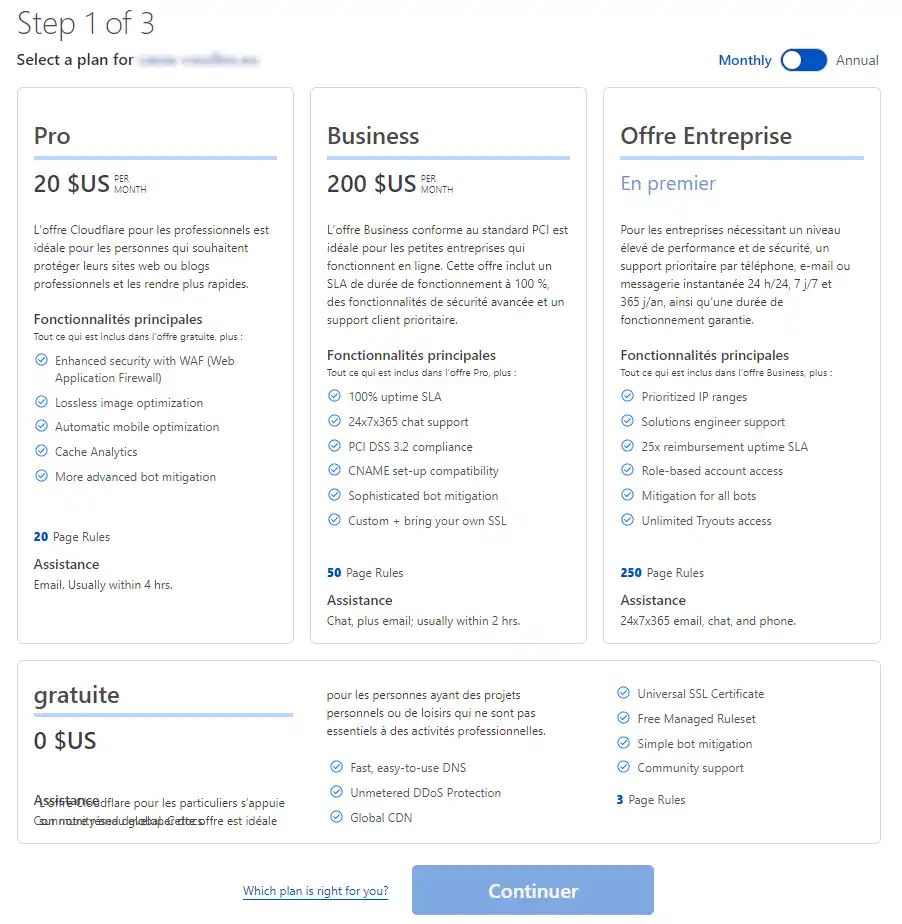
5. Click on the plan you want to use and click on "Continue" :
6. Cloudflare will then try to retrieve all of the DNS records on your cPanel plan. If DNS records are missing, you can add them. It is recommended to have exactly the same DNS records visible in the "DNS Editor" icon in your cPanel interface. Feel free to compare them and adjust whatever is missing. Then click on "Continue" :
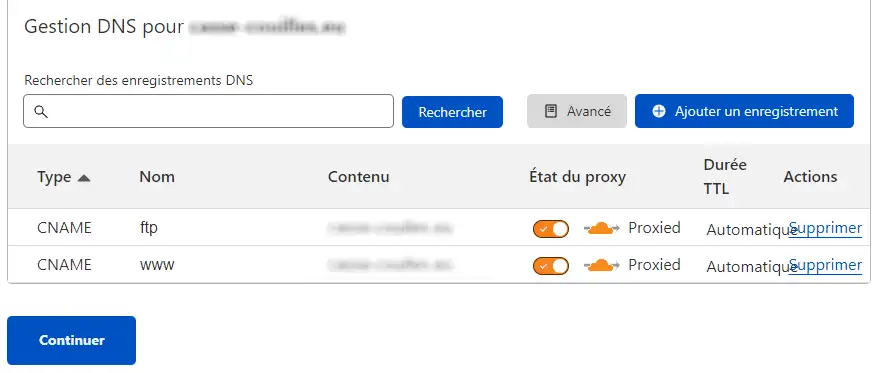
7. Cloudflare will then provide the DNS servers to enter with your domain name provider:
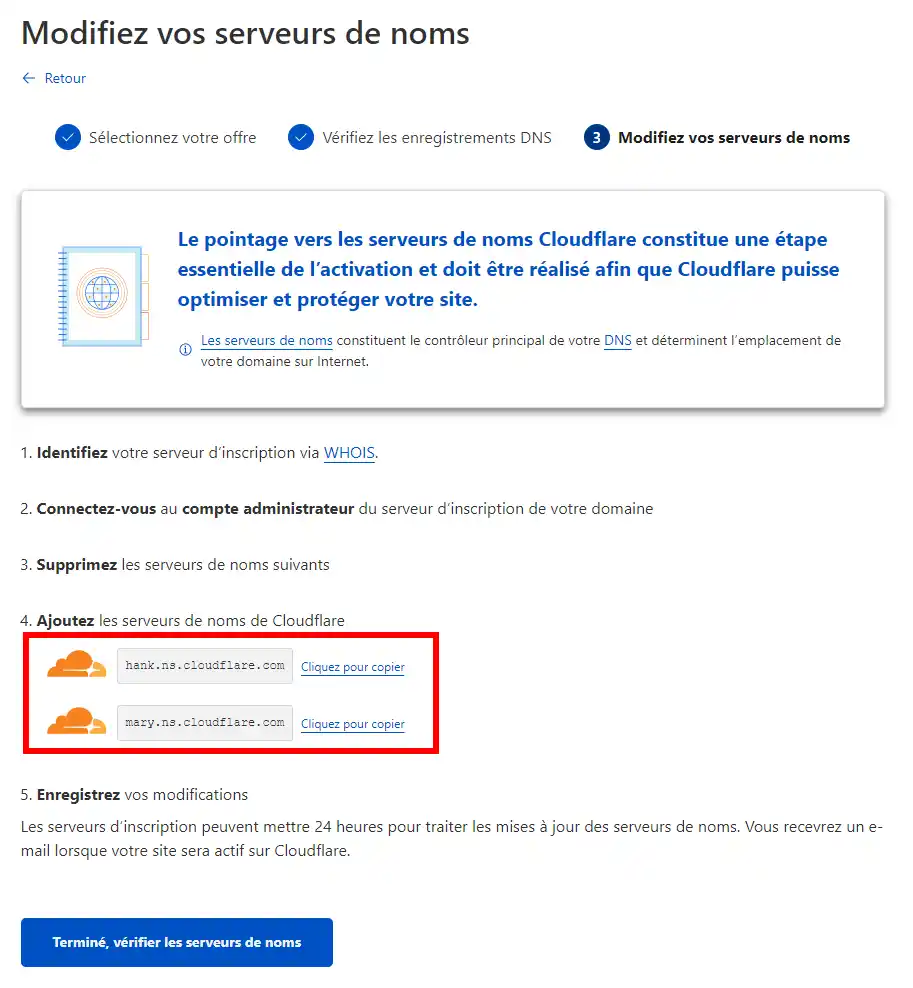
8. You will then need to set them up. If your domain name is registered with LWS, please follow the instructions in the dedicated documentation.
9. Then go back to Cloudflare and click on "Done, check nameservers" so that Cloudflare can verify whether your configurations are correct. Note that DNS changes may take several hours to take effect.
Ask the LWS team and the community. Answers are published after moderation.
 About LWS :
LWS is a 100% French web hosting company that focuses on quality and innovation and offers a responsive and competent technical service at affordable prices.
About LWS :
LWS is a 100% French web hosting company that focuses on quality and innovation and offers a responsive and competent technical service at affordable prices.



 Yes
Yes No
No