
Online help
The web host accessible to all
Procédure
Would you like to move your WordPress site to LWS hosting? LWS Site Migrator lets you easily create a backup of your site, then transfer and restore it directly from the WPManager. This method makes it easy to migrate your site without having to manually transfer your files and database. Import from another URL is still marked in WPManager as a feature under development (beta): back up your data before using it, and use the fallback solution described below if it fails.
LWS offers its own backup/migration plugin for WordPress, LWS Site Migration, allowing you to create and download backups from any WordPress site and send them to an LWS hosting account.
You can get the plugin file from WPManager; then add it to your WordPress site.
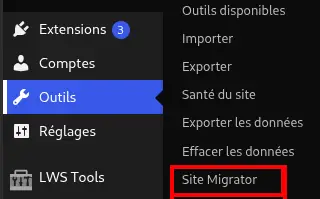
Once the plugin has been downloaded and installed, look for the "Tools" menu and then the "Site Migrator" submenu in the WordPress menu on the left to access the backup management page.
On the newly opened page, you can start the backup process by clicking the "Start backup" button.

After an analysis of your site (the analysis duration depends on the number of files on your WordPress site), you will be able to view the files and database tables that will be copied. You can choose which files and folders should be included in the backup; some folders are ignored by default and cannot be included, such as common cache folders or the folder containing backups made by Site Migrator.
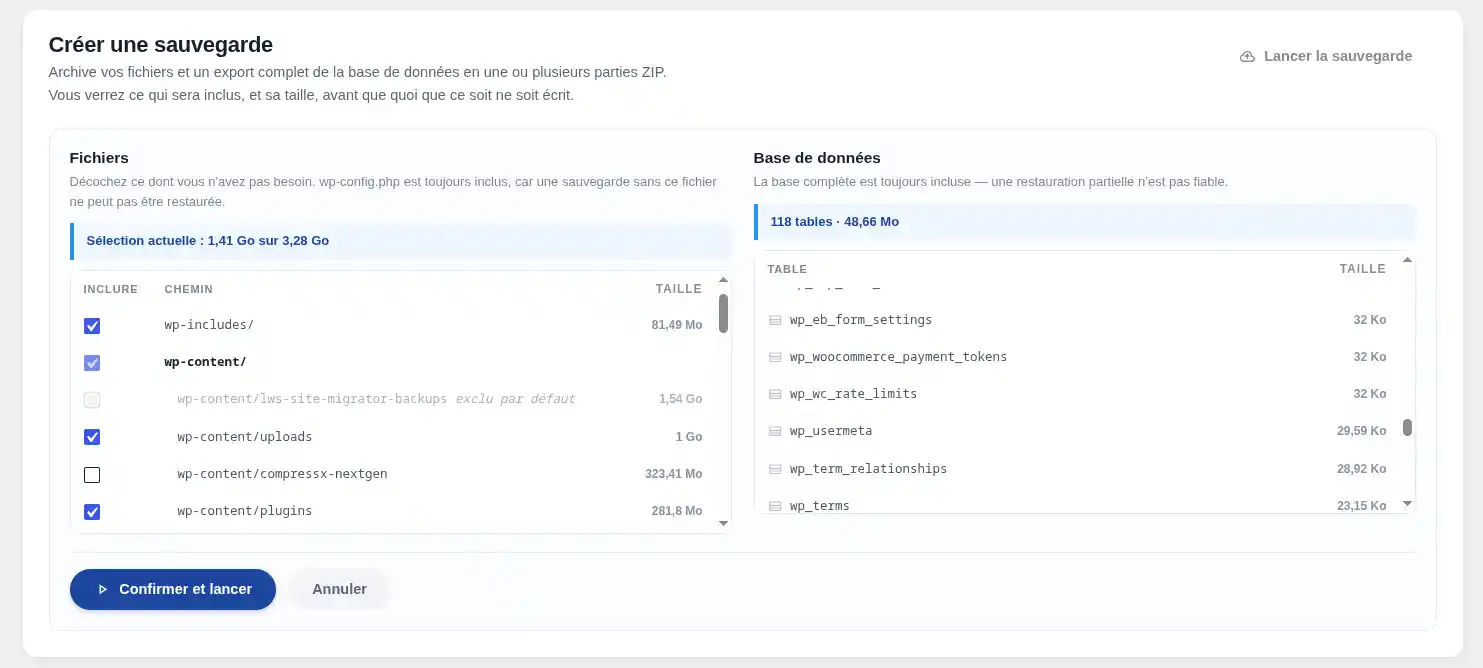
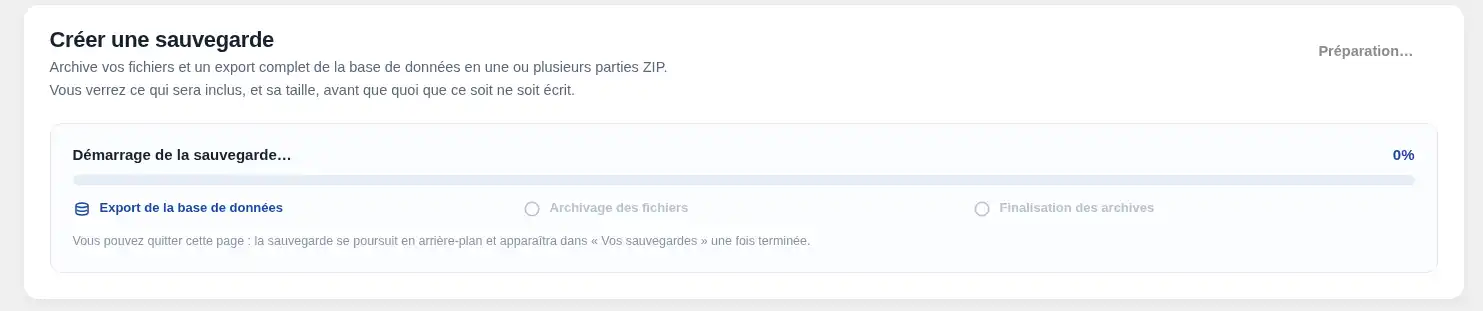
Once ready to back up, click the "Confirm and start" button to begin the process, which may take more or less time depending on the amount of data to back up.
If cron jobs are enabled on your site (WP-Cron or server cron), the backup will continue even if you leave the page.
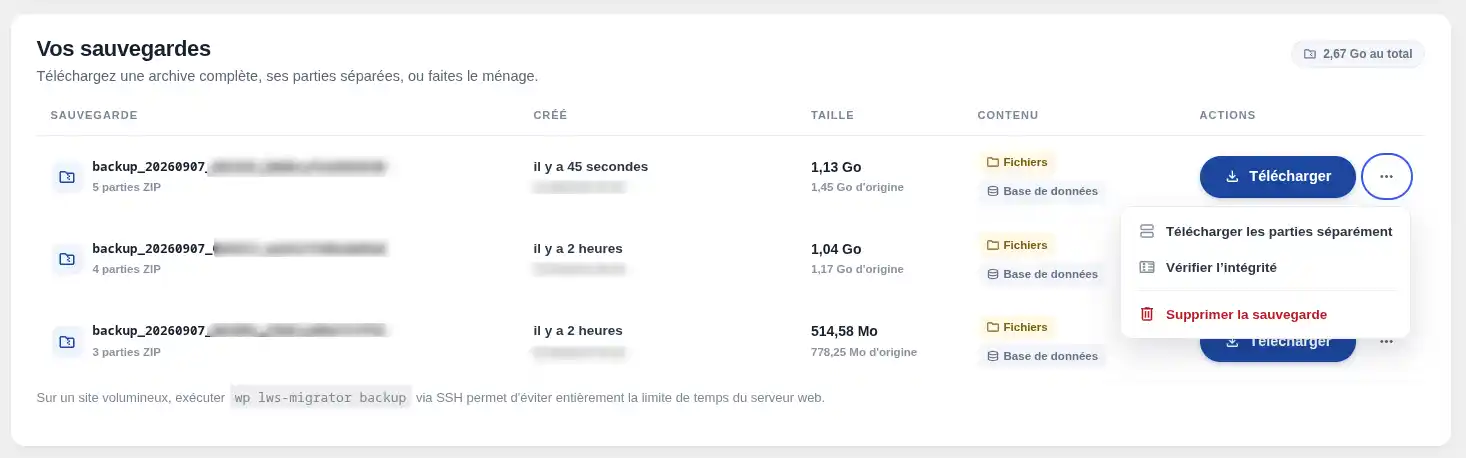
Once the backup is complete, you will find it in the "Your backups" section of the page, with its name, creation date, size, and number of parts.
From there, you can permanently delete it or download it; you can download each part separately or download a single file (ZIP format) containing all parts.
Backups are stored in wp-content/site-migrator-backups, with no expiration date. If you delete the plugin, they will not be deleted unless you add the following line to the wp-config.php file:
define('SM_DELETE_BACKUPS_ON_UNINSTALL', true);This will force the plugin to delete its backups when it is removed.
To open access to WPManager and migrate your site, go to the "External access" section and click the "Generate a token" button.
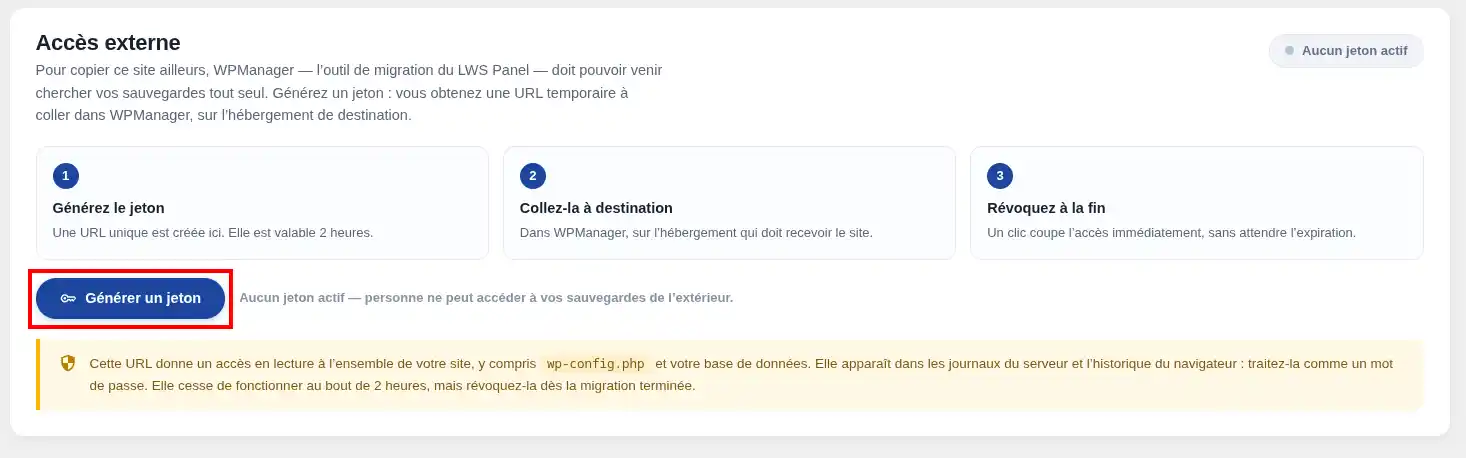
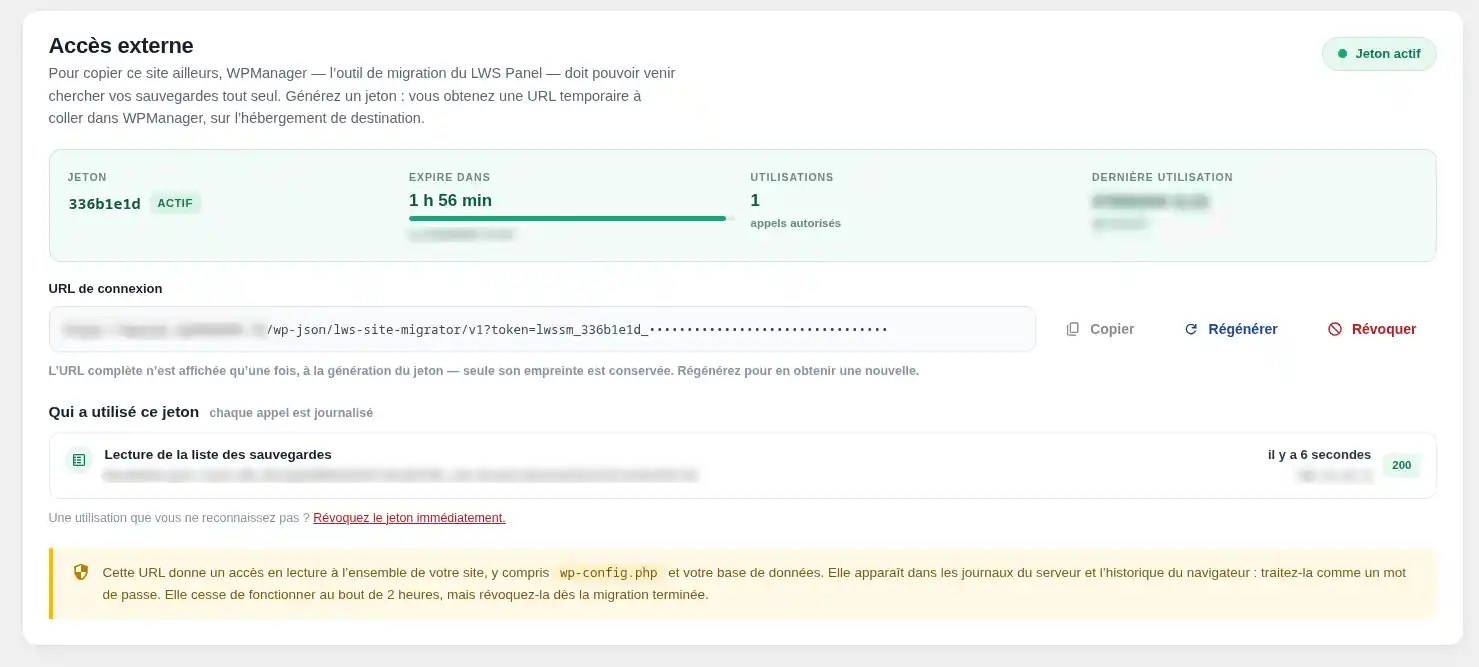
Once generated, the token will automatically expire 2 hours later, but you can also revoke it manually at any time. It is displayed only once and is not stored in plain text anywhere, so this is your only chance to copy and paste it into WPManager.
From this block, you can also monitor the use made of the generated URL. If you do not recognize any activity, immediately revoke the connection token.
On your LWS hosting account, you can use our WordPress site management software, WPManager, to manage the various components of your site, such as plugins, themes, users, and more.
You will also use this tool to migrate your backups generated by Site Migrator.
To access it, go to the LWS Panel where the destination hosting is located and click the WPManager icon.
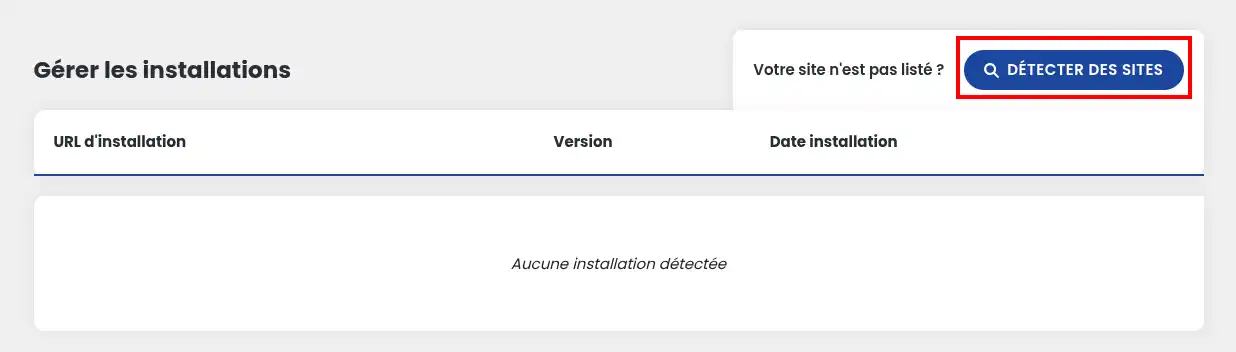
On the newly opened page, if you have never accessed the manager before, click the Detect sites button to scan your hosting account and list all WordPress installations. If your sites are already detected, you can skip this step.
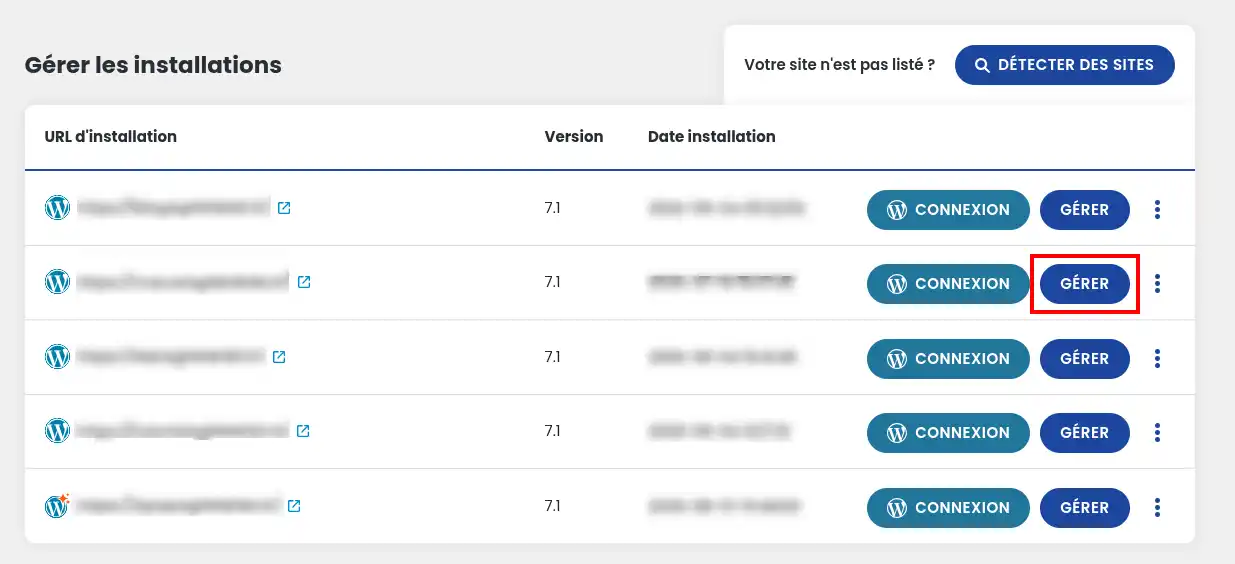
After refreshing the page, a list of detected sites is displayed, accompanied by some basic information such as the URL, WordPress version, and site installation date.
Then click the Manage button for the site you are interested in to access the advanced settings.
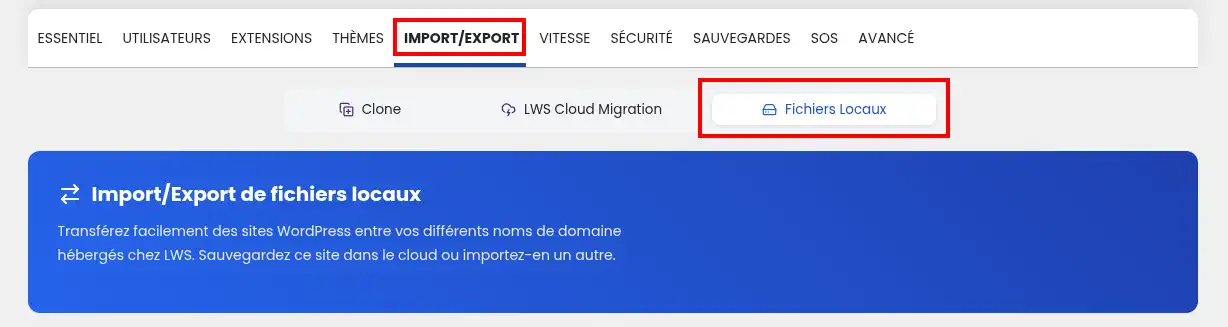
On the management page, go to the "Import/Export" tab and then "Local files." At the bottom of the page, you will find the block "[BETA] Import a backup from another URL"; this is where you will need to paste the URL generated earlier in our plugin.
You will also find a direct download link for the LWS Site Migrator plugin mentioned previously.
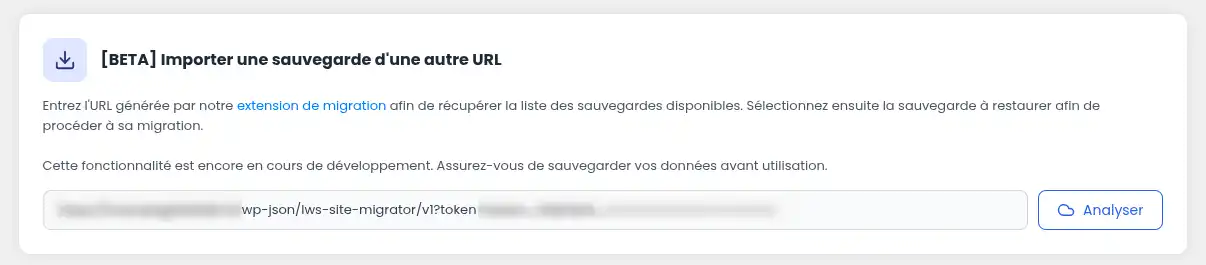
Once the URL has been generated on the site to be migrated, copy it into the field provided and click "Analyze." After a short loading time, you will see a list of all backups available on the site.
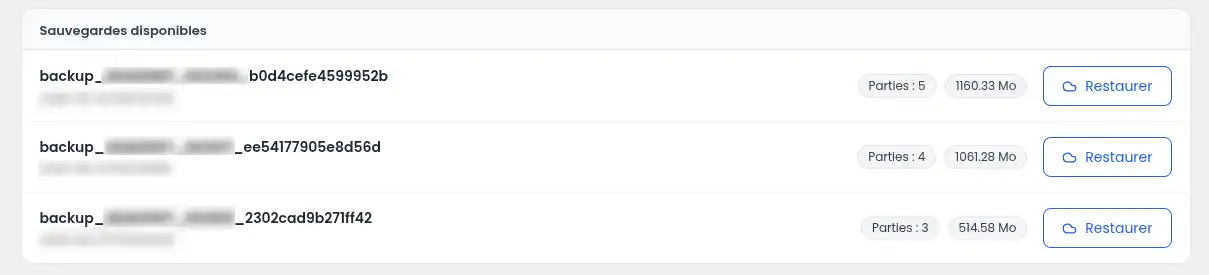
Find the backup you want, then click "Restore." After the archives are retrieved, a confirmation modal will appear, summarizing the files that will be migrated after verifying the integrity of the archive. You can change the WordPress version that will be used; by default, the current version of the backup is selected.
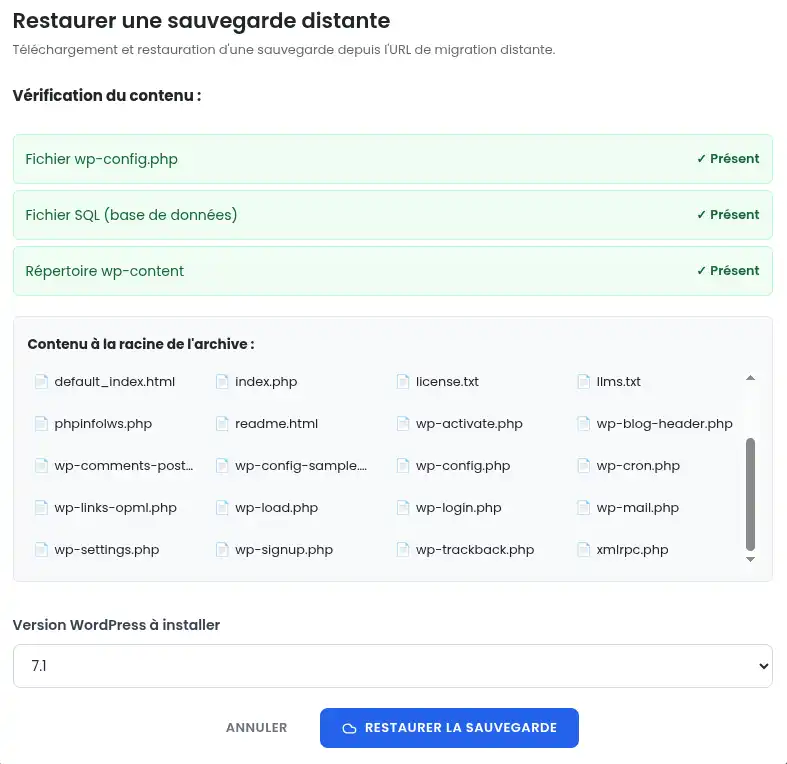
Once confirmed, the migration will start and replace all the content of the current site with that of the backup. Once migrated, your new site is ready to use.
Thanks to LWS Site Migrator and WPManager, you now have a simple and effective way to back up, manage, and migrate a WordPress site with complete peace of mind 🚀🙂
You now know how to: create a full backup of your WordPress site, select the files and tables to include, manage your generated backups, generate a secure external access token, and then import and restore a backup from WPManager on your LWS hosting account 🔐💾
With this service, WordPress migration becomes more accessible, faster, and above all more reassuring for your web projects 🌐✨
Thank you for reading! Feel free to leave a comment about the service and share your feedback 😊
Ask the LWS team and the community. Answers are published after moderation.
 About LWS :
LWS is a 100% French web hosting company that focuses on quality and innovation and offers a responsive and competent technical service at affordable prices.


 Yes
 No