
Online help
The web host accessible to all
Procédure
CalDAV is a protocol used for calendar synchronization.
You can use CalDAV to synchronize the calendar in your Webmail with your devices and applications that support CalDAV.
The procedure differs slightly depending on the graphic theme used in Roundcube; this documentation explains both procedures based on the theme you use.
1. Log in to your Roundcube webmail
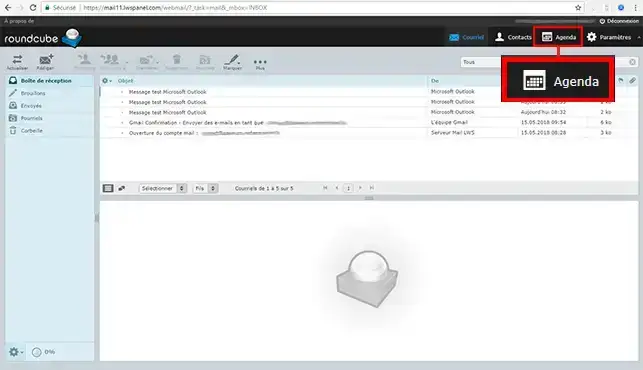
2. Go to the "Calendar" section
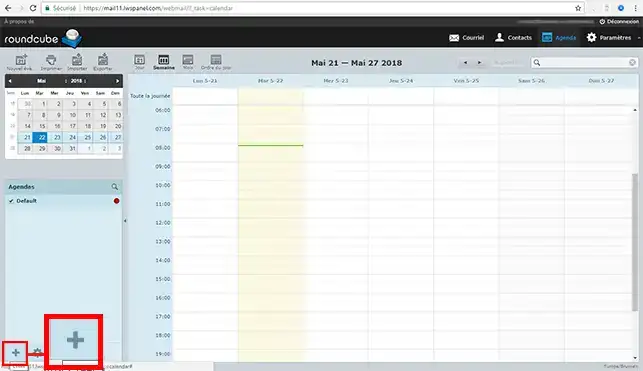
3. Click the "+" icon at the bottom left of the page
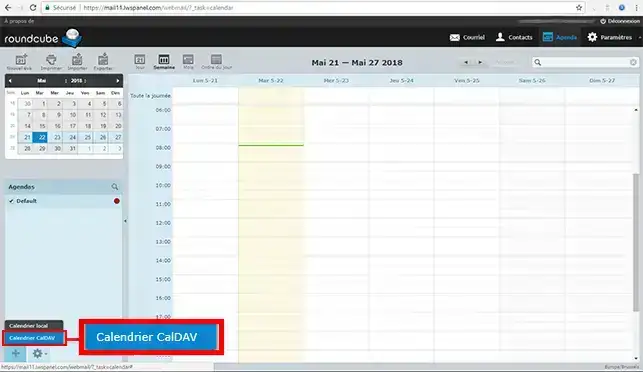
4. Click on "CalDAV Calendar"
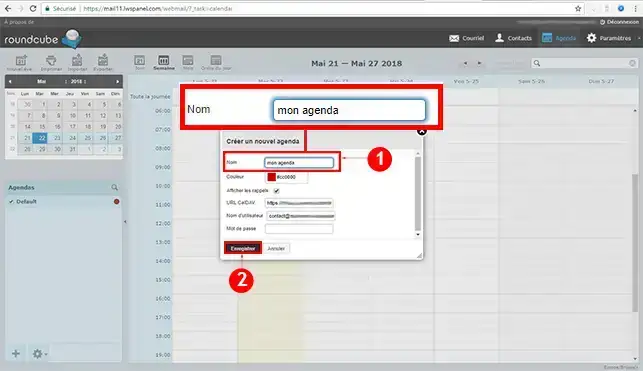
5. Choose the name of your calendar
Copy the URL of your synchronized calendar and save it in a safe place
The username will be the full email address on which you created the calendar
The password is the one you chose when creating the email address in question.
Then click the "Save" button
6. You can now synchronize your calendar with all your devices; you will only be asked for the CalDAV URL, username, and password.
The events you create in this new synchronized calendar will therefore be visible via your Roundcube webmail as well as on any synchronized device.
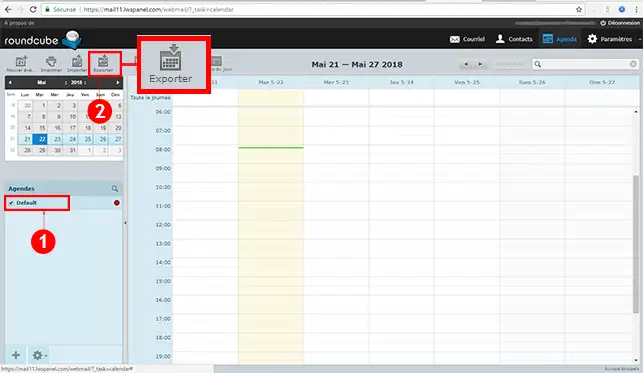
1. Select the calendar to export, then click export:
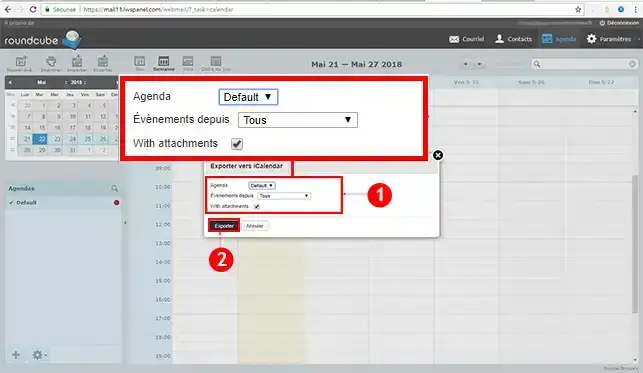
2. A popup will open; then make sure you have selected the calendar to export as well as the event period you want, then click export:
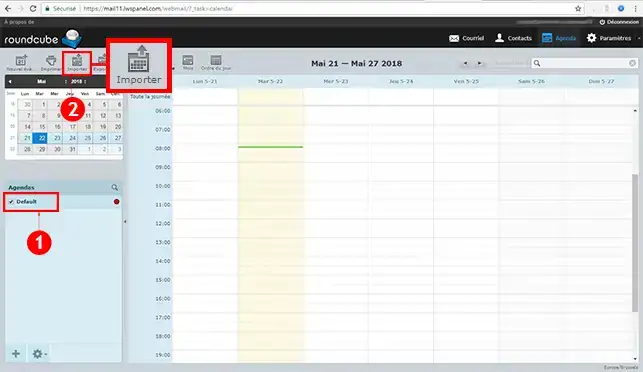
3. To import your calendar, select the calendar where it should be imported, then click import:
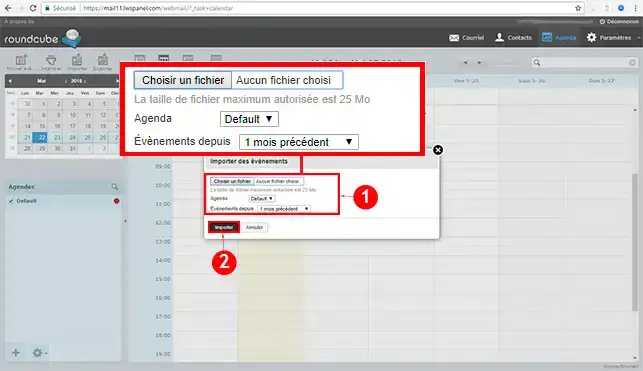
4. A popup will open; choose the file you previously imported, then make sure you have selected which calendar it should be imported into as well as the event period, then click import:
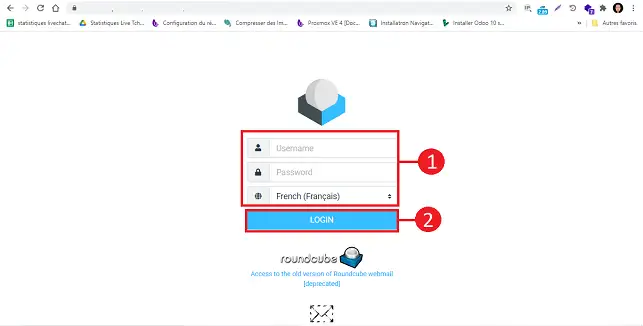
Log in to your Webmail Roundcube.
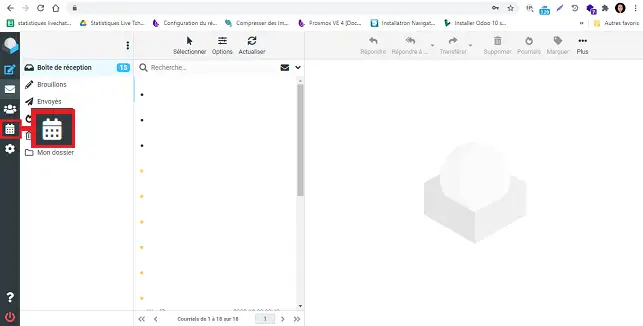
Click on the "Calendar" icon located on the left side of your Webmail.
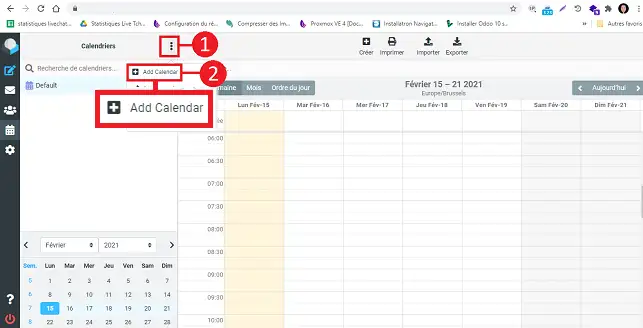
Click on the tab represented by three small dots at the top of the page, then on "Add Calendar".
Choose a name for your calendar and copy its URL because you will need it to synchronize your devices.
In the "CalDAV Digest Login" section, enter the password associated with your email account and click "save" to save your calendar.
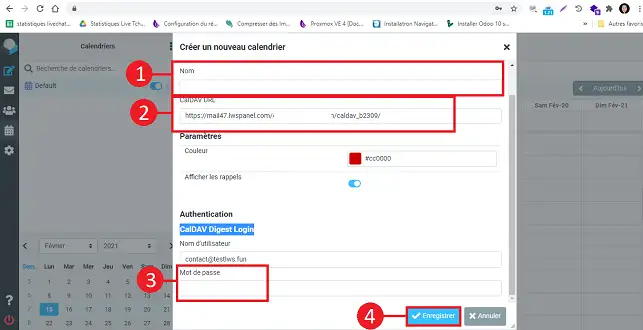
You can now synchronize your calendar with different devices. To perform the synchronization, only the URL will be required.
Select the calendar to export and click "Export" located at the top right of your screen.
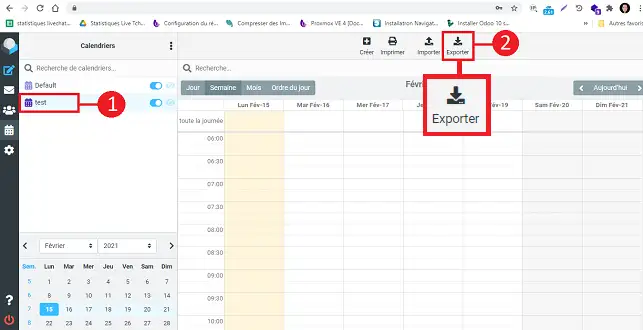
A new popup will open. Select the calendar you want to export, also choose the period you want to export, and click the "Export" button to download the relevant file.

You can import a calendar by clicking the "Import" button located on the left side of your screen.

In the new window, choose the file you want to import as well as the calendar into which you want to import it. Also choose the period to import and click the "Import" button.

Settings used:
Server: http://mondomaine.com/email@mondomaine.com/caldav
Username: email@mondomaine.com
Password: the password for my email
You are now able to synchronize the CalDAV calendar of your Roundcube Webmail linked to your LWS shared hosting plan. You can also synchronize your address book.
Feel free to share your comments and questions!
Ask the LWS team and the community. Answers are published after moderation.
 About LWS :
LWS is a 100% French web hosting company that focuses on quality and innovation and offers a responsive and competent technical service at affordable prices.
About LWS :
LWS is a 100% French web hosting company that focuses on quality and innovation and offers a responsive and competent technical service at affordable prices.



 Yes
Yes No
No