
Online help
The web host accessible to all
Procédure
The Docker CE template installs Docker CE, Docker Compose, and Buildx on your LWS KVM VPS, with no package to add manually. This guide shows you how to reinstall your server with this template, then use it day to day with Docker Compose. You will see how to launch a site, follow its logs, keep its data, update it, and expose it on the Internet.
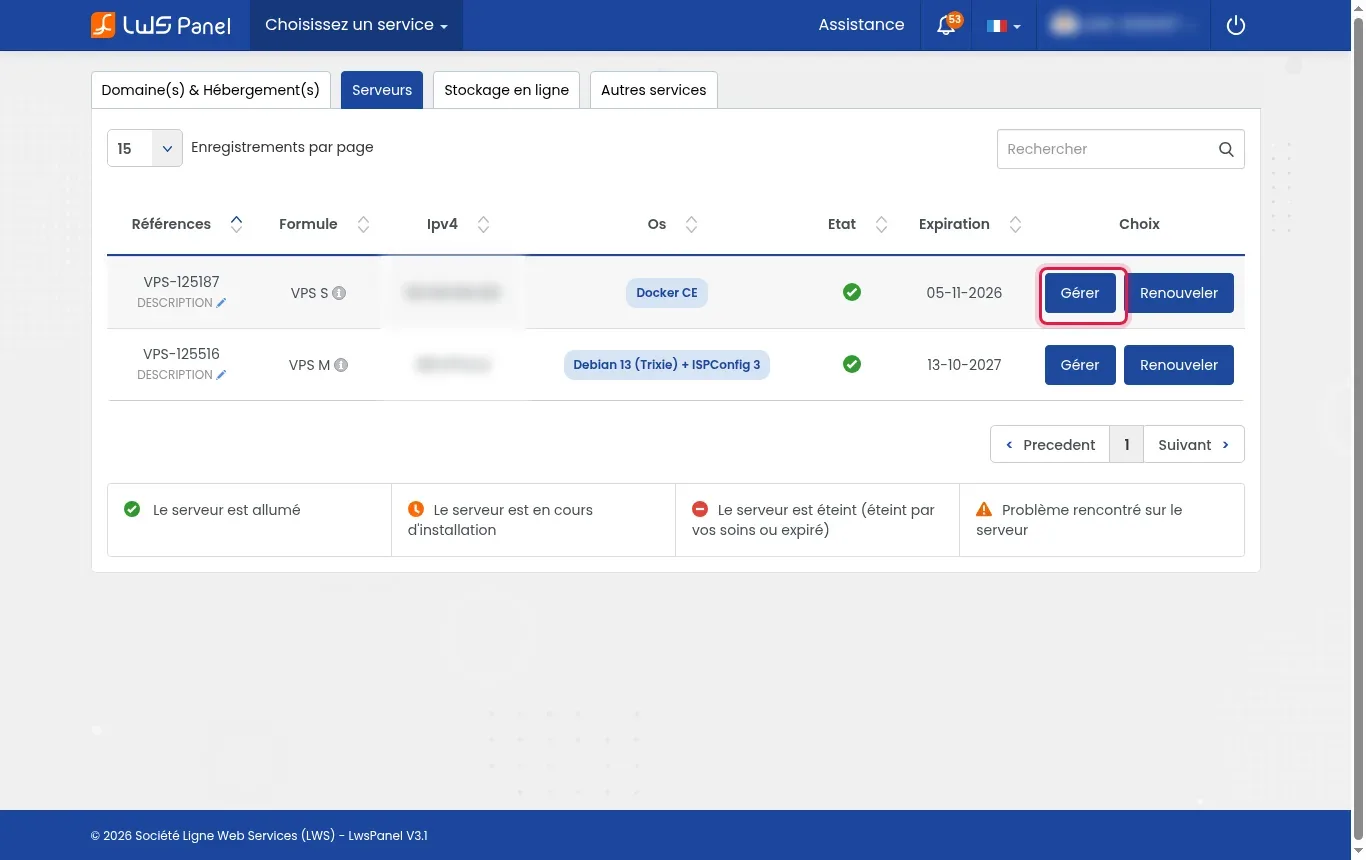
Log in to your LWS customer area and open the Servers tab. Find your VPS, then click Manage to open its interface.
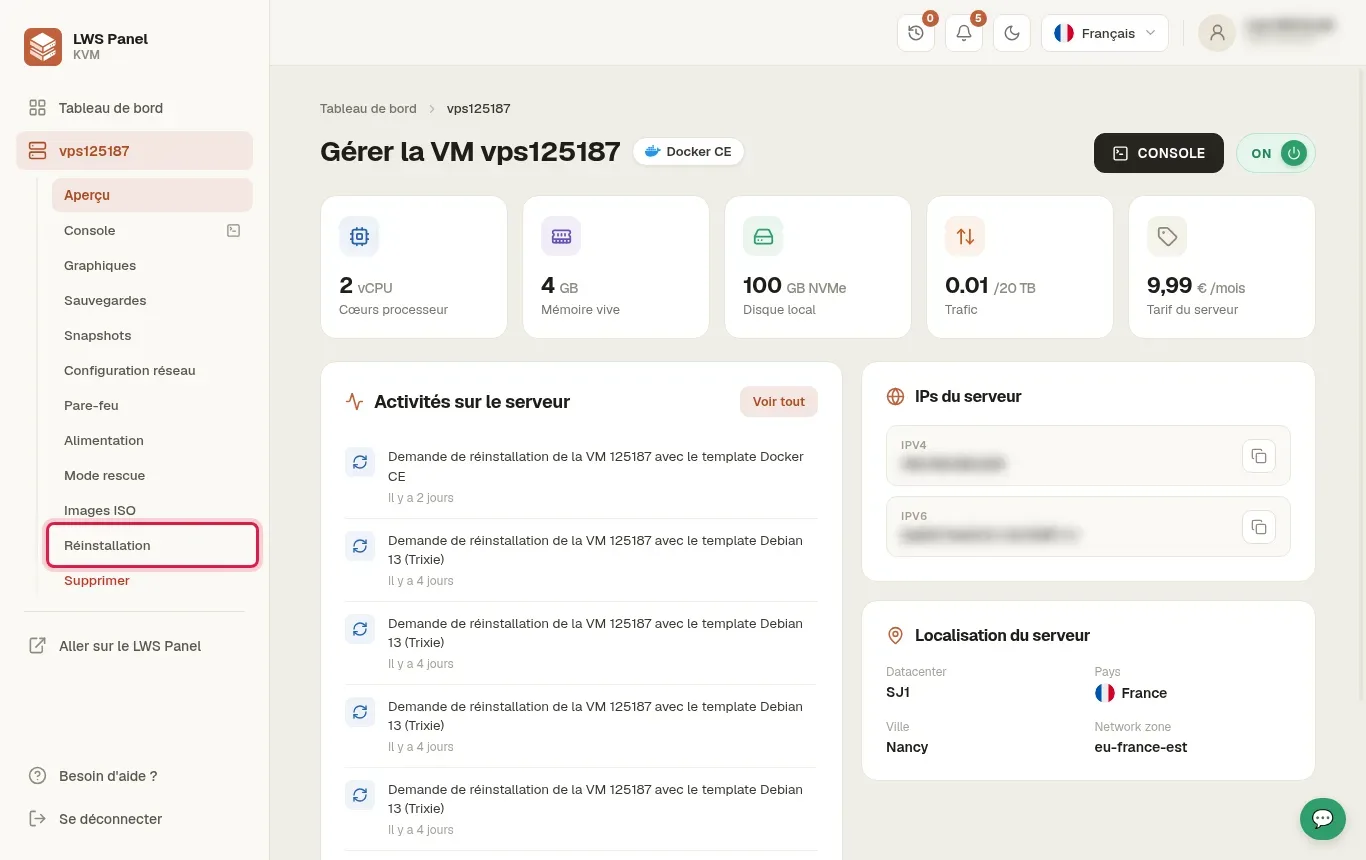
In the left-hand side menu, click Reinstallation. The catalog of systems and applications is displayed.
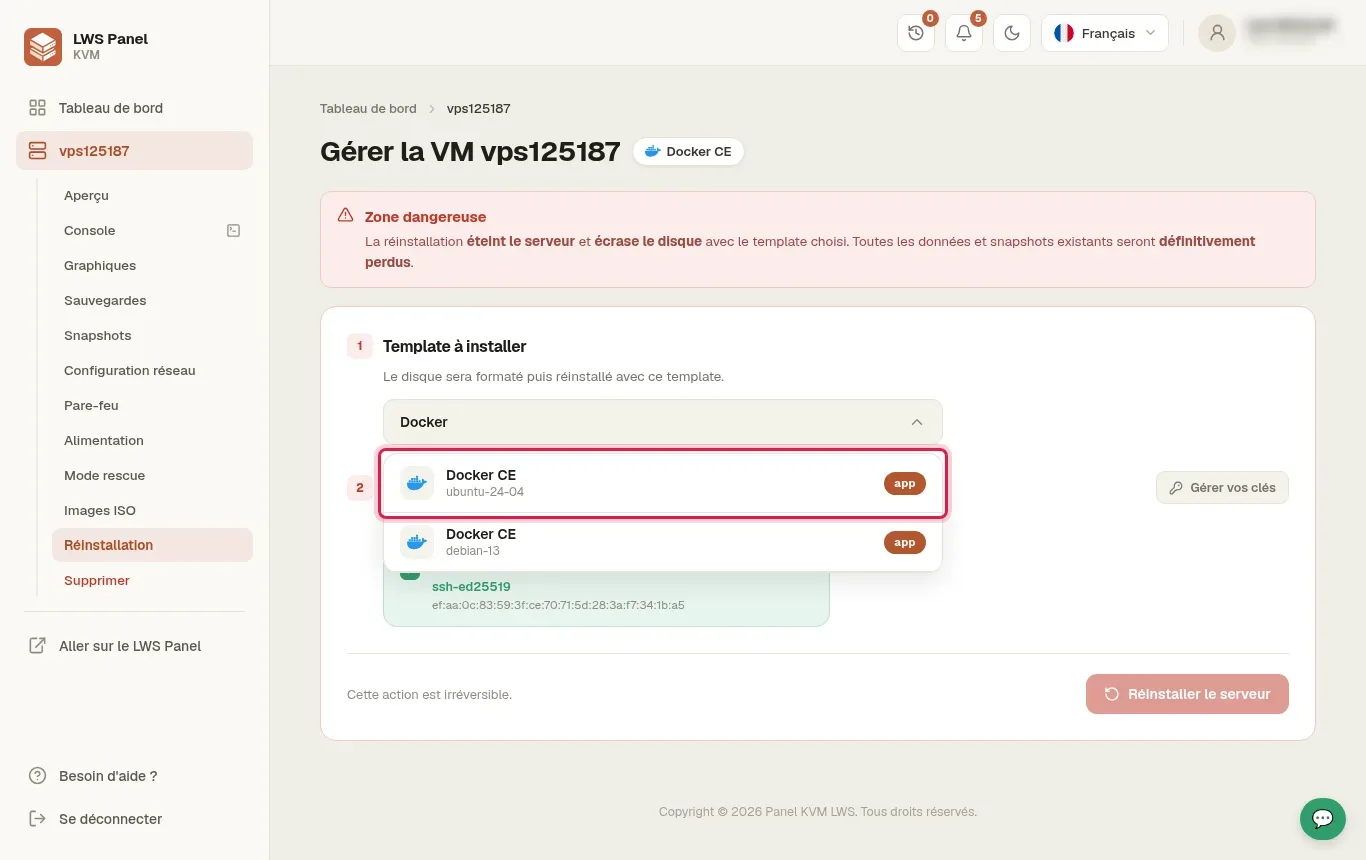
In the applications section, under the Docker category, choose for example Docker CE ubuntu-24-04.
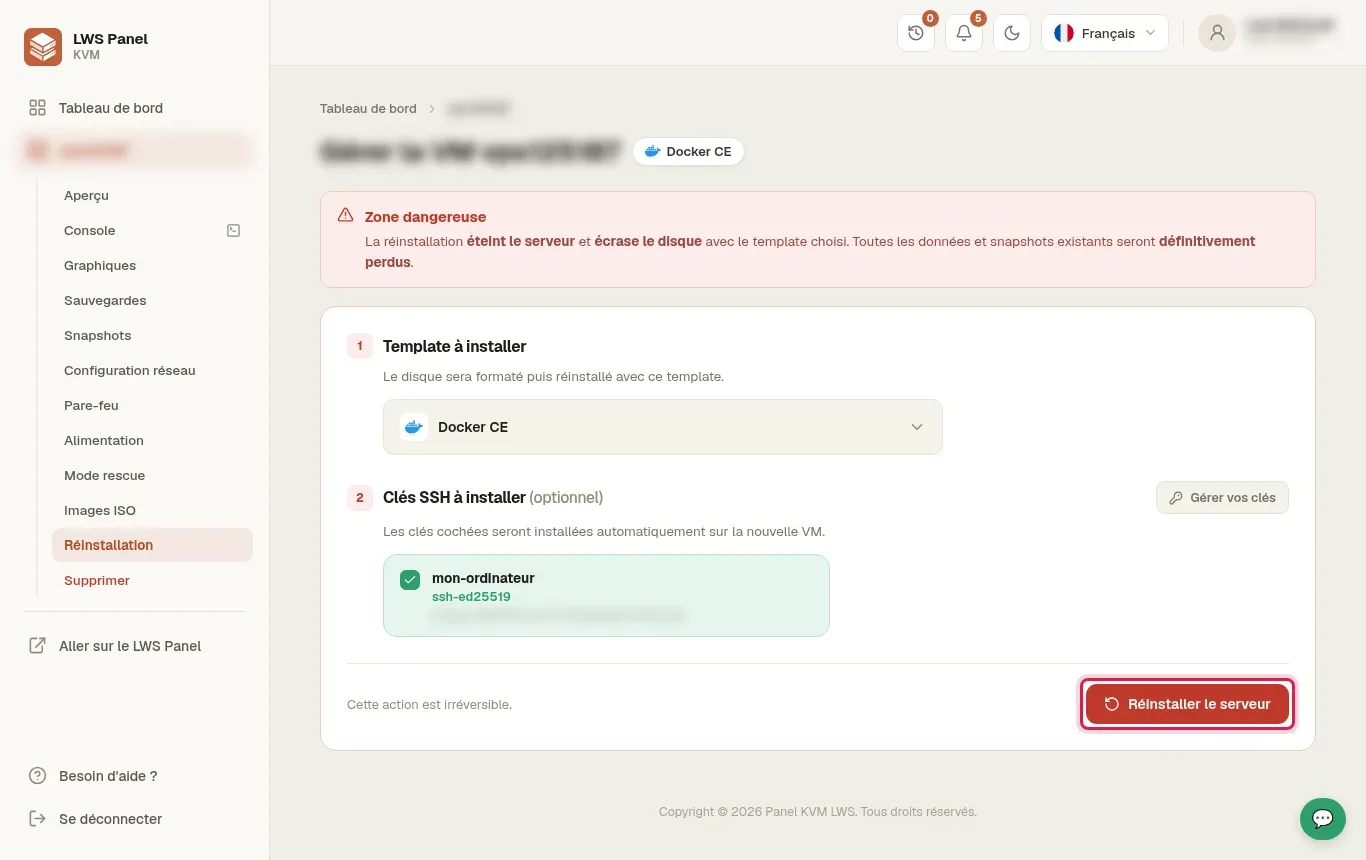
Under SSH keys to install (optional), check your SSH key. Then click Reinstall the server at the bottom right.
In the warning window, enter your server's exact name, then click the red Reinstallation button.
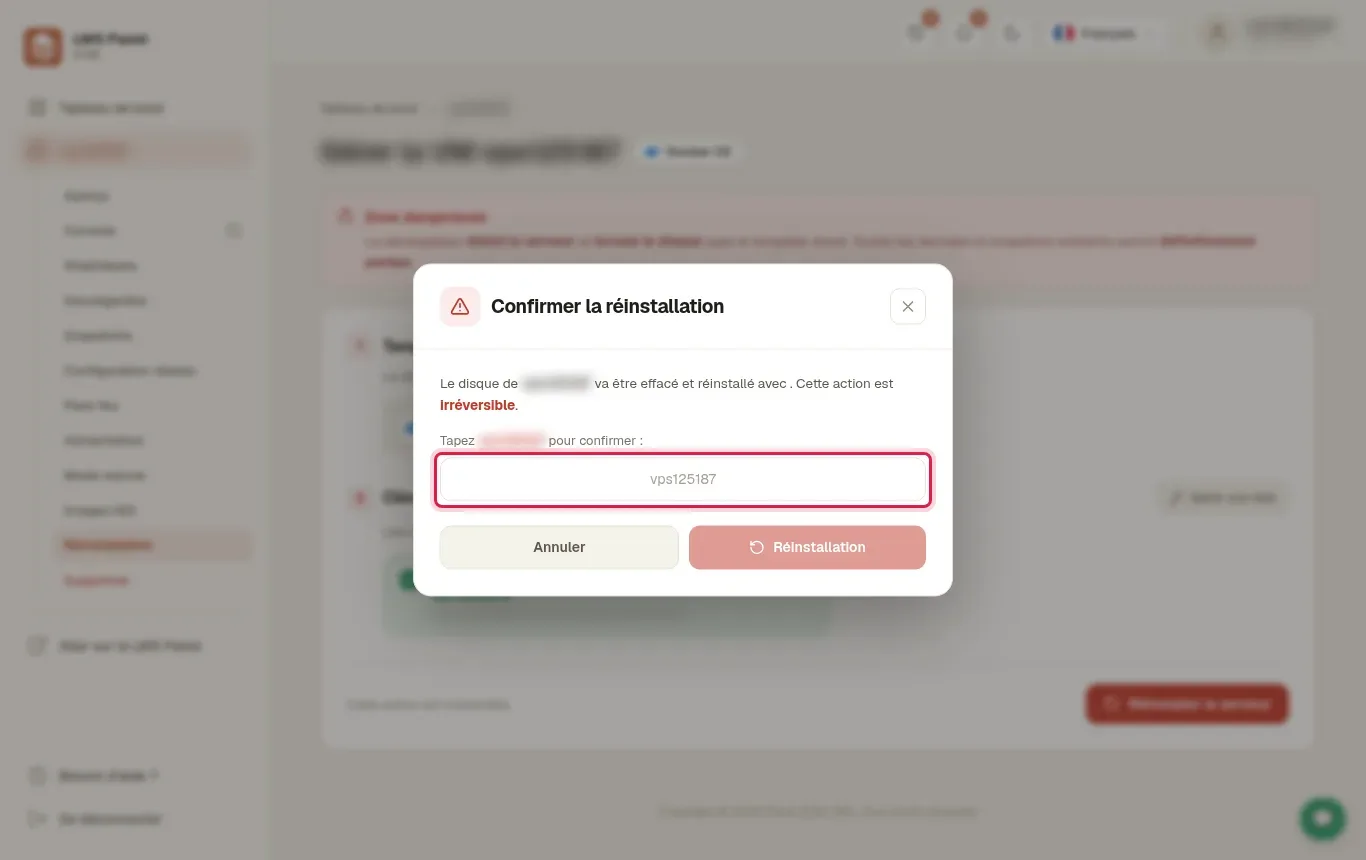
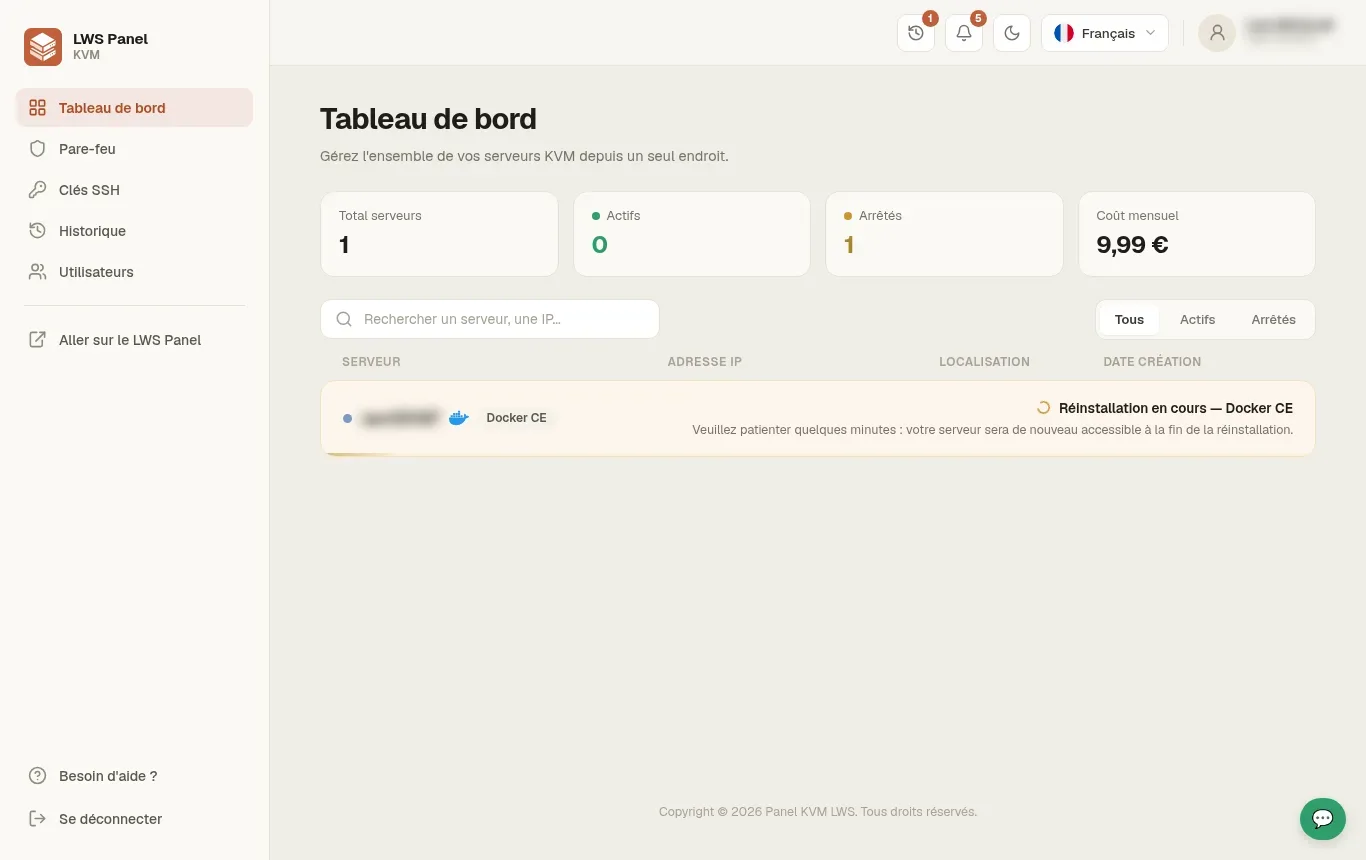
The system creates your environment with Docker CE, Docker Compose, and Buildx. The operation usually takes between 3 and 5 minutes.
When the server switches back to ON with the Docker CE label, note its IPv4 address in the Server IPs block. Open a terminal on your machine and connect as root, replacing the example IP with yours.
ssh root@203.0.113.10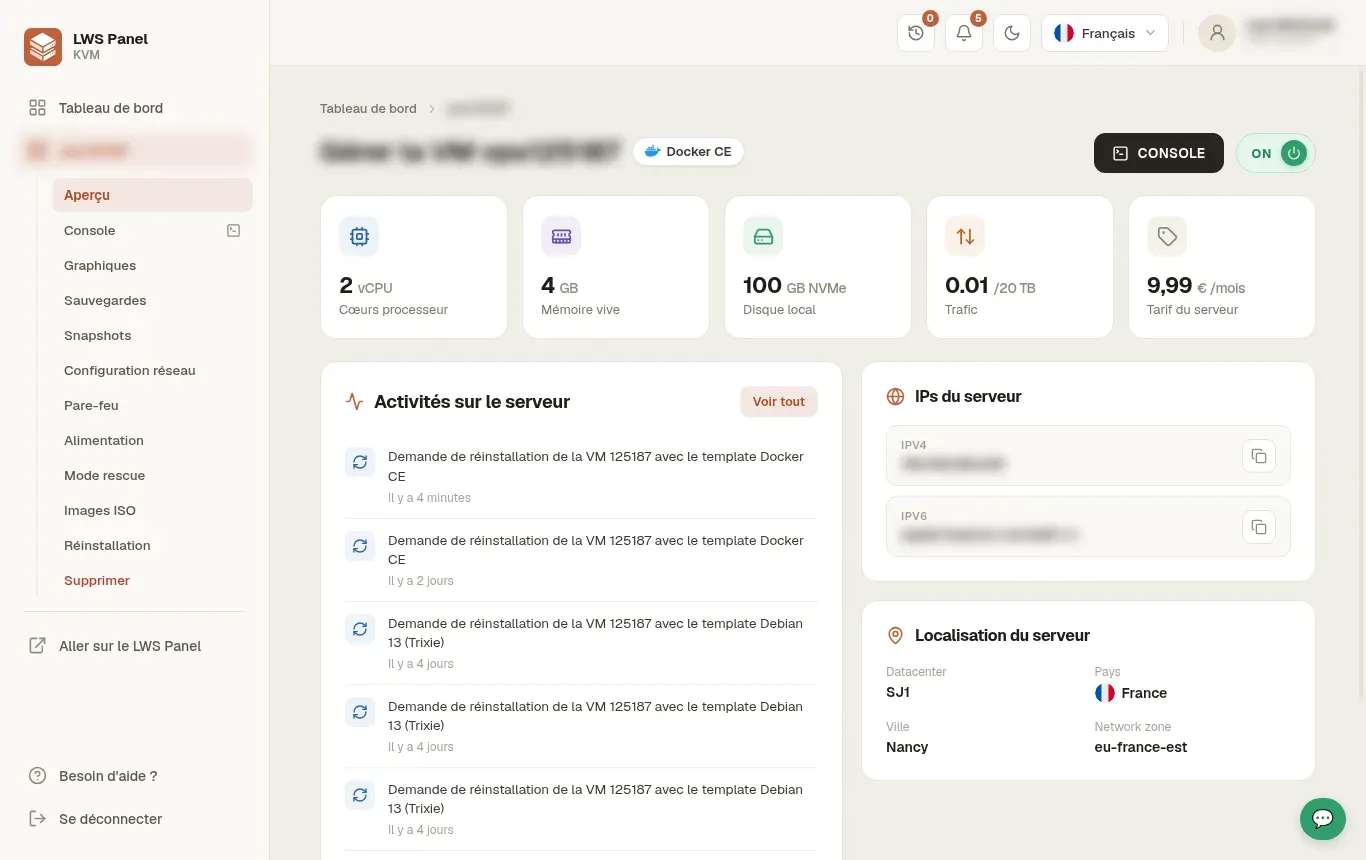
Display the Docker and Docker Compose versions. Then run the hello-world test container: it displays a message and then stops.
docker --version
docker compose version
docker run --rm hello-worldHello from Docker!
This message shows that your installation appears to be working correctly.A compose.yaml file describes your containers. Create a project folder with a subfolder for the site pages and a home page. Then create the compose.yaml file: it starts Nginx, publishes server port 8080 to container port 80, mounts the local folder read-only, and restarts the container unless manually stopped.
mkdir -p /root/my-site/html
cd /root/my-site
echo 'Hello from Docker
' > html/index.html
nano compose.yamlservices:
web:
image: nginx:stable
ports:
- "8080:80"
volumes:
- ./html:/usr/share/nginx/html:ro
restart: unless-stoppedFrom the project folder, start the services in the background. Docker downloads the image the first time, then creates the container. Then test the site's response from the server.
cd /root/my-site
docker compose up -d
curl http://localhost:8080Hello from Docker
List the project's containers to check their status. Then follow their logs live to spot an error or see the requests received. Exit the follow mode with Ctrl+C: the containers keep running.
docker compose ps
docker compose logs -fThe contents of a container disappear when it is removed. To keep data, store it in a volume. In the example, the html folder is mounted into the container: your pages remain on the server. For a database, use instead a named volume, declared in the compose.yaml file. The commands below list the volumes and show the location of one of them.
docker volume ls
docker volume inspect volume_nameTo switch to a newer version of the image, download it then recreate the container. Docker only replaces the services whose image has changed. Your volumes are preserved.
cd /root/my-site
docker compose pull
docker compose up -dWith restart: unless-stopped in the compose.yaml file, the container restarts after a server reboot. It remains stopped if you stopped it yourself. The Docker service starts automatically with the system: check it with the command below.
systemctl is-enabled dockerenabledThe first command stops and removes the project's containers, but keeps your files and volumes. The second removes stopped containers, unused networks, and orphaned images (untagged). Docker asks for confirmation before running it.
docker compose down
docker system pruneThe ports line in the compose.yaml file publishes a server port. With 8080:80, the site responds on port 8080 of the server IP, for example http://203.0.113.10:8080. If the firewall is active on your VPS, open this port in the Firewall menu of the KVM panel. To use a domain name such as example.com, point it to the server IP through your DNS manager.
curl http://203.0.113.10:8080Hello from Docker
No. The Docker CE template includes the Docker CE engine as well as the Docker Compose and Docker Buildx extensions. They are usable as soon as the reinstallation is complete.
SSH keys are injected into the root account only during system installation. If you add a key later, add it yourself in the ~/.ssh/authorized_keys file.
Publish the port with the ports section of the compose.yaml file, for example 8080:80. If the firewall is active, also open this port in the Firewall menu of the KVM panel.
For a named volume, Docker stores it on the server disk, under /var/lib/docker/volumes. The docker volume inspect command shows the exact location. For a folder mounted as ./html, the data remains in your project folder.
From the project folder, run docker compose ps -a to see each service's status, then docker compose logs service_name to read its error messages. An indentation mistake in the compose.yaml file is a common cause.
Add restart: unless-stopped to the service in the compose.yaml file, then run docker compose up -d again. The Docker service starts with the system and then restarts your containers.
An image is a fixed template that contains the code and its dependencies. The container is the running instance created from that image.
No. Reinstallation overwrites the local disk and permanently deletes the data as well as the existing snapshots.
Ask the LWS team and the community. Answers are published after moderation.
 About LWS :
LWS is a 100% French web hosting company that focuses on quality and innovation and offers a responsive and competent technical service at affordable prices.
About LWS :
LWS is a 100% French web hosting company that focuses on quality and innovation and offers a responsive and competent technical service at affordable prices.



 Yes
Yes No
No