LWS Linux shared hosting and domain package11 October 2026By Aurélien T. 3 min read
Accelerate your website speed with LWS Cache
Procédure
Why speed up your site’s loading time?
It is good to know that your site’s loading speed is essential to ensure its success. For a business, for example, it gives the first impression to its visitors. Moreover, loading too slowly can have an impact on your site’s SEO ranking on major search engines and will not allow sufficient exposure for it to thrive.
There is no threshold not to exceed regarding the loading of your web pages. However, the loading time of most websites is under three seconds.
Speed up the loading of your pages by taking advantage of the advanced cache offered by LWS Cache, a system designed to streamline requests via NGINX, significantly reduce script execution time, and lighten your servers. Do you have a WordPress site? Manage this cache in LWS Optimize, recognized as the best Wordpress cache plugin optimized to improve overall performance. It is available free of charge in the official repository as the best free Wordpress cache plugin.
What is LWS Cache and what is it used for?
The LWS Cache tool is a system designed and developed by LWS that makes it possible to optimize your website’s loading performance through the use of advanced cache mechanisms, configured at server level. The tool uses technologies provided by NGINX.
NGINX is a performance-oriented web server that can handle far more requests than Apache (see our blog post entitled “Apache VS Nginx: Performance Test”).
With the right configurations in place, NGINX makes it possible to handle more requests on your website, while speeding up page loading time and reducing CPU and memory usage.
How does the LWS Cache plugin work?
11. Operation without cache
To better understand how it works, we will first see what happens without a cache plugin so that the visitor can view your site.
Processing of an HTTP request without LWS Cache
1. The visitor requests the page from the web server. Example: index.php
22. The web server performs the necessary script executions (PHP, Perl, NodeJS, …)
33. The web server receives the result of the execution.
44. The web server sends the HTML page resulting from the script execution
22. Operation with the LWS Cache plugin
When LWS Cache is enabled, a cache server is introduced between the visitor and the web server.
The goal is to reduce the number of script executions required by keeping the execution result in memory for future requests that need the same response. This avoids having to execute the same script multiple times to obtain the same result.
Thus, we eliminate the waiting time for script execution from the page loading time, and at the same time, we save the resources used during script execution.
Processing of an HTTP request with LWS Cache
1. The visitor requests the page from the web server. Example: index.php
2. LWS Cache checks whether the page has already been generated and stored in cache memory
If yes, the page is returned directly to the visitor without needing to access the web service and without executing the script
If not, the page is requested to be generated on the web service, resulting in script execution (PHP, NodeJS, Perl, Ruby, …).
33. Once the page is generated, LWS Cache determines whether the page can be kept in cache (via headers, URL, …)
If yes, the page is stored in cache memory and returned to the visitor
If not, the page is stored in microcache memory (cache memory with a short validity period) and returned to the visitor
We can see that when a page is stored in cache memory, processing by the web server as well as script execution is avoided.
Cacheable, non-cacheable and microcache
When the web service provides a new response to LWS Cache, it is analyzed to determine whether or not it should be kept in cache memory for future use.
Some page content should not be stored in cache memory, such as the result of a sign-up form, the result of a payment page, … because they contain data that varies according to users and events.
To determine whether a page can be cached or not, LWS Cache uses several mechanisms:
HTTP requests using HTTP verbs other than HEAD and GET will be systematically excluded from the cache.
If the web server response contains browser cache instructions (cache-control header), this will automatically be taken into account by LWS Cache and the page will be kept in cache memory.
If an HTTP request is of type GET and there is no specific browser cache instruction, it is kept in microcache for a few seconds.
The microcache thus helps to address spikes in demand on pages that are not cached. For example, this helps solve overloads and slowdowns in the event of a wave of searches for the same product on an e-commerce store.
Interface overview and plugin activation
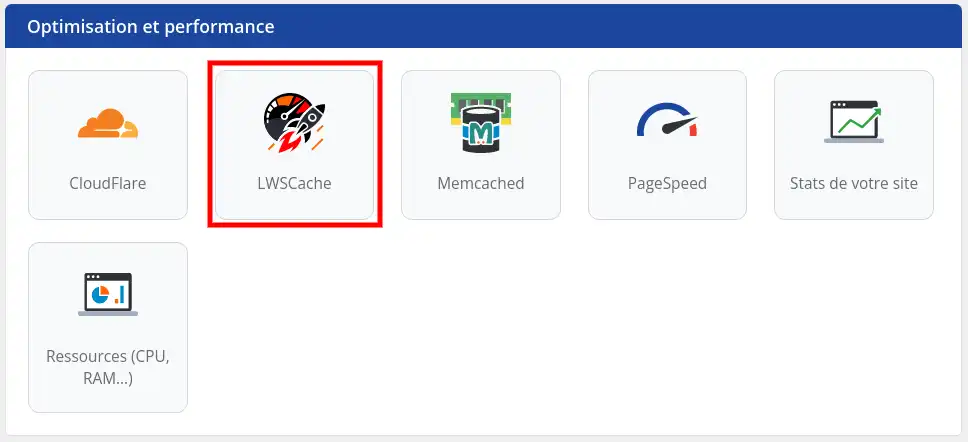
LWS Cache appears as an icon in the LWS panel in the “Optimization and Performance” section.
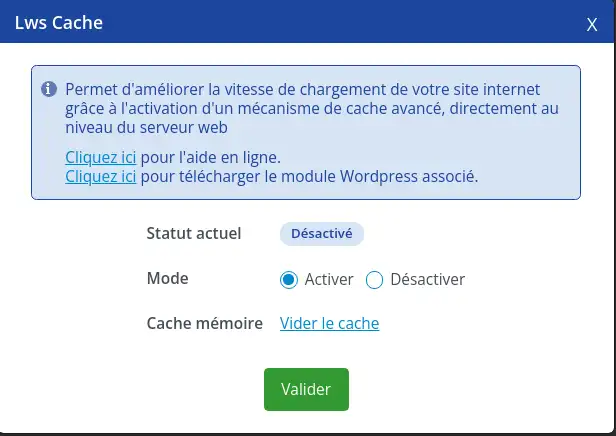
Once in the interface, select the "Activate" button then "Validate"; LWS Cache will be activated on your hosting account within a few minutes.
Cache purge
This section concerns LWS Cache, the LWS Panel cache: purging it via cURL requires the lwsapitoken token. For Varnish Fastest Cache, purging is done without a token from your hosting account: see this help article.
Beyond the LWS Panel interface that allows you to purge the cache, it is possible to purge the cache using the following methods:
1. Cache purge with LWS Optimize for Wordpress
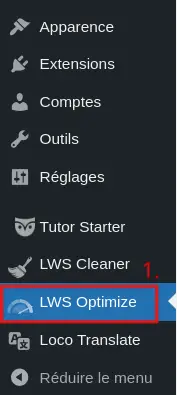
The WordPress LWS Optimize plugin allows you, among other optimization options, to automatically purge the dynamic cache (LWSCache) of your pages when you make changes to your site. To do so, go to the plugin settings and then to the "Caching" tab.
Next, enable the "Dynamic cache" option to activate automatic purging.
If you want to manually clear the LWSCache cache, click the "Empty cache" button to perform a full purge.
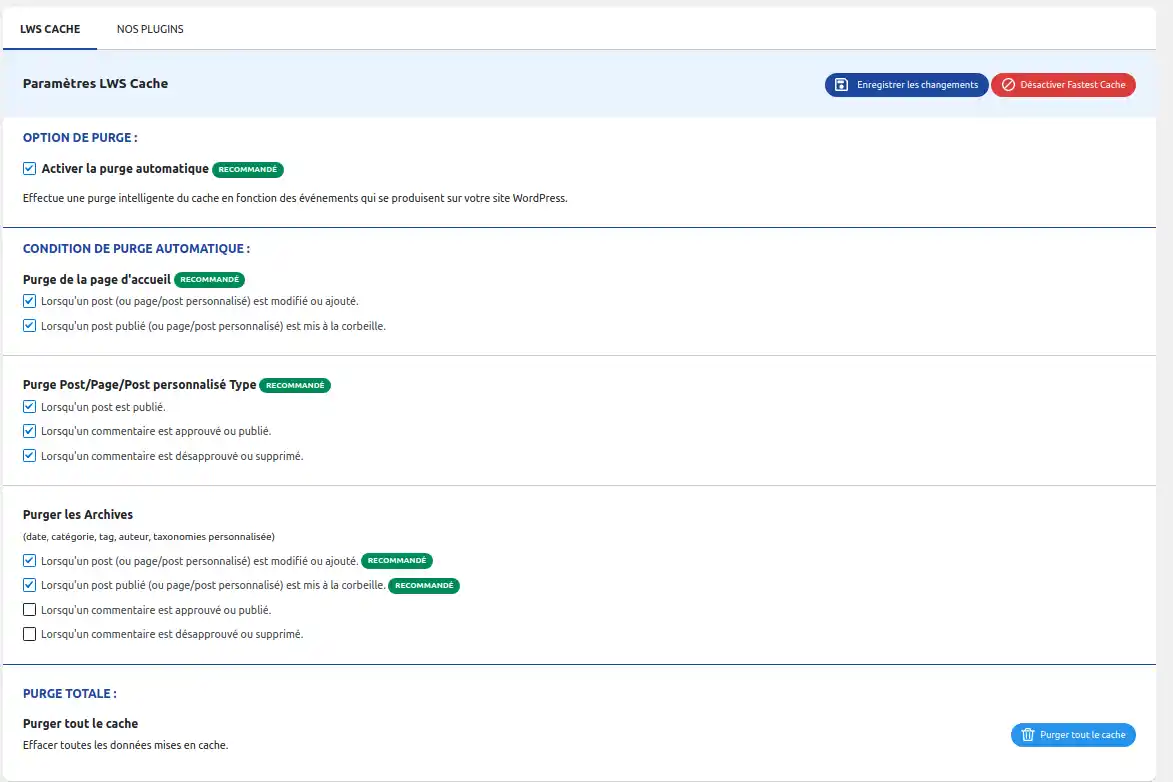
2. Cache purge with LWS Cache for Wordpress
The Wordpress LWS Cache plugin allows you to automatically purge your page cache when you modify them or when comments are added/approved.
The plugin is included in all automatic Wordpress installations via LWS Panel.
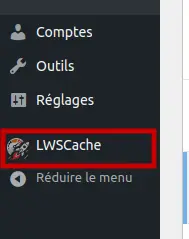
To manage the plugin, once logged into your Wordpress administration console, go to the "LWS Cache" menu
From the settings page, you can enable/disable automatic clearing, define in which cases to automatically clear the LWS Cache cache and fully purge the cache.
Note that you must check the "Enable automatic purge" box for all options to appear.
A full cache clearing button is available everywhere in the Wordpress administration console in the quick access bar located at the top of the screen.
2. Cache purge via cURL
The authentication token required to run these commands is available in your LWS Panel customer area.
Purging a page’s cache
Code
curl -H 'lwsapitoken: ' 'http://my-website.com/--api/cache-purge/example.php'
This will purge the cache for the URL 'http://my-website.com/example.php'
Cependant, je tiens à vous informer que notre service d'hébergement LWS Panel ne propose actuellement pas d'outil intégré pour minifier les fichiers CSS ou autres fichiers.
Pour effectuer la minification des fichiers CSS, vous devrez le faire manuellement en utilisant un outil tiers ou un logiciel dédié. Il existe de nombreuses options disponibles, y compris des outils en ligne gratuits et des logiciels open source. Vous pouvez copier et coller votre code CSS dans l'un de ces outils, et il vous générera une version minifiée du code que vous pourrez ensuite utiliser sur votre site web.
Je vous remercie de votre attention et reste à votre disposition pour toute autre question ou complément d'information.
Nous vous invitons à contacter notre service support à travers votre espace client, afin de vous apporter une aide si vous rencontrez des difficultés quelconque. (Contacter le support LWS)
Cordialement, L'équipe LWS
Was this answer helpful?
A question about this article?
Ask the LWS team and the community. Answers are published after moderation.
Ask the LWS team and its community a question
!
To enable this form, please tick the two consent boxes below.









 Yes
Yes No
No About
About 