
Online help
The web host accessible to all
Procédure
To reinstall your VPS with the OpenClaw application, just a few clicks are enough from your LWS administration area. This process lets you reset your virtual machine with a preconfigured, ready-to-use OpenClaw environment. We will see how to access your VPS management interface, select the OpenClaw template, and confirm the deployment safely.
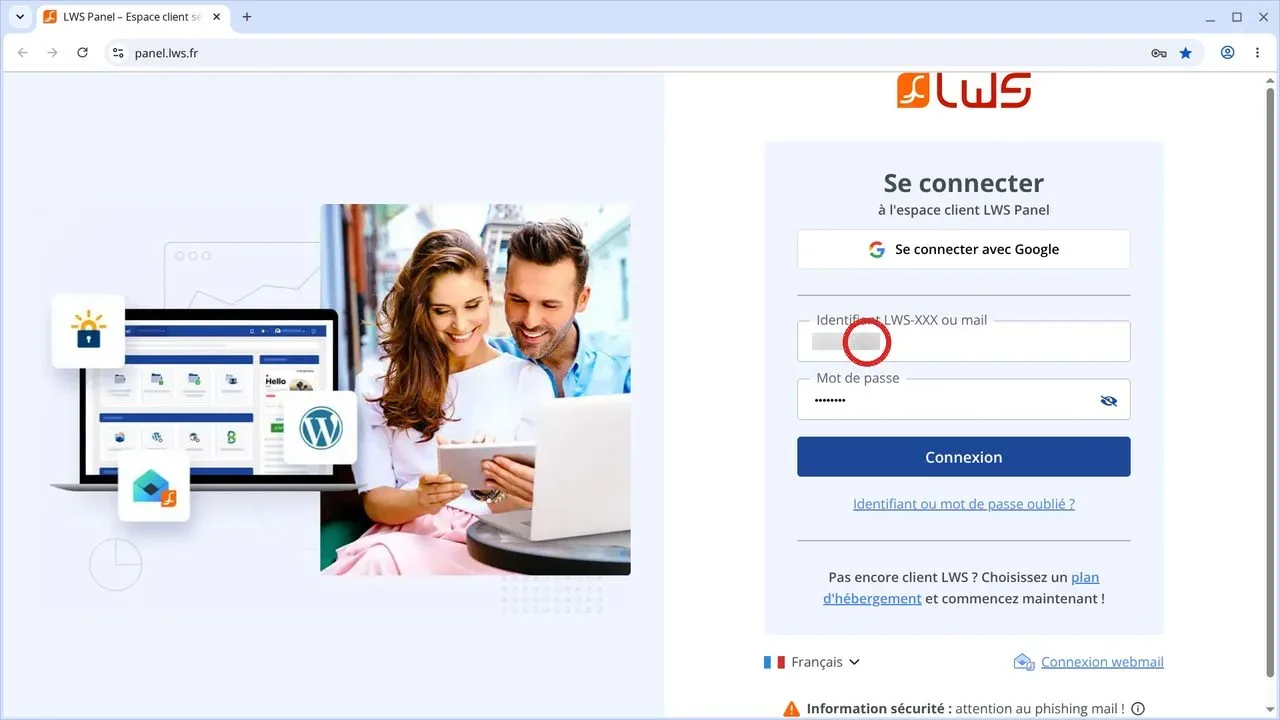
Go to the LWS client area authentication page. Enter your username (in the format LWS-XXX or your email address) and your password in the fields provided. Then click the blue Login button to access your dashboard.
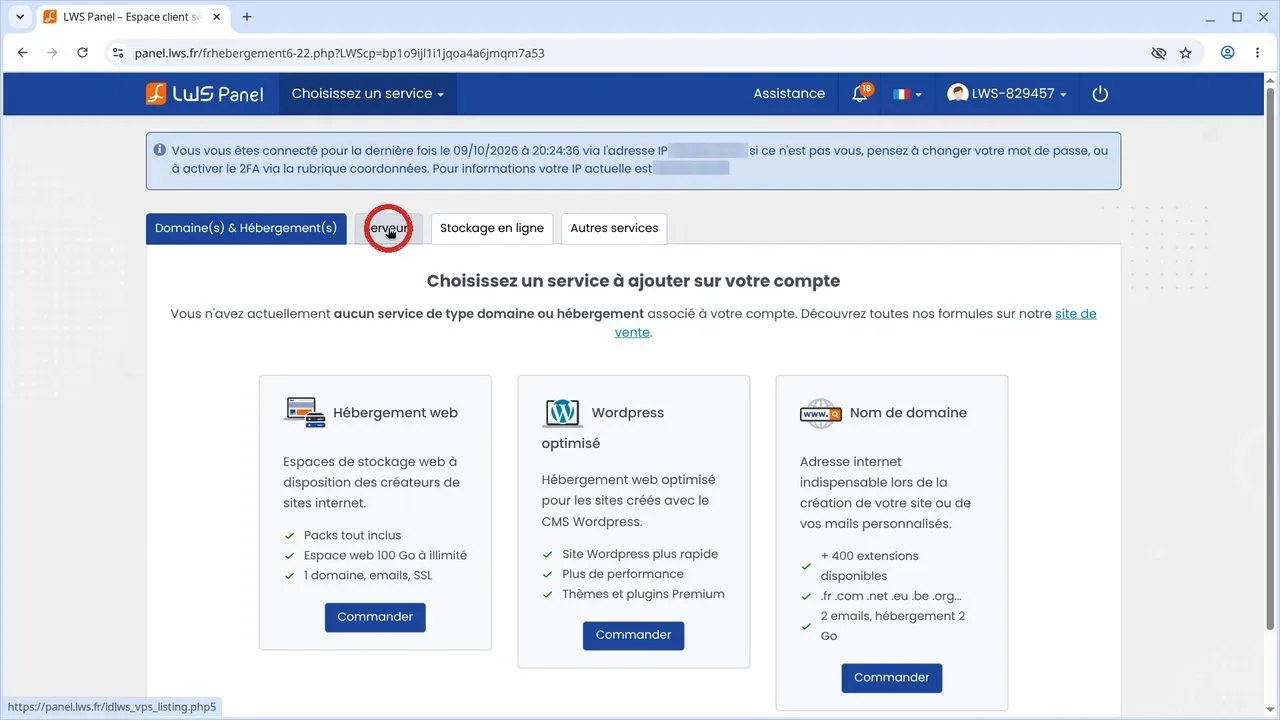
Once logged in to your dashboard, several service categories are displayed as horizontal tabs. Click the Servers tab to display all the virtual machines associated with your LWS account.
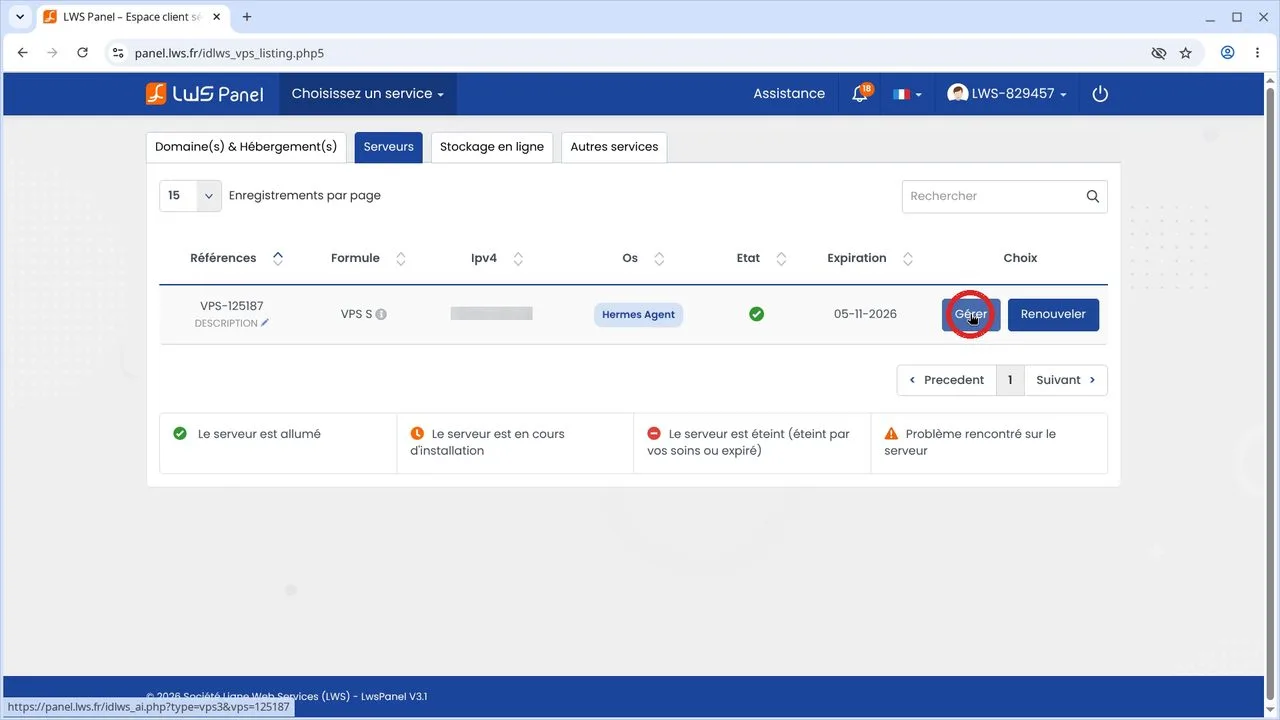
The summary table lists your VPS servers with their references, IP addresses, and statuses. Find the line corresponding to the machine you want to modify, then click the blue Manage button in the Choice column. You will then be automatically redirected to the LWS Panel KVM management interface.
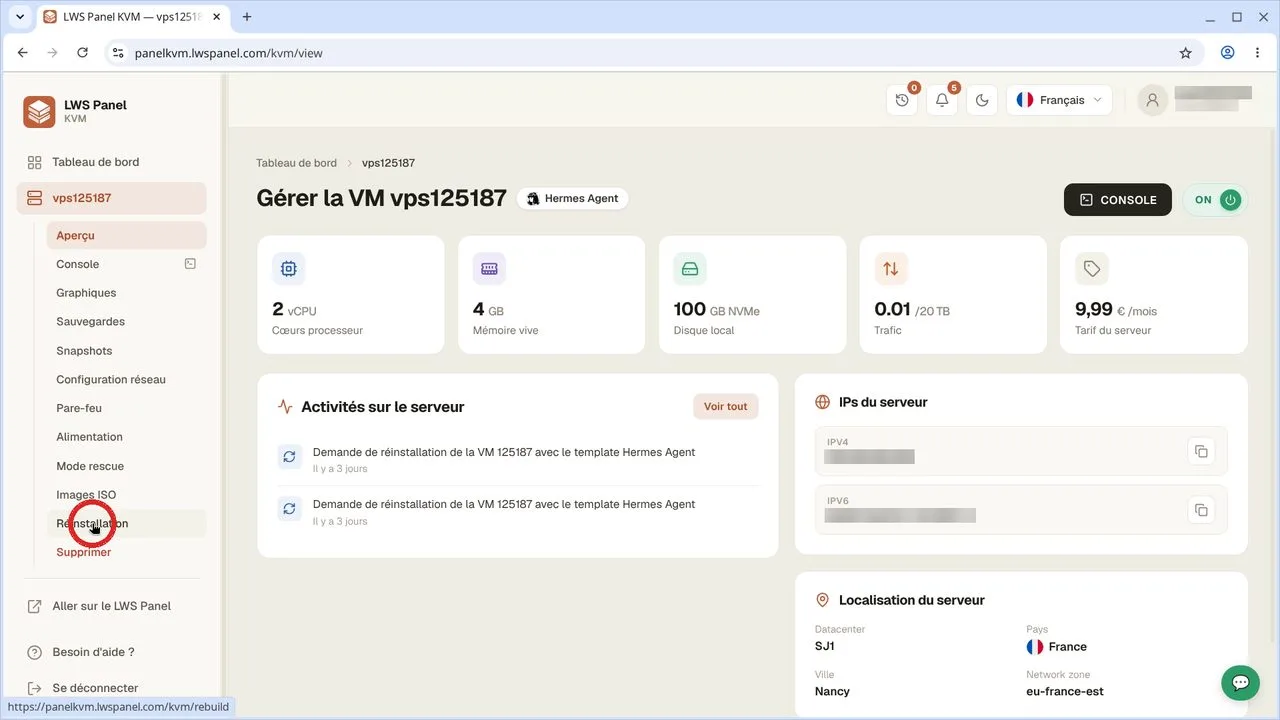
In the side panel on the left of your screen, browse the different virtual machine administration sections. Click Reinstallation to open the system reset tool.
In the “Template to install” section, click the dropdown menu Select the template to install. Scroll through the available templates or search for OpenClaw in the list, then click it to set it as the new system to deploy.
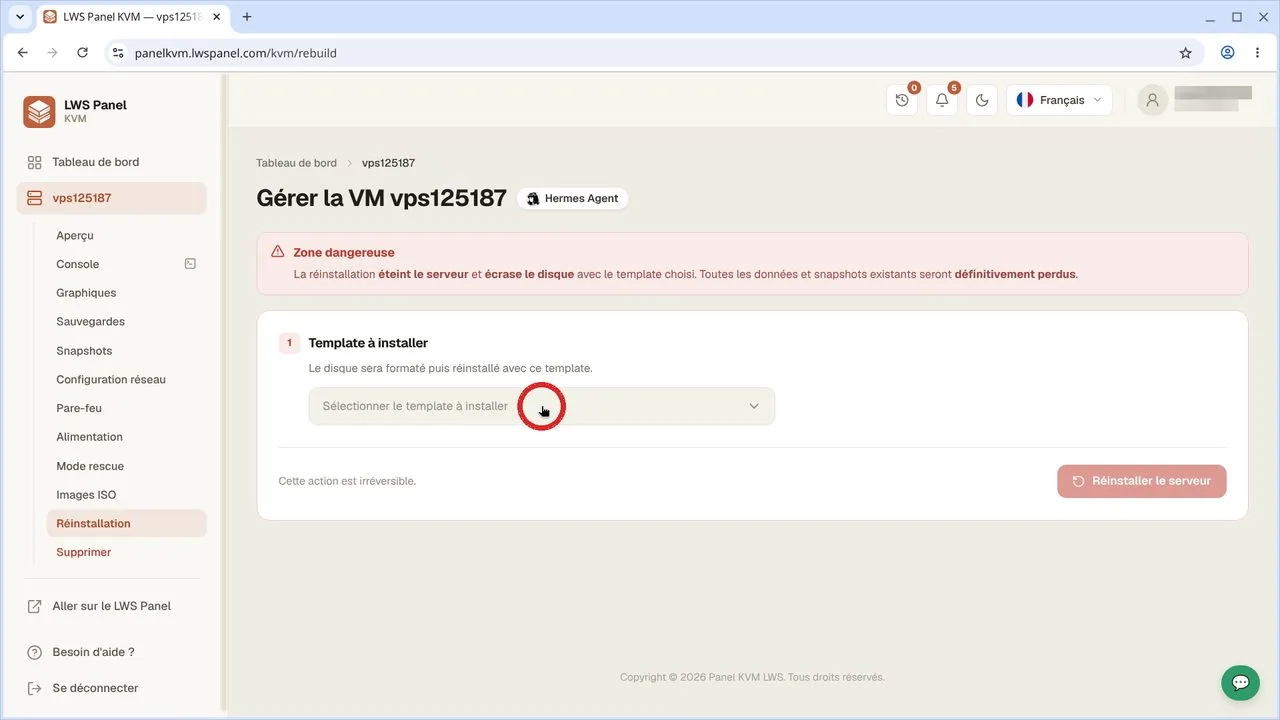
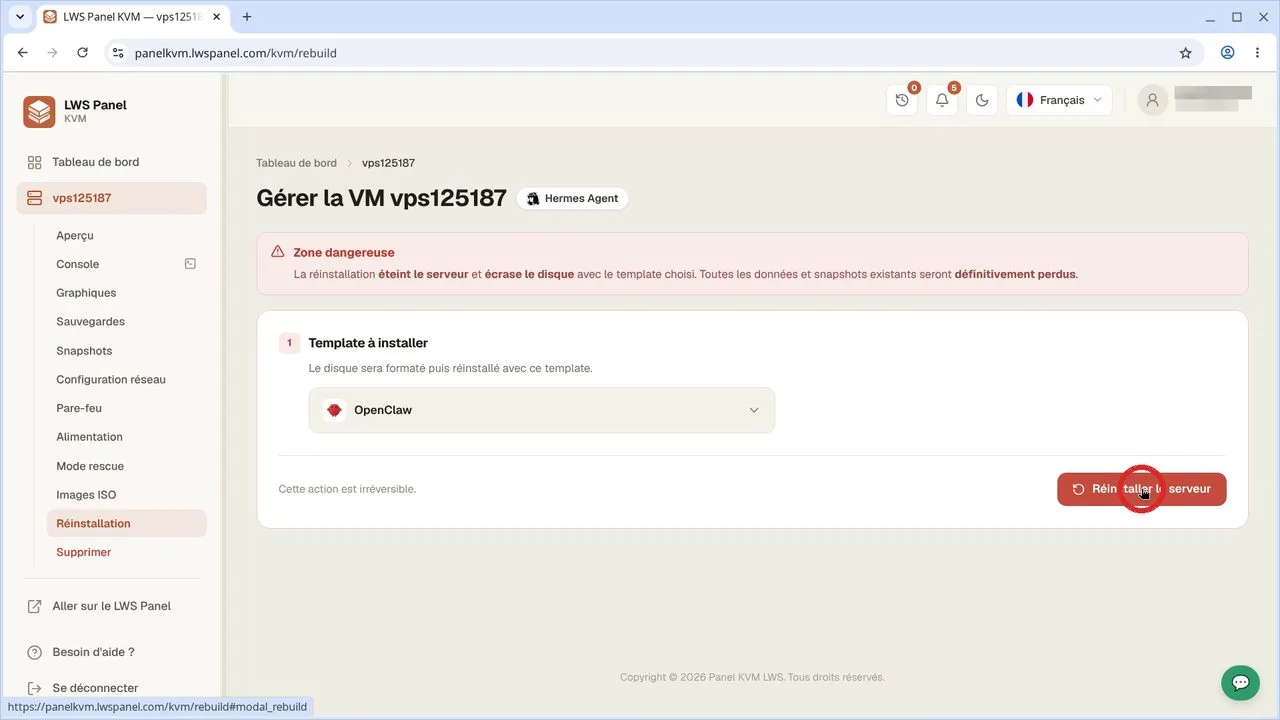
Check that the OpenClaw template is selected in the field. Then click the red Reinstall the server button at the bottom right of the page to launch the confirmation process.
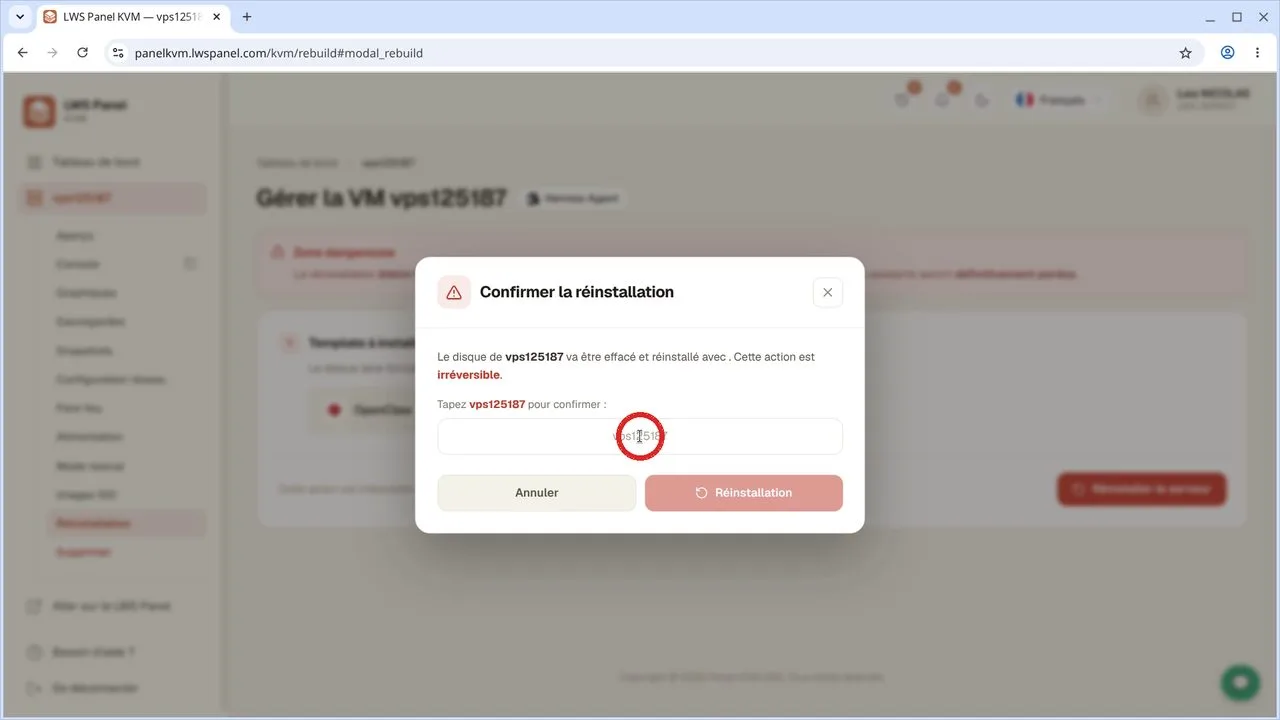
A modal window titled “Confirm reinstallation” appears on the screen. Enter the exact name of your server (shown above the field, for example vps123456) to unlock validation. Finally, click the Reinstallation button to start reformatting.
No, the operation completely overwrites your VPS disk. All files, databases, configurations, and previously created snapshots will be permanently deleted.
No, the IPv4 address and IPv6 address assigned to your VPS server remain strictly identical after a reinstallation from the KVM panel.
The operation generally takes a few minutes. You will receive an email notification as soon as the OpenClaw template is ready and the server is back online.
As soon as the reinstallation is complete, a summary email containing the login details for your server is sent to the address associated with your LWS client account.
Ask the LWS team and the community. Answers are published after moderation.
 About LWS :
LWS is a 100% French web hosting company that focuses on quality and innovation and offers a responsive and competent technical service at affordable prices.
About LWS :
LWS is a 100% French web hosting company that focuses on quality and innovation and offers a responsive and competent technical service at affordable prices.



 Yes
Yes No
No