
Online help
The web host accessible to all
Procédure
To connect to your LWS VPS with an SSH key, all you need to do is generate a key pair on your computer and associate it with your server when reinstalling it. SSH key authentication usefully replaces traditional passwords by offering a much higher level of security against brute-force attacks. In this tutorial, you will see how to create your key, save it in your LWS Panel KVM customer area, reinstall your machine under Debian 13, and connect to it instantly.
Open your local terminal to generate your cryptographic key pair. Run the generation command by specifying the ed25519 algorithm, which is more modern and secure, along with a comment to identify your computer. Then validate each prompt with Enter to accept the default paths and options without setting a passphrase.
ssh-keygen -t ed25519 -C "mon-ordinateur"Generating public/private ed25519 key pair.
Enter file in which to save the key (/home/tuto/.ssh/id_ed25519):
Enter passphrase for "/home/tuto/.ssh/id_ed25519" (empty for no passphrase):
Enter same passphrase again:
Your identification has been saved in /home/tuto/.ssh/id_ed25519
Your public key has been saved in /home/tuto/.ssh/id_ed25519.pub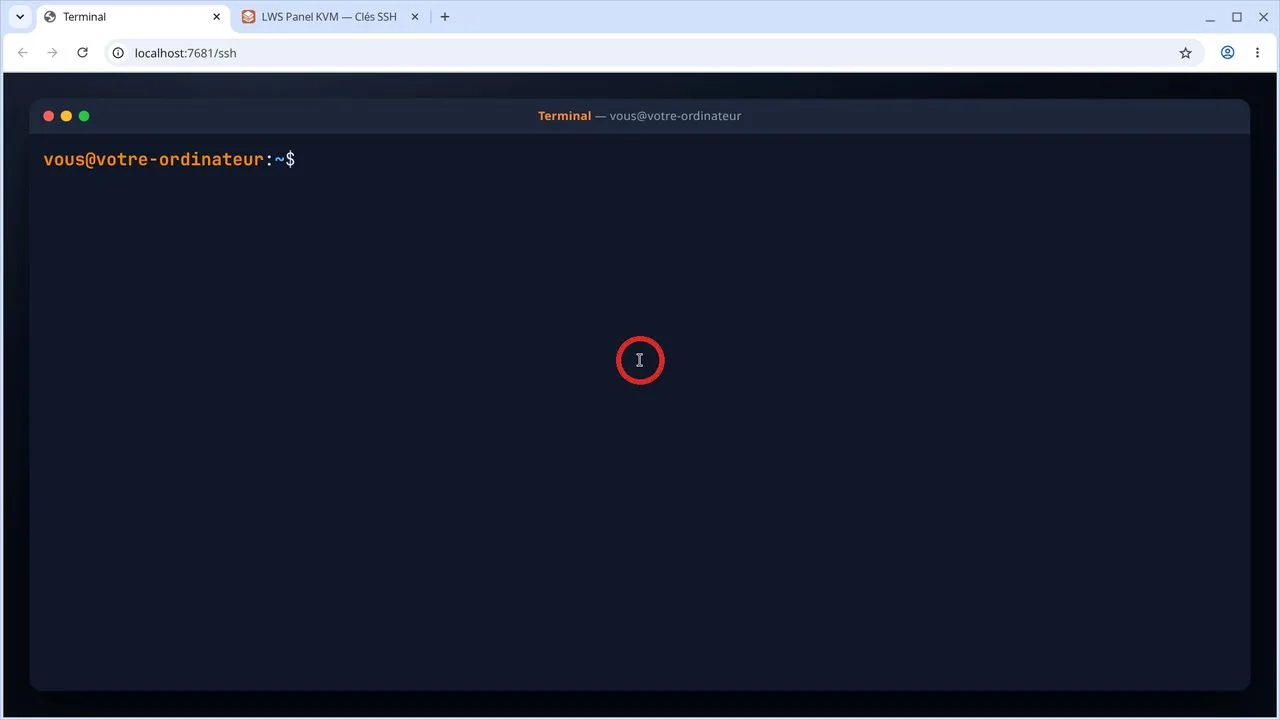
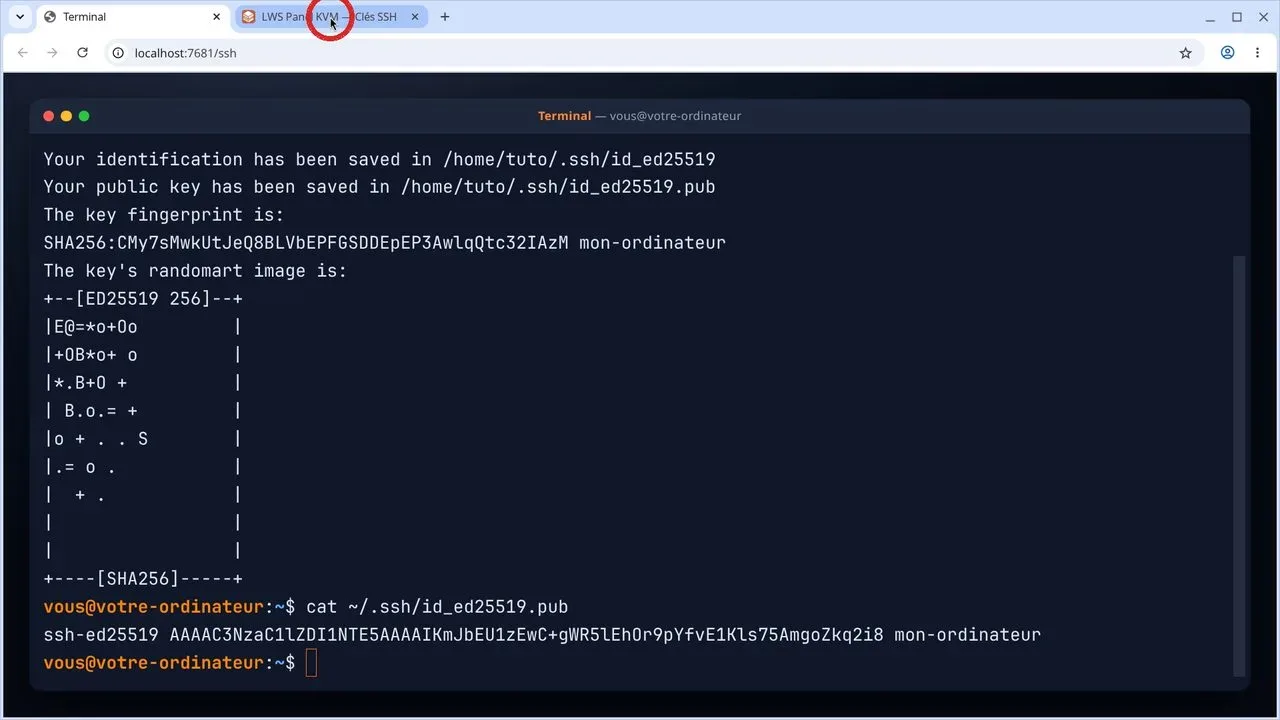
Display the contents of your public key file in the terminal with the dedicated command. Select the entire displayed line, starting with ssh-ed25519 and ending with your comment, then copy it to your clipboard.
cat ~/.ssh/id_ed25519.pubssh-ed25519 AAAAC3NzaC1lZDI1NTE5AAAAIKmJbEU1zEwC+gWR5lEhOr9pYfvE1Kls75AmgoZkq2i8 mon-ordinateurSwitch to your web browser and open your LWS Panel KVM area. In the left-hand side menu, click on the SSH Keys section to open the key configuration page.
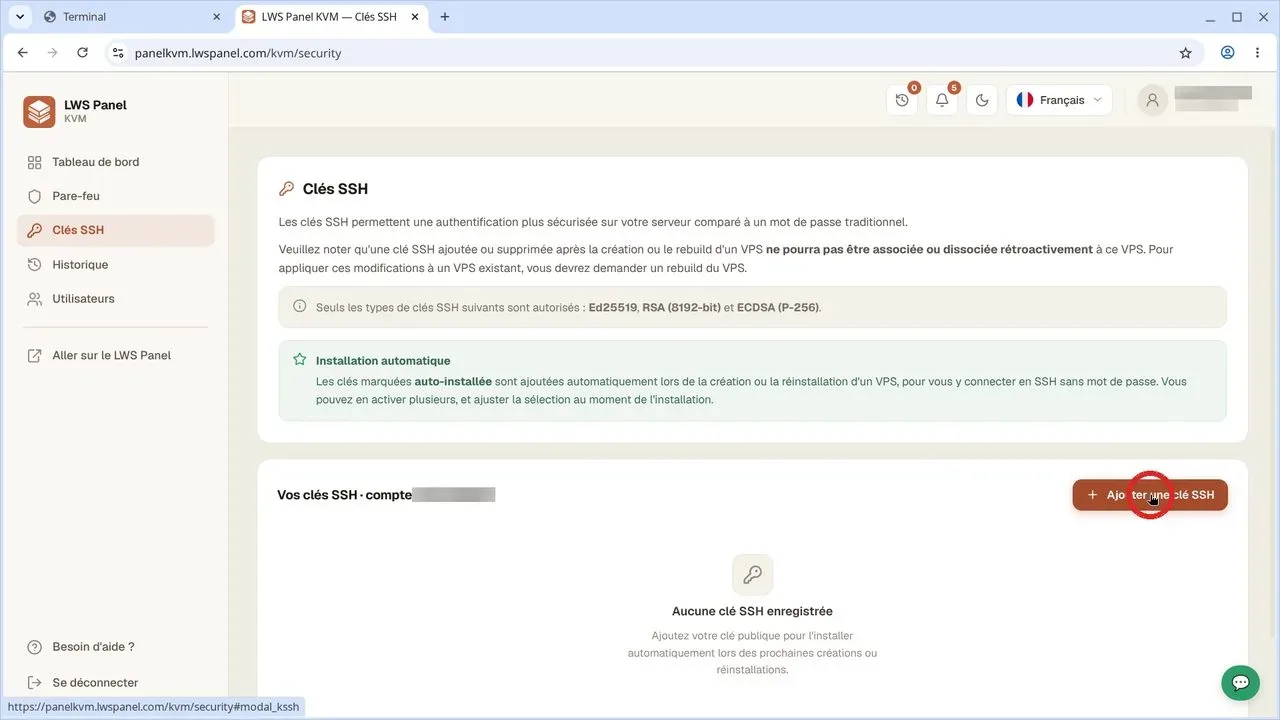
On the SSH keys page, click the red + Add an SSH key button. In the window that opens, paste the full contents of your previously copied public key, then confirm to save it. Your key will automatically be labeled Auto-installed.
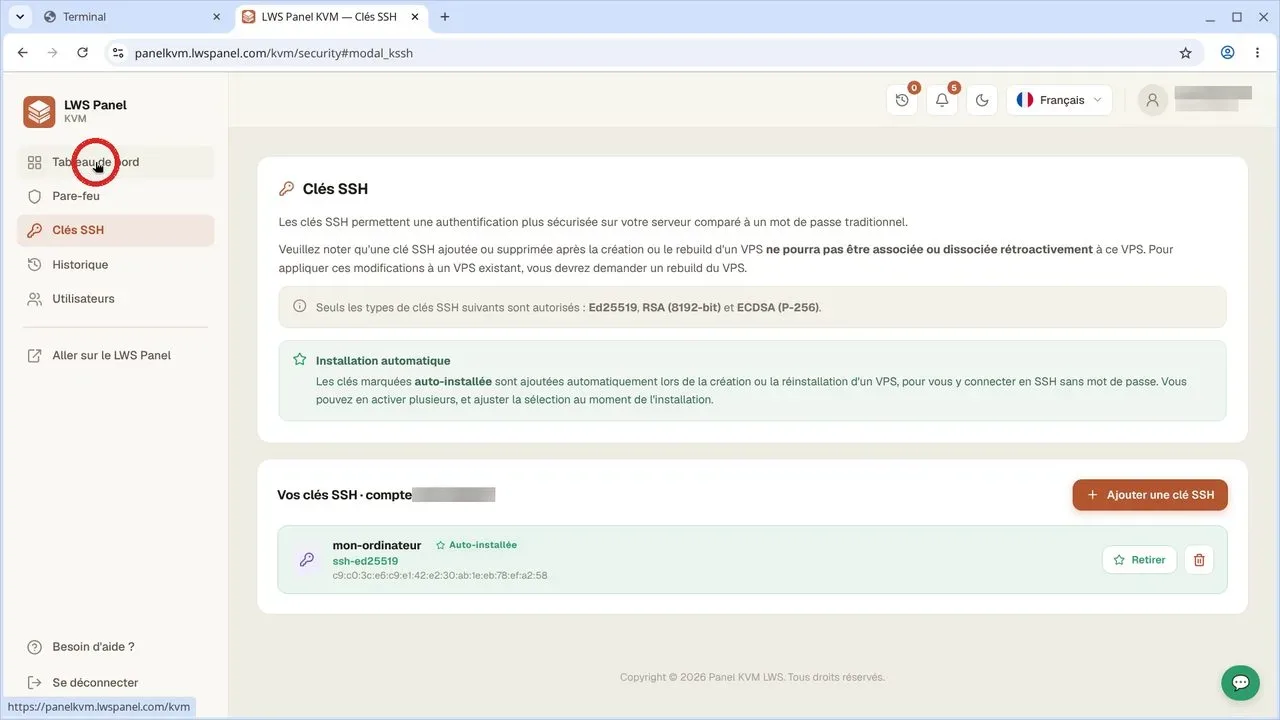
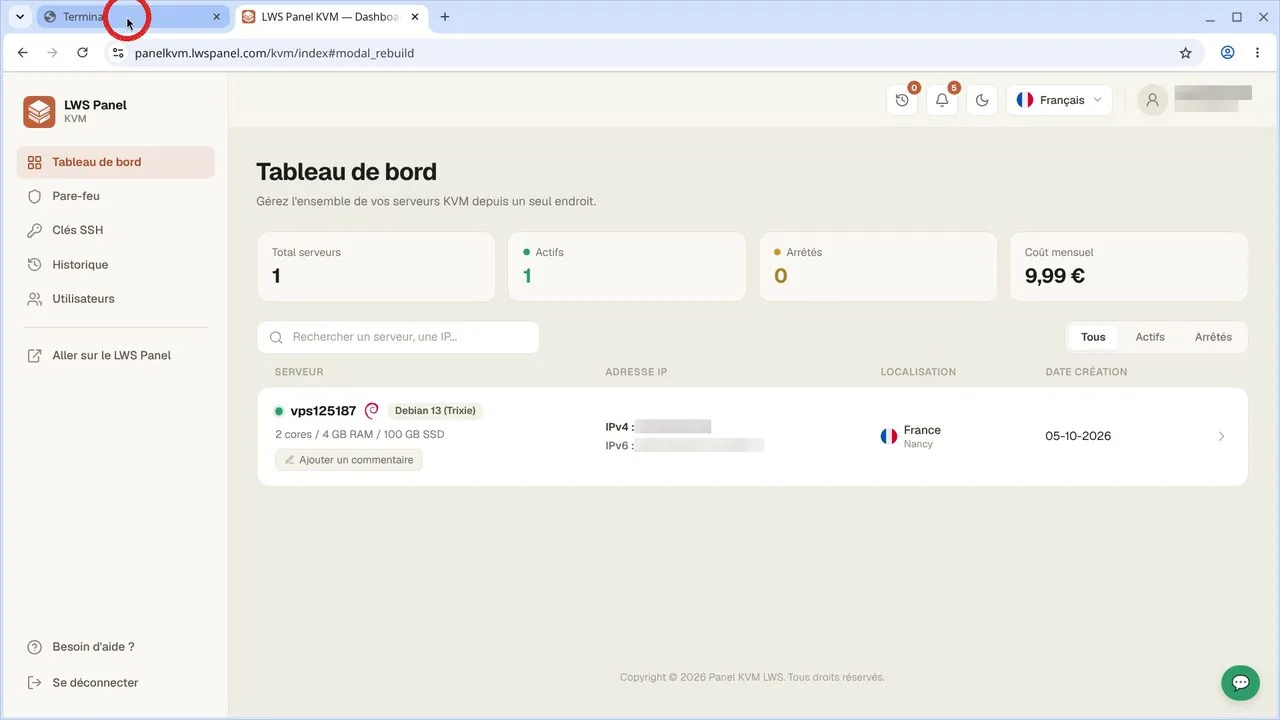
Once the key is saved and visible in the list, go back up to the left-hand menu and click Dashboard. This takes you back to the overall list of your available virtual machines.
In the list of your servers, find your VPS and click directly on its name to display the machine's detailed management page.
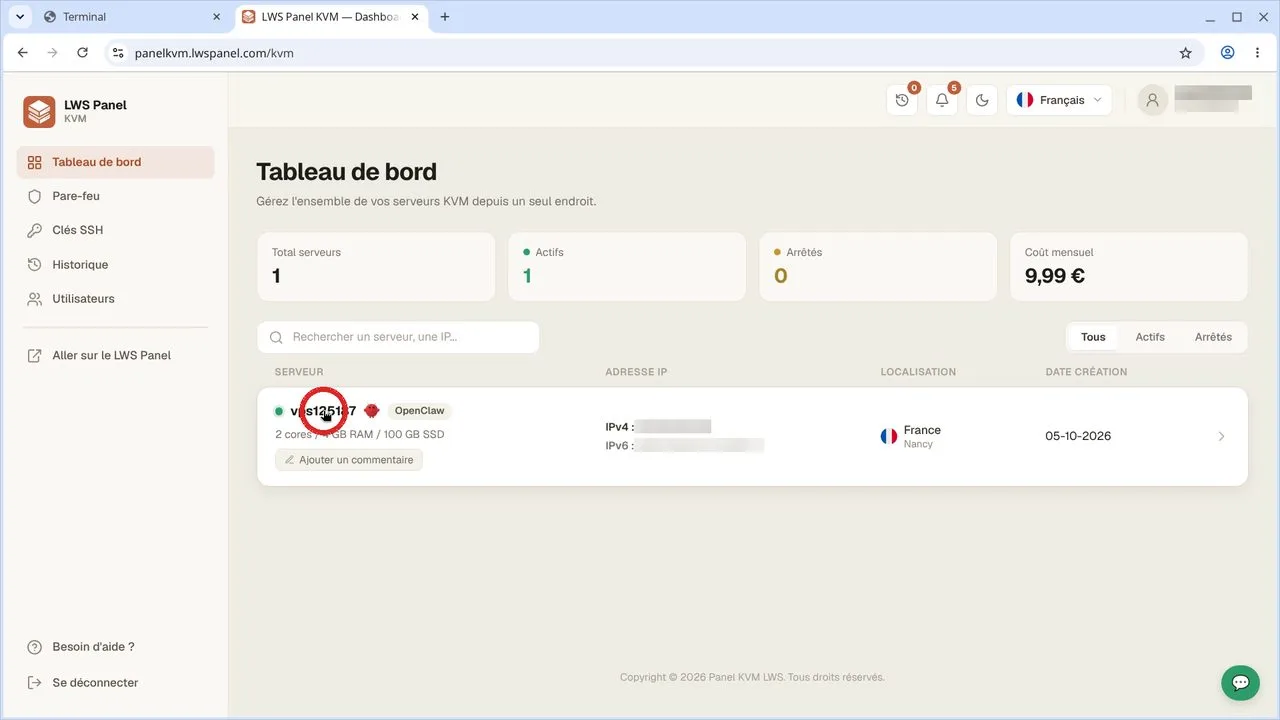
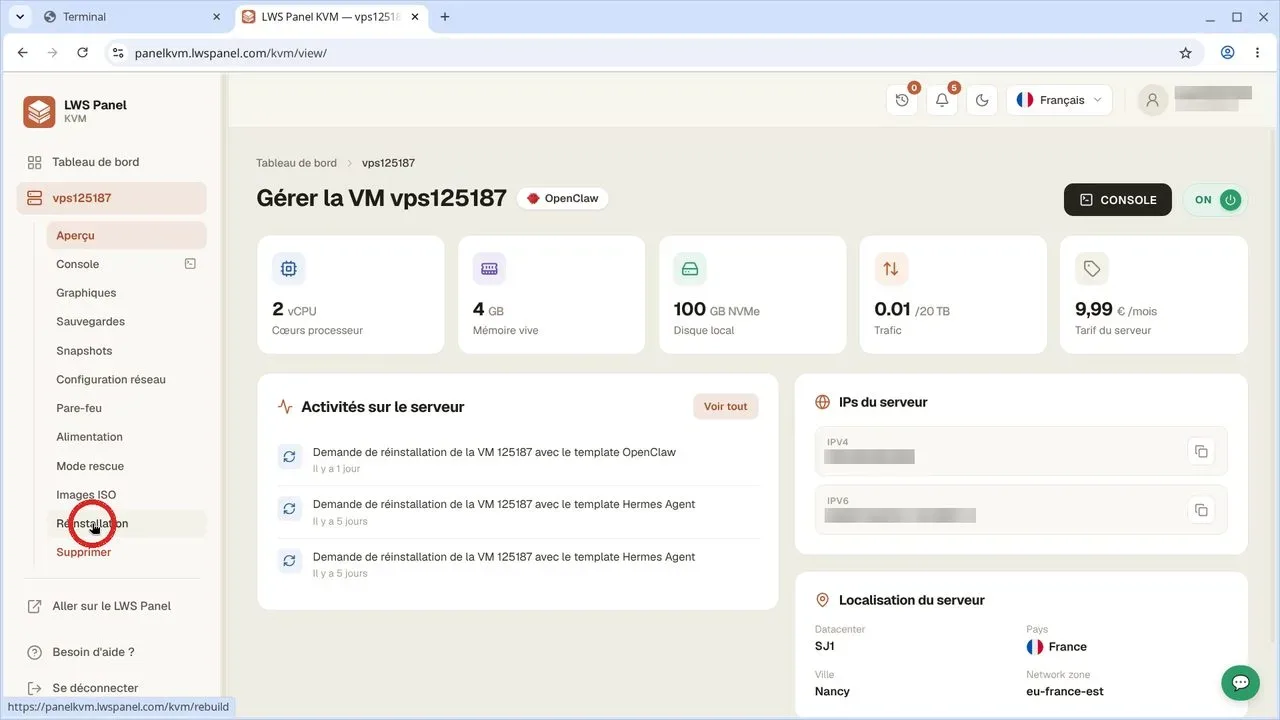
In the left-hand menu for your machine, click Reinstallation. Take note of the warning displayed at the top of the page reminding you that data will be deleted.
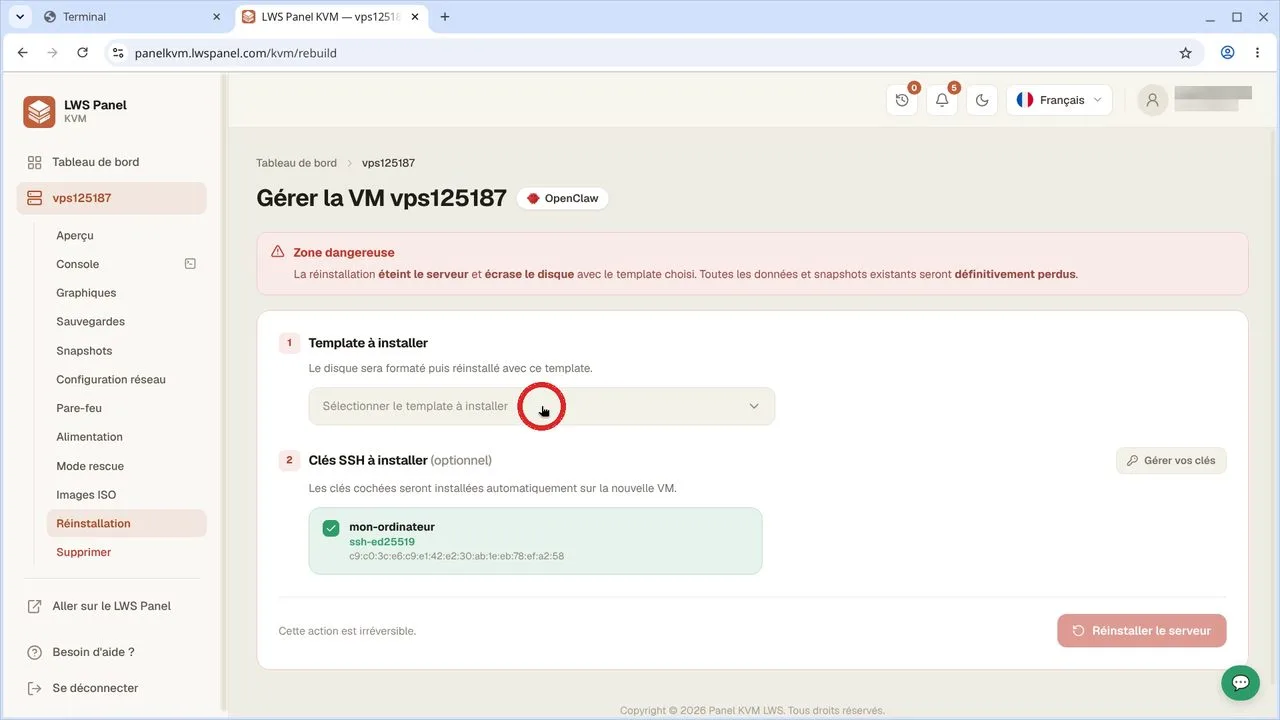
Open the Select the template to install list and choose the Debian 13 (Trixie) option. Check underneath the box that your mon-ordinateur key is indeed selected to be injected into the system.
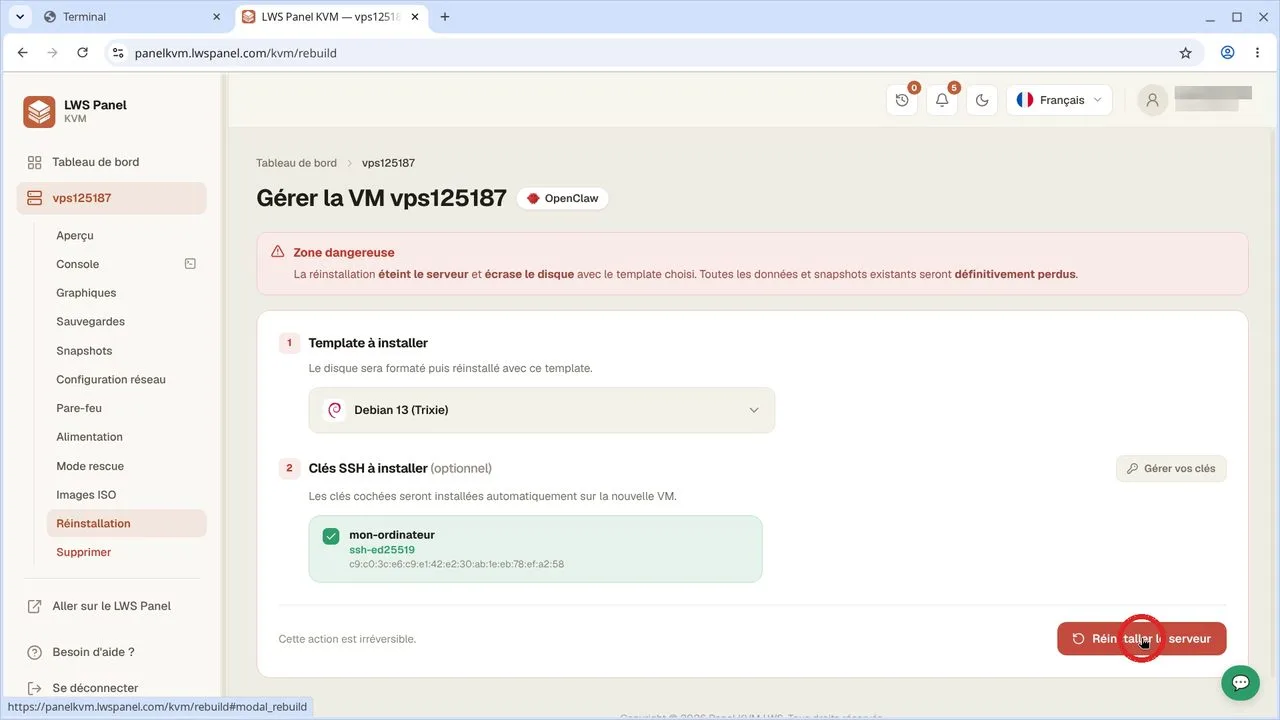
Click the Reinstall the server button at the bottom right of the screen. A pop-up window will ask you to type the requested confirmation to permanently start the erase and system installation.
Wait a few moments until the reinstallation is reported as complete on the dashboard. Then switch back to your local terminal window to prepare the connection.
Run the SSH command to the root user followed by your server's IP address (replace 203.0.113.10 with the actual IP address of your VPS, available in your customer area). On the very first connection, confirm the server's security fingerprint by typing 'yes' and then validate.
ssh root@203.0.113.10The authenticity of host '203.0.113.10 (203.0.113.10)' can't be established.
ED25519 key fingerprint is SHA256:wYmks+xkf8arSnDfWEvqR7zsgZs86OD0P3vMAX59p3I.
This key is not known by any other names.
Are you sure you want to continue connecting (yes/no/[fingerprint])? yes
Warning: Permanently added '203.0.113.10' (ED25519) to the list of known hosts.You are now connected with root privileges. Verify that the installed system is Debian 13 by displaying the version information, then exit the SSH session by typing 'exit'.
cat /etc/os-release
exitPRETTY_NAME="Debian GNU/Linux 13 (trixie)"
NAME="Debian GNU/Linux"
VERSION_ID="13"
VERSION="13 (trixie)"
VERSION_CODENAME=trixie
DEBIAN_VERSION_FULL=13.4
ID=debian
HOME_URL="https://www.debian.org/"
SUPPORT_URL="https://www.debian.org/support"
BUG_REPORT_URL="https://bugs.debian.org/"A cryptographic key is practically impossible to guess or brute-force, unlike even a complex password. It also saves you from having to remember or enter credentials at each administration session.
Your public IP address is indicated in the server's original delivery email. You can also find it on your KVM panel dashboard, directly in your machine summary.
This is a normal security check when connecting to a new host for the first time. By typing 'yes', you save the machine's fingerprint in your computer's known_hosts file to protect yourself against interception attacks.
No. Once your key is configured with the 'Auto-installed' status in your KVM panel, it will automatically be deployed to all your future servers created or reinstalled on your LWS account.
Ask the LWS team and the community. Answers are published after moderation.
 About LWS :
LWS is a 100% French web hosting company that focuses on quality and innovation and offers a responsive and competent technical service at affordable prices.
About LWS :
LWS is a 100% French web hosting company that focuses on quality and innovation and offers a responsive and competent technical service at affordable prices.



 Yes
Yes No
No