Procédure
Encrypt your emails with pgp key.
Why encrypt your email?
When an email is sent without encryption, it is copied to several different servers in the following way:
- original copy
Your computer
- copy 1
a first computer (incoming mail server) at your ISP
- copy 2
a second computer (outgoing mail server) at your ISP
- copy 3
a first computer (incoming mail server) at your recipient's ISP
- copy 4
a second computer (outgoing mail server - webmail) at the recipient's ISP
- copy at the recipient's
your recipient's computer
In theory, these multiple "transit" copies are automatically deleted when the sender receives the email.
Thanks to encryption, only your recipient will then be able to consult this email thanks to exchange keys.
The procedure differs slightly depending on the graphic theme used in Roundcube. This documentation explains the two procedures depending on the theme you are using.
Procedure with the Larry theme
11. Connect to webmail
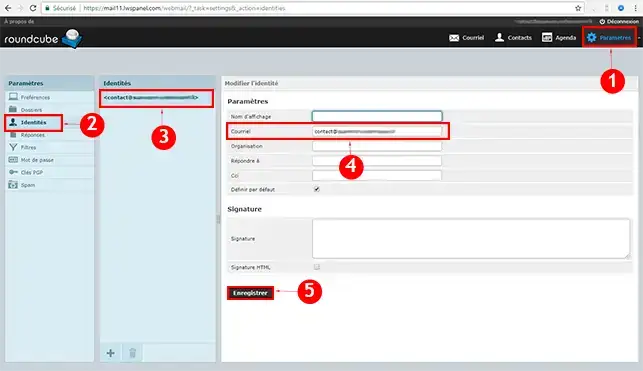
2. You will need to create an identity, by clicking on"settings" then on"identity" and you will be able to select your email address, then click on save :
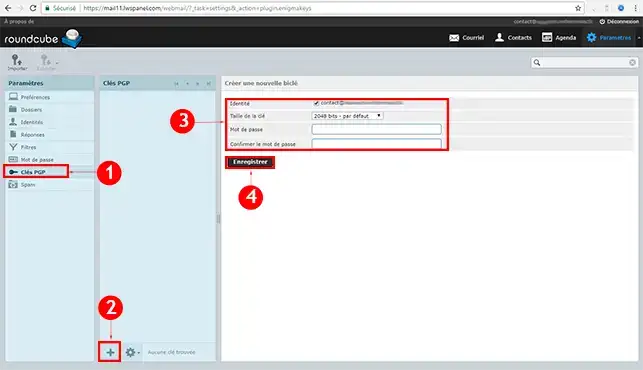
3. Once your identity has been created, click on"PGP Key" and click on add, then choose your e-mail address. Select the value of the key (we advise you to choose 4096), then enter the password of your choice and click on save.
How do you send your encryption key to one of your recipients?
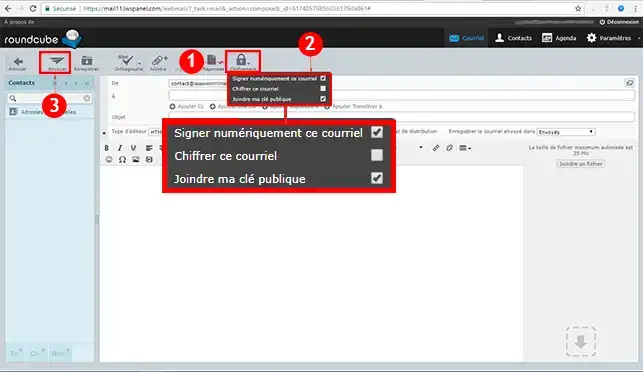
11. You will need to send an email by checking "Digitaly sign this message" and"Attach my public key" in"Encryption ", then you can send your email.
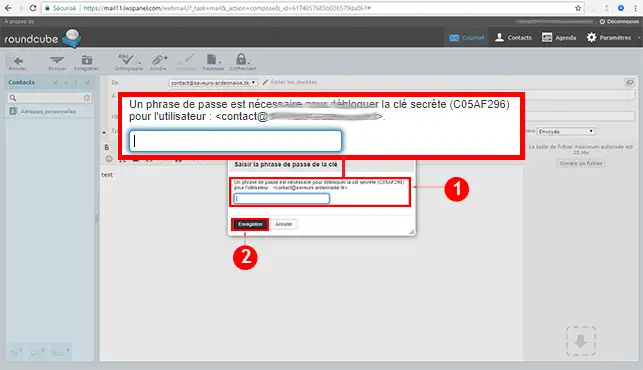
A popup will then appear where you will need to enter the password you set up when creating the PGP key in step 3.
Your recipient will then receive 2 files containing the key to be added to their email software.
Your recipient will also have to generate a key and send it to you.
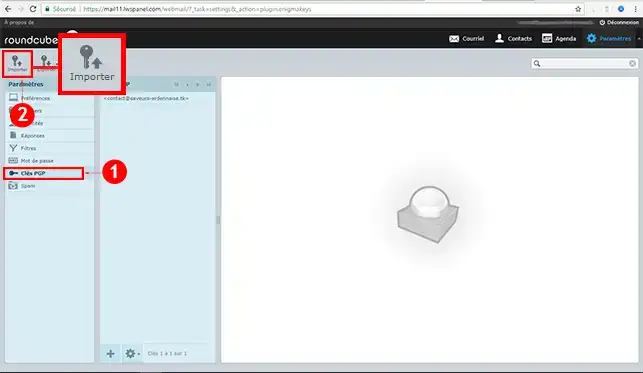
To add your recipient's key, go to"Settings", then"PGP Key", then"Import":
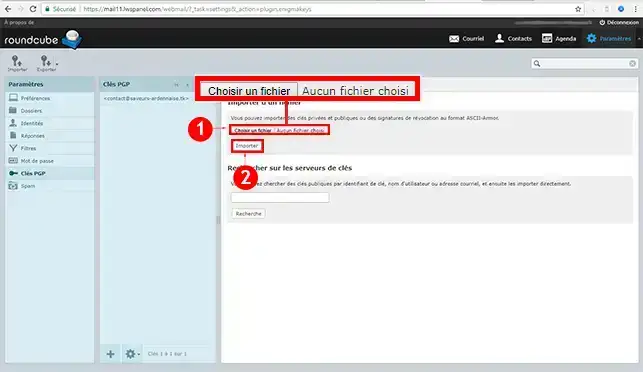
To finalise, choose the file you want to import and click on "Import":
Procedure with the Elastic theme
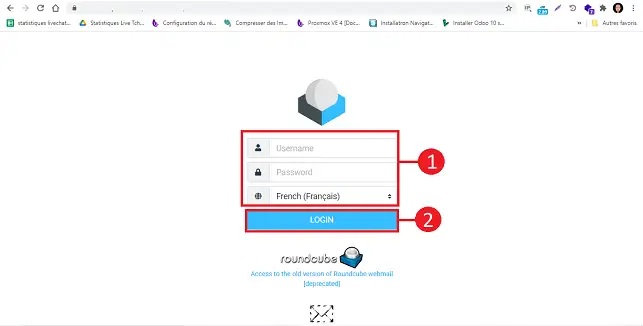
Connect to your Webmail.
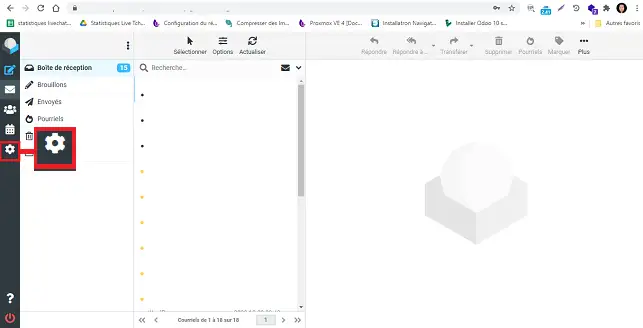
Click on the"Settings" button on the left-hand side of your screen.
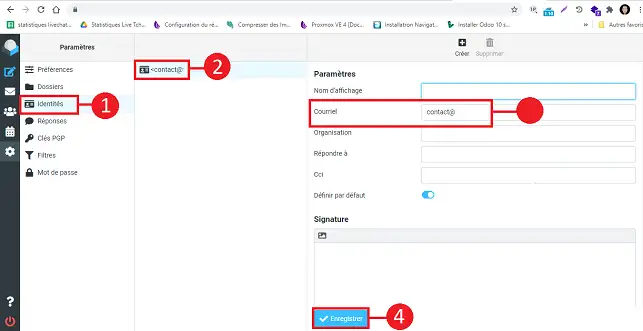
You will need to create your identity if you have not already done so. To do this, click on"Identity" and then on"Your email address". Enter your email address in the field provided and click the"Save" button.
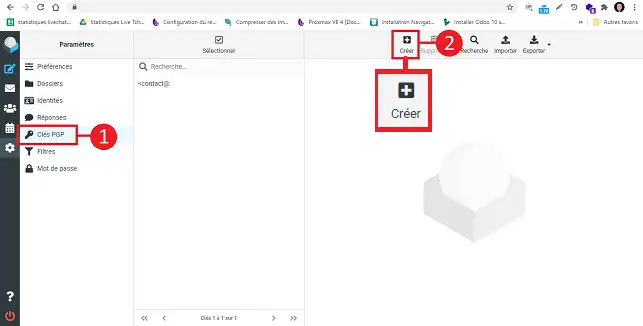
Once your identity has been created, click on"PGP Key" and then on the"Create" button.
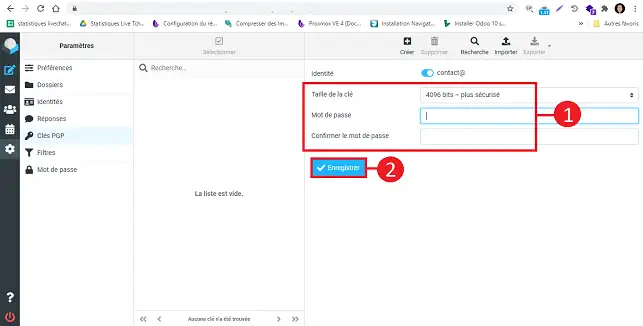
Fill in the fields as follows:
- Key size: It is recommended that you choose a value of 4096.
- Password: choose a password for your key
- Confirm password: confirm the password for your key.
Click on"Save" to save your key.
How do you communicate your encryption key to your recipients?
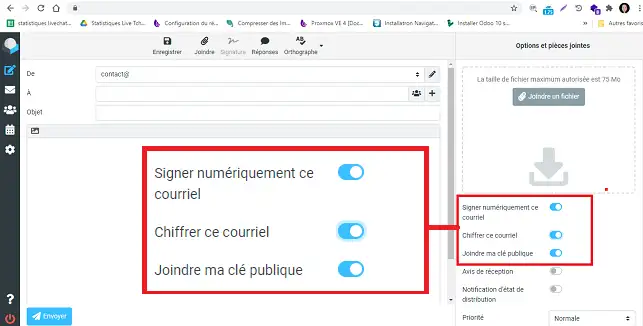
When you send the email, you will need to tick the following boxes:
- Digitally sign this email
- Encrypt this email
- Attach my public key
A popup window will appear, allowing you to enter the password used to create the key.
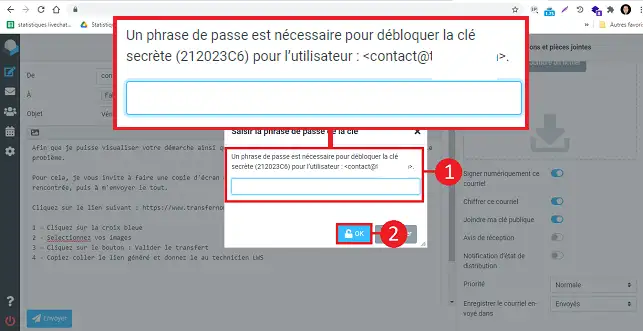
Your recipient will then receive 2 files containing the key to be added to their email software.
Your recipient will also have to generate a key and send it to you.
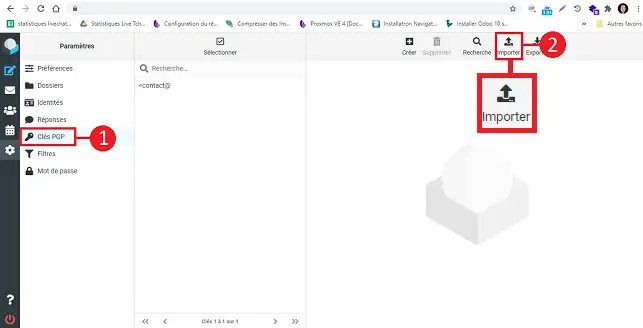
To add your recipient's key, go to"Settings" then"PGP Key" then"Import":
Conclusion
You can now create an encryption key and encrypt your emails via your Roundcube Webmail attached to your LWS shared hosting package. You can import the encryption key if you need to.
Don't hesitate to share your comments and questions!



 Yes
Yes No
No About
About 