
Online help
The web host accessible to all
Procédure
Redis is an in-memory data structure storage system used as a database, cache, and message broker. For a WordPress site, Redis offers a significant performance improvement by reducing page load times. Acting as an advanced object cache, Redis stores frequently requested data in memory, enabling fast access and reducing the load on the database. This capability is particularly useful for high-traffic WordPress sites, where reducing database queries can greatly improve the user experience and reduce server response times. In addition, Redis supports data structures such as strings, lists, and sets, offering flexibility in data management for WordPress developers.
If you have a Linux LWS shared hosting plan (excluding cPanel), you can enable Redis from your LWS client area.
To do this, you simply need to:
1. First, you need to log in to your LWS account and access the shared hosting for which you want to enable Redis.
2. Find the "Optimization and performance" category and click on "Memcached/Redis"
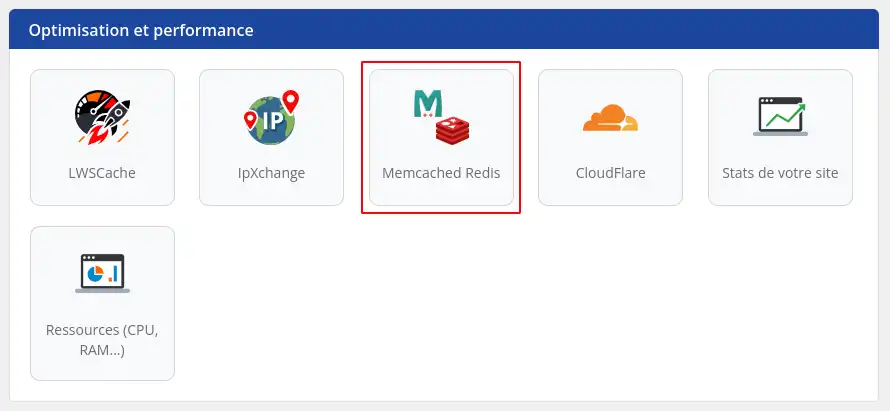
3. In the modal that opens, check the enable button
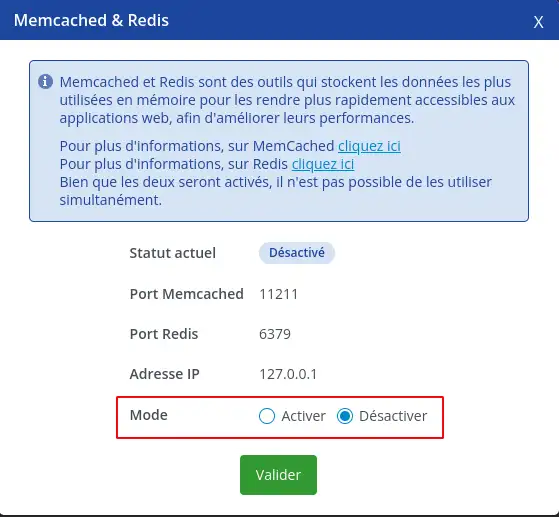
4. Confirm and wait about 5 minutes for Redis to be properly configured on your service.

An indicator on the home page of your service management interface will show you an approximate countdown of the remaining time before it takes effect.
After the wait, Redis is now operational on your service. We will now see together how to set it up in the case of a site created with WordPress.
If Redis and Memcached are enabled through the same action in the LWS panel, it is not possible to use Redis and Memcached at the same time on your WordPress site. You will need to choose one or the other.
To use Redis on your WordPress site, we recommend using the "Redis Cache" plugin.
To do this, log in to the admin area of your Wordpress site, then simply go to the left-hand menu and click on "Plugins".
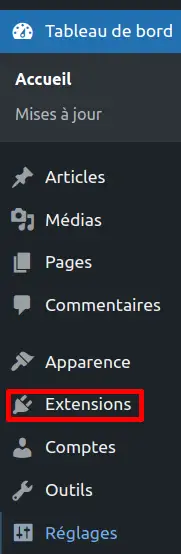
Click on the Add button at the top of the page.

Search for the plugin using the search bar by entering "Redis Cache"
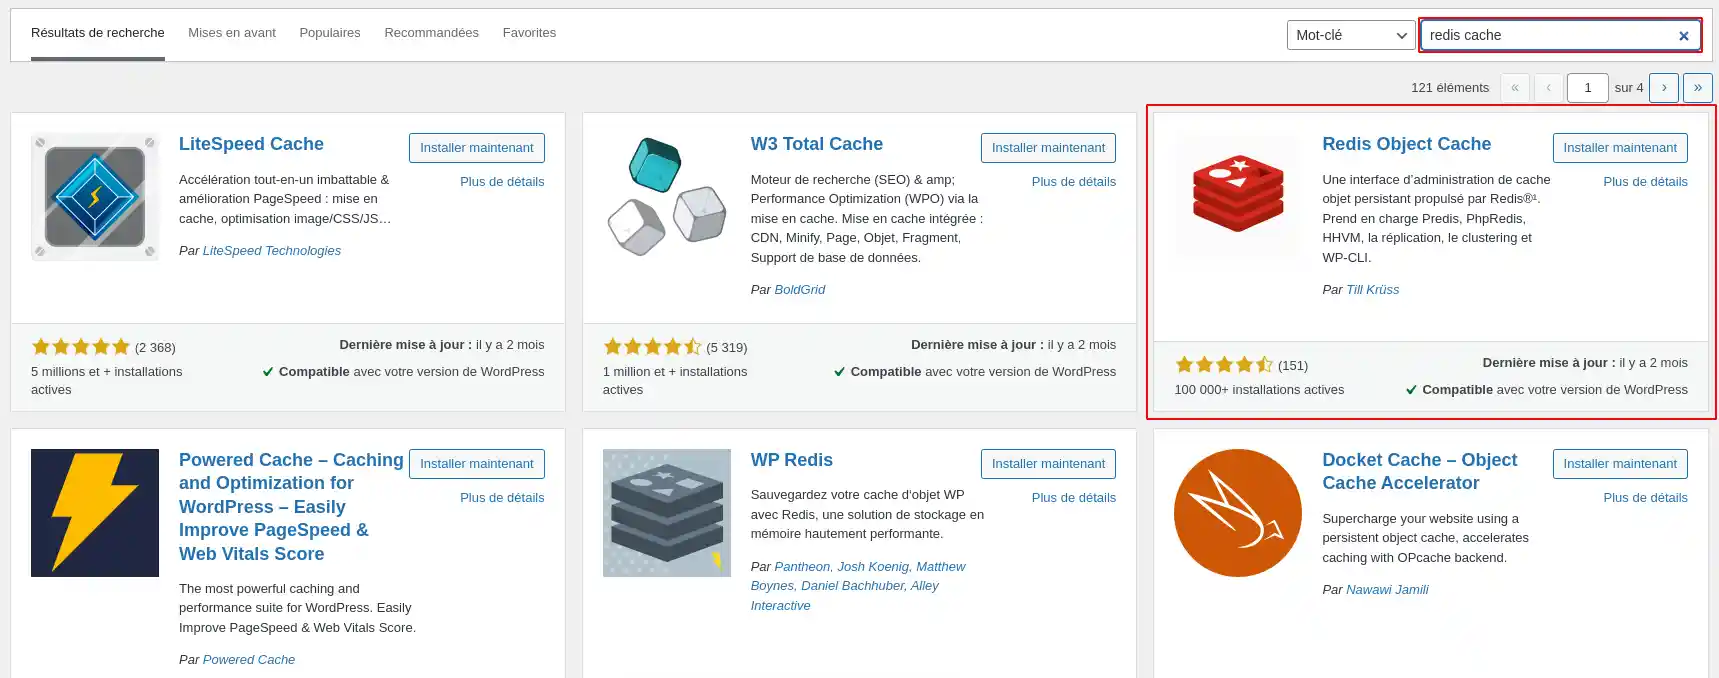
Once you find it in the list, click on "Install now" and once that is finished, click on "activate".
It is recommended to add a specific prefix in the wp-config.php file, using the following constant:
define( 'WP_REDIS_PREFIX', 'your_unique_prefix_' );
This helps avoid conflicts between multiple sites using the same Redis server.
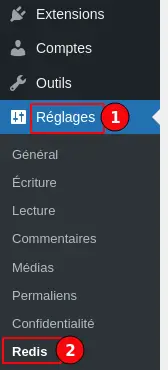
Then, in the left-hand menu, click on "Settings" in your WordPress dashboard, then click on "Redis".
If you have enabled Redis on the LWS client panel, you will have an "Enable object cache" button that you must click for Redis to be operational for your WordPress site; there is nothing else you need to do.
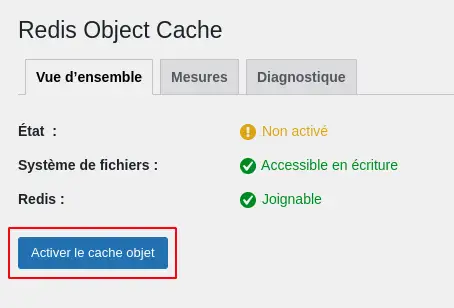
If not, this button will not appear, meaning that Redis is not enabled on your service. In that case, I invite you to go back to the previous section to enable it on your LWS Panel.
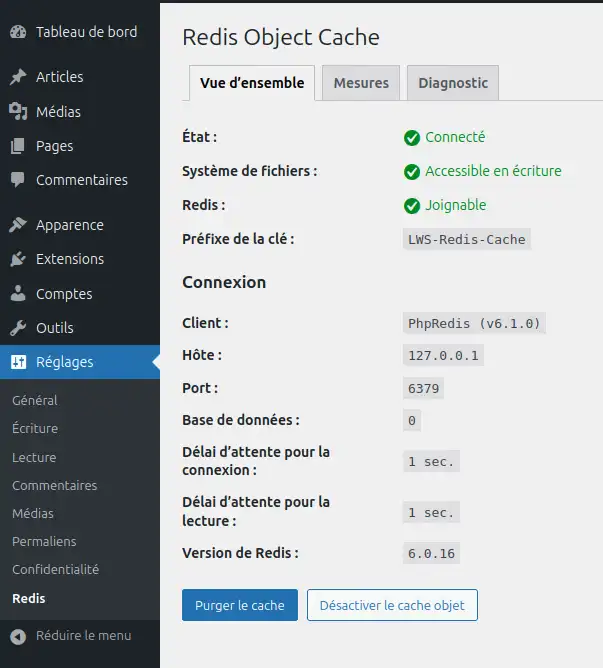
You now know how to:
By following these steps, you have taken a significant step forward in optimizing your site's loading speed and performance. Using Redis as an advanced object caching system is a smart choice for high-traffic sites, ensuring a better user experience and a noticeable reduction in the load on your database. 🚀
We hope this guide has been useful and that you will quickly feel the benefits of these changes. Many thanks for reading, and feel free to share your feedback or questions by leaving a comment below. Your opinion matters to us! 💬
Ask the LWS team and the community. Answers are published after moderation.
 About LWS :
LWS is a 100% French web hosting company that focuses on quality and innovation and offers a responsive and competent technical service at affordable prices.
About LWS :
LWS is a 100% French web hosting company that focuses on quality and innovation and offers a responsive and competent technical service at affordable prices.



 Yes
Yes No
No