
Online help
The web host accessible to all
Procédure
Before restoring your MySQL database, consult the Backup policy for your shared web hosting to check what is backed up according to your plan.
This documentation explains how to download or restore a backup of your MySQL database from the LWS Panel.
This operation can be useful if you want to recover an older version of your site after an error, content deletion, a mistaken action, or a recently occurring malfunction.
This procedure is intended for customers with LWS Linux shared hosting, managed from the LWS Panel.
The hosting must allow MySQL database management, which excludes domain-only plans.
Make sure you have the following:
It is also important to understand that a MySQL database can contain essential elements of your site, such as content, settings, user accounts, orders, or forms depending on the tool used. Restoring this database may therefore significantly change the site's behavior.
Restoring a database does not always put a complete site back into the expected state by itself.
Indeed, a website often relies on two separate elements:
If you restore only the database, but the site files remain newer, you may end up with a partially inconsistent site. You should also remember to restore the website files to the same date.
The LWS Panel offers a one-click restoration feature for different services, including web data, MySQL, and mail. The retention period depends on the plan: some offers allow access to backups from the last 30 days, others from the last 90 days.
Before going any further, make sure that your hosting plan includes the backup level you need.
Step 1 : Start by logging in to your LWS account with your usual credentials.
Step 2 : Once logged in, access the shared hosting where the database you want to view, download, or restore is located.
Step 3 : In the LWS Panel, find the Files section, then click Backups / Restorations.

Step 4 : On the backup page, click the MySQL Backups tab.
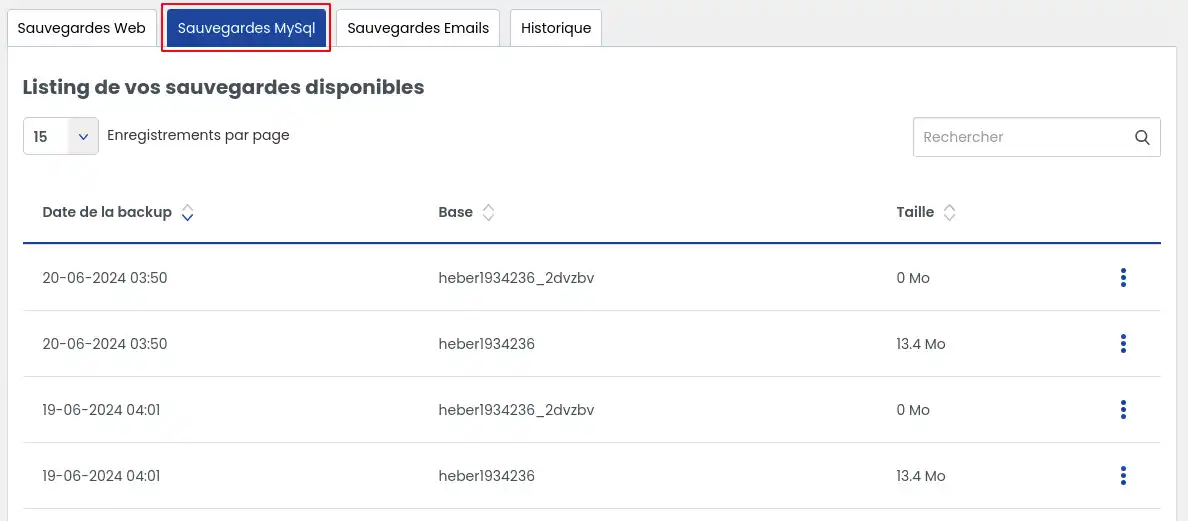
You will then see the list of backups available for your hosting plan.
Downloading a backup is recommended if you want to keep a copy before making a sensitive change, or simply retrieve a database file from a given date.
Step 1 : In the MySQL Backups tab, find the backup date that interests you.
Step 2 : On the line corresponding to the chosen backup, click the action button located on the right (1).
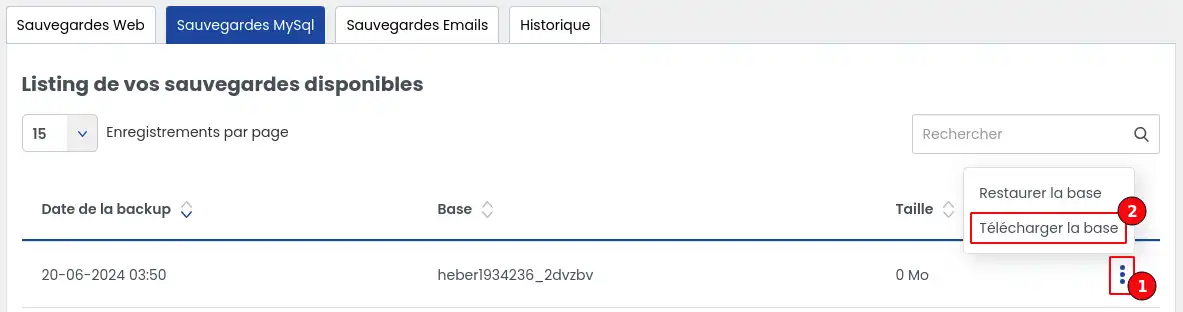
Step 3 : In the actions offered, click Download database (2).
Step 4 : The download starts automatically through your web browser.
The file will be saved in the download folder usually used by your browser.
Expected result
At the end of this operation, you have a local copy of your MySQL backup on your computer.
You can keep it as a safeguard or use it as part of a technical intervention.
Restoration allows you to return your database to its previous state on the chosen date.
Warning before continuing
Restoration replaces the data currently present in the database with the data contained in the selected backup.
In other words, changes saved after that date may be lost.
Before confirming the restoration, take a few seconds to make sure you have chosen the correct date.
Step 1 : In the MySQL Backups tab, find the backup corresponding to the desired date.
Step 2 : Click the button on the right (1) of the relevant backup to display the available actions.
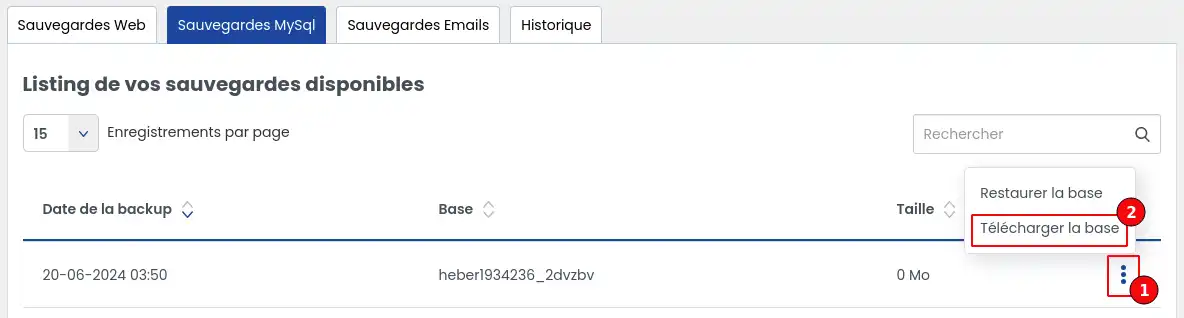
Step 3 : Click Restore database (2).
Step 4 : A confirmation window opens.
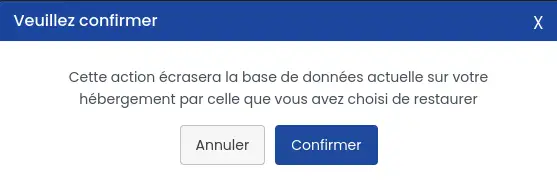
Read the displayed message carefully, then confirm only if you are certain you want to start the restoration.
Once the action is confirmed, it is no longer possible to stop the restoration before it finishes.
Step 5 : After confirming, open the History tab to track the progress of the operation.
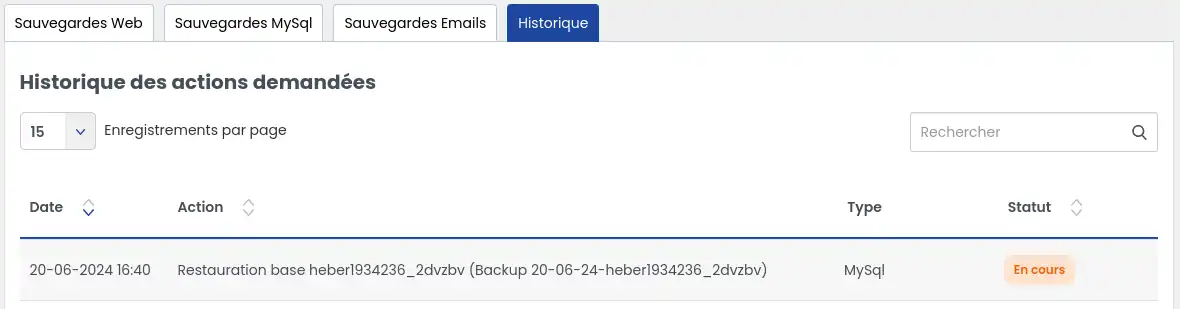
This section lets you view the progress and check the restoration status.
You can refresh the page regularly to see whether the status changes.
Step 6 : The restoration may take several minutes.
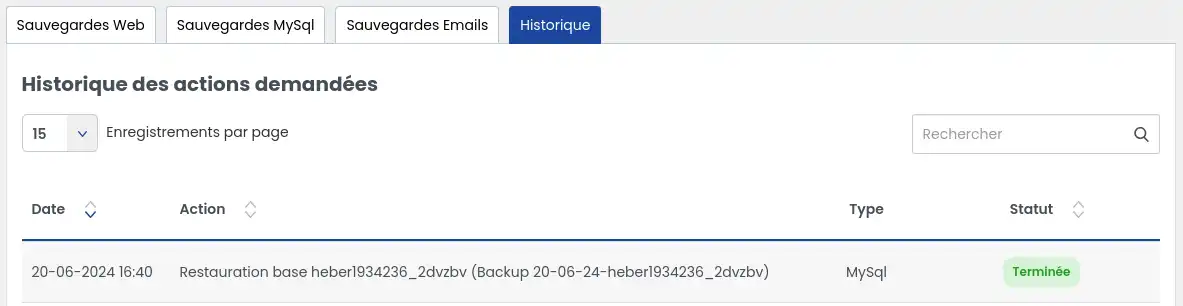
The delay mainly depends on the size of the database to be restored.
Once the restoration status is complete in the History tab, carry out the following checks:
First, make sure the operation no longer appears as in progress.
Then, open your website or the relevant tool in your browser, as you usually do.
It is recommended to clear the cache or refresh the page if the expected result does not appear right away.
Then check the specific element that was causing the problem. For example:
Expected result
If the restoration went well, your database has been returned to the state it was in on the selected date.
Important point
If the site remains inconsistent after restoration, this may mean that only the database contents were restored, not the site files. In this case, it may be necessary to also restore the website files to the same date to recover a consistent state of the site.
If the backup you are looking for is not visible in the list, several cases are possible.
Case 1: the date you are looking for is beyond the period included in your plan: you may have access to backups for 30 days or 90 days. If the date you are looking for is older than the period included in your plan, it will not be displayed.
Case 2: your plan does not provide access to a sufficient retention period: subscribing to the Business support option gives you access to backups for up to 90 days instead of 30 days.
Case 3: you need a specific search or intervention: If the hosting has undergone a plan change since the backup date, a backup search service, carried out by a technician, is required to retrieve the backup.
Case 4: the date is too old: beyond 90 days, backups are deleted. In that case, they can no longer be restored.
Start by checking whether your plan provides access to 30 days or 90 days of retention.
If the desired date is older than the included duration, it cannot be displayed.
The backups offered correspond to the last 7 daily backups and then one weekly backup over a maximum period of 3 months.
That can be normal. The operation may take several minutes depending on the volume of data. Check the History tab and refresh the page before concluding that there is a malfunction.
Clear your browser cache, then reload the page.
Then check a specific element of the site.
If the site remains inconsistent, also consider restoring the website files to the same date as the database.
In the event of an error, you should contact technical support so that a technician can analyze the problem and intervene if the action is possible.
When contacting support, prepare the following information if possible:
You now know how to:
Ask the LWS team and the community. Answers are published after moderation.
 About LWS :
LWS is a 100% French web hosting company that focuses on quality and innovation and offers a responsive and competent technical service at affordable prices.
About LWS :
LWS is a 100% French web hosting company that focuses on quality and innovation and offers a responsive and competent technical service at affordable prices.



 Yes
Yes No
No