
Online help
The web host accessible to all
Procédure
To refresh a WordPress staging site from your live site, delete the old staging site in WP Manager, then clone your live site again to the same subdomain by checking the box “Overwrite if the folder already exists”. The same method is used to recreate a staging site you have deleted. This help article applies to staging sites created with the WP Manager cloning tool on shared LWS hosting.
Refreshing the staging site means replacing it with a fresh copy of your live site. All work done in the staging site since it was created disappears: posts and pages, WordPress settings, user accounts, plugins, themes, and added or modified media. Deletion removes the staging site database and the contents of its wp-content folder, and the new clone, with the “Overwrite if the folder already exists” option, replaces what remains in the subdomain folder.
In WP Manager, click MANAGE on the line for your staging site. Open the IMPORT/EXPORT tab, then the Local Files sub-tab. In the Export a backup block, click Download the backup (.zip) to save a complete backup of the test site to your computer.
If you do not need to keep anything from the staging site, go straight to the next step.
Still in the staging site details, check under its name that the displayed address is indeed the test subdomain address (for example https://preprod.example.com/) and not your live site address. Open the ESSENTIAL tab, scroll all the way down to the Delete installation block, then click DELETE.

A Delete installation window opens. Type the word Delete in the field provided, then click CONFIRM DELETION.
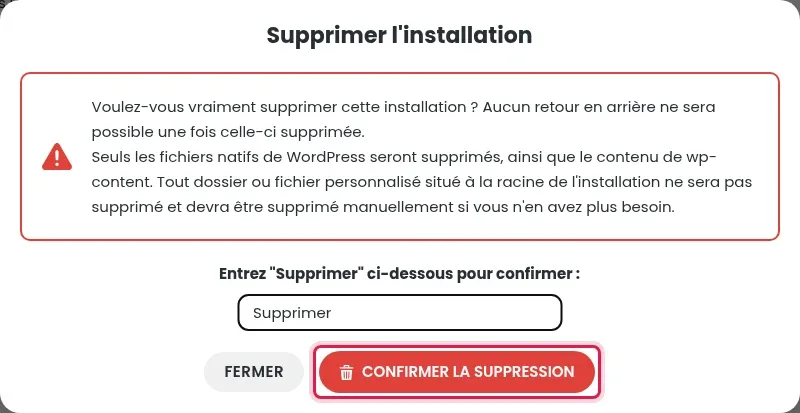
You are returned to the site list: the staging site no longer appears and its database is deleted. Its subdomain and folder, however, remain in place: keep them, the new clone will be installed there.
In the WP Manager list, click MANAGE this time on the line for your live site. Open the IMPORT/EXPORT tab, stay on the Clone sub-tab, then click CLONE THE SITE.
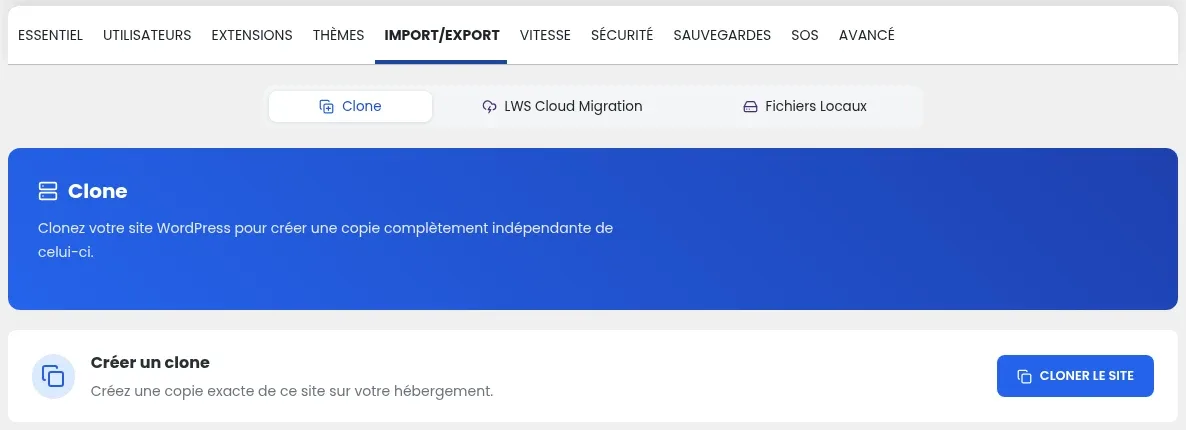
In the Clone WordPress installation window:
Click CLONE THE SITE at the bottom of the window. Wait while the files and database are copied, without closing or refreshing the page.
The staging site reappears in the WP Manager list with its subdomain address. Open this address in your browser: you should find the current content of your live site there. To log in to its administration area, click MANAGE on its line, then Admin Login.
If you deleted your staging site and want to recreate it, follow steps 4 to 6 above. The old staging subdomain and folder are still there: choose that subdomain as the destination and check “Overwrite if the folder already exists”. You can also create another subdomain directly from the cloning window, using the + Create button.
If you no longer want any staging site at all, remove what remains after deletion:
/htdocs/preprod.example.com), which is not deleted with the subdomain: remove it with the LWS Panel file manager.First check, in the cloning window, that the “Overwrite if the folder already exists” box is checked: without it, the clone cannot be installed in the folder left in place. Then check that your hosting has enough free disk space for a complete copy of your site, files and database. If the error persists, open a support request from your customer area, indicating the address of your live site, the destination subdomain, the exact error message, and the time of the attempt.
Deletion in WP Manager removes the WordPress files, the contents of wp-content, and the staging site database. The subdomain remains declared, and its folder remains on the hosting with any files you may have added yourself.
Not if you check “Disable indexing (SEO)” at each clone: this option prevents search engines from indexing the staging site. Remember to check it again with each refresh, since the staging site is recreated.
Ask the LWS team and the community. Answers are published after moderation.
 About LWS :
LWS is a 100% French web hosting company that focuses on quality and innovation and offers a responsive and competent technical service at affordable prices.


 Yes
 No