
Online help
The web host accessible to all
Procédure
To delete a WordPress site from your LWS Panel hosting, open WP Manager (under Software), then use either the “⋮” menu on the site row or the “Delete installation” block on its details page. Both paths remove the WordPress files and the site database. The subdomain and any files you added yourself remain in place: this guide also explains how to finish the cleanup.
Log in to your LWS account and access the hosting where the WordPress site to delete is located. In the Software section, click WP Manager. The Manage installations list displays your WordPress sites.
Find the row for the site to delete by checking its address in the Installation URL column, then choose one of the two methods below.
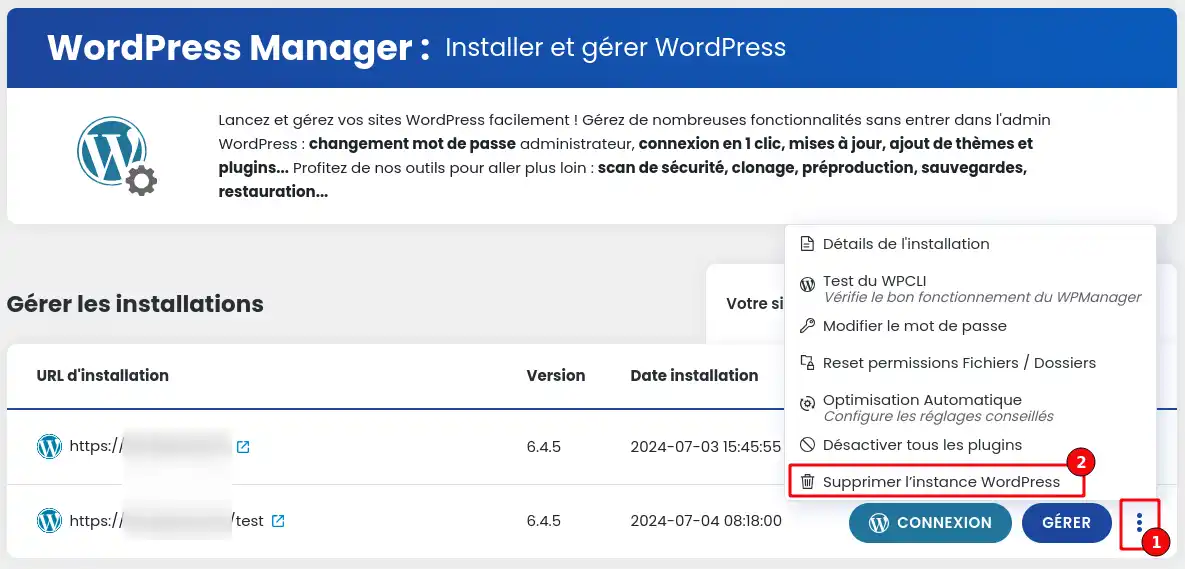
Click the three vertical dots ⋮ at the end of the site row, to the right of the MANAGE button, then click Delete WordPress instance.
In the Delete installation window, type Delete in the field, then click CONFIRM DELETION.
Click the MANAGE button on the site row. The details page opens on the ESSENTIAL tab.
At the bottom of the ESSENTIAL tab, in the Delete installation block, click DELETE.

The Delete installation window reminds you what will be deleted. Type Delete in the field: as long as the word is not entered, the button remains greyed out. Then click CONFIRM DELETION.
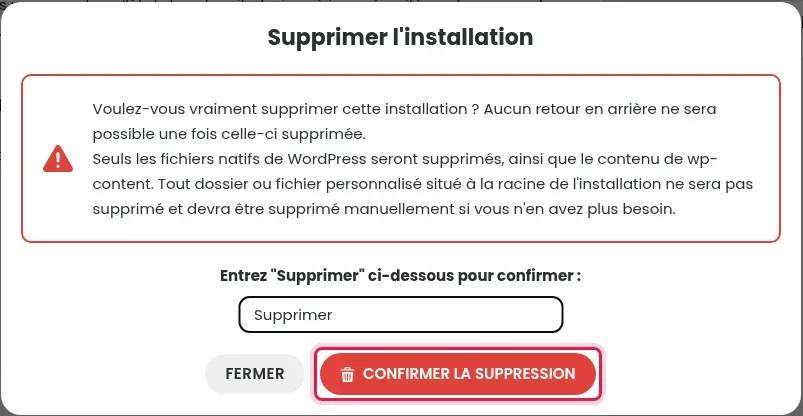
Deletion removes the WordPress files, the contents of the wp-content folder (plugins, themes, uploaded images), and the site database. You return to the WP Manager list, where the site no longer appears.
What remains in place, to delete yourself if you no longer need it:
The confirmation word has not been entered exactly: type Delete, with no space before or after.
This is the case, for example, for a site installed manually. First run a search for WordPress installations using the DETECT SITES button.
Ask the LWS team and the community. Answers are published after moderation.
 About LWS :
LWS is a 100% French web hosting company that focuses on quality and innovation and offers a responsive and competent technical service at affordable prices.


 Yes
 No